


December 09, 2020
Update!Yanhua Mini ACDPaddedModule 16 for Mercedes Benz Gearbox Clone / Refresh (No soldering, No Risk). What it covers and how to perform, please go on reading.
- Clone :
Mercedes-Benz (VGS-FDCT/ VGS2-FDCT) dual-clutch gearbox;
Mercedes-Benz 722.8 (VGS2-FCVT) gearbox
- Refresh/Renew:
Mercedes-Benz 722.9-2 (VGS2-NAG2) gearbox
Mercedes-Benz 722.9 -3 (VGS3-NAG2) gearbox
Features:
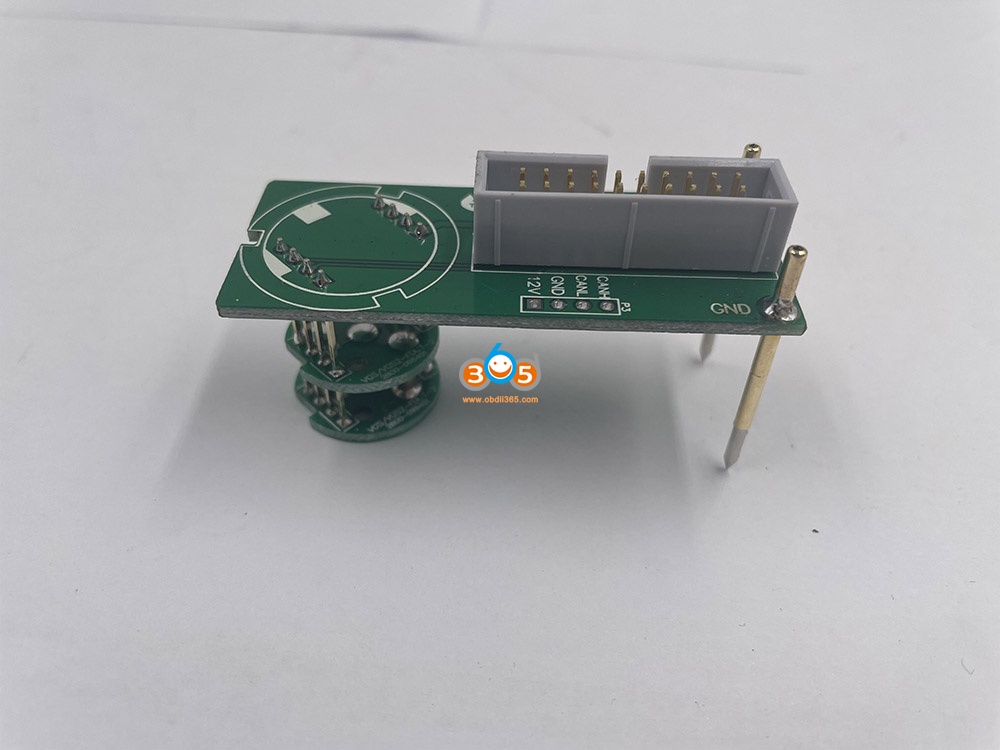
The dedicated interface board connecting method will replace the traditional plugging wire method, which will prevent plug wire to opposite direction and wrong place,simple and efficient, plug and play, safe and reliable.
Look at the 3 dedicated interface board:
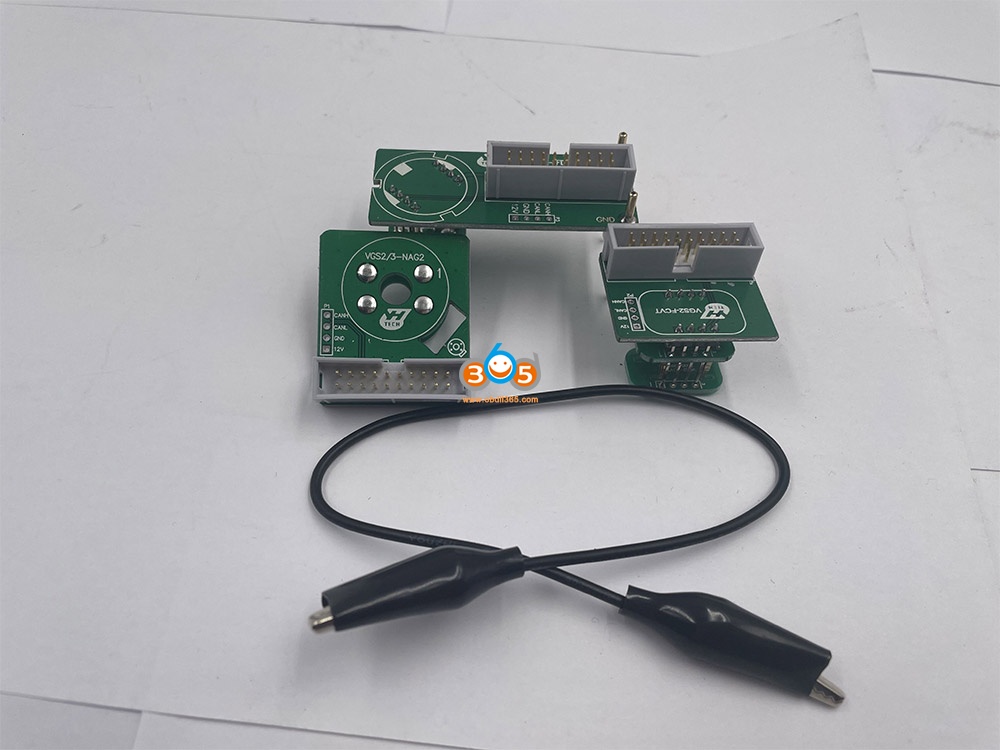

The board and software authorization from:
https://www.obdii365.com/wholesale/yanhua-mini-acdp-benz-gearbox-clone-module.html
Let’s move on how to virgin/reflash Mercedes-Benz 722.9-2 (VGS2-NAG2) gearbox using Yanhua Mini ACDP:
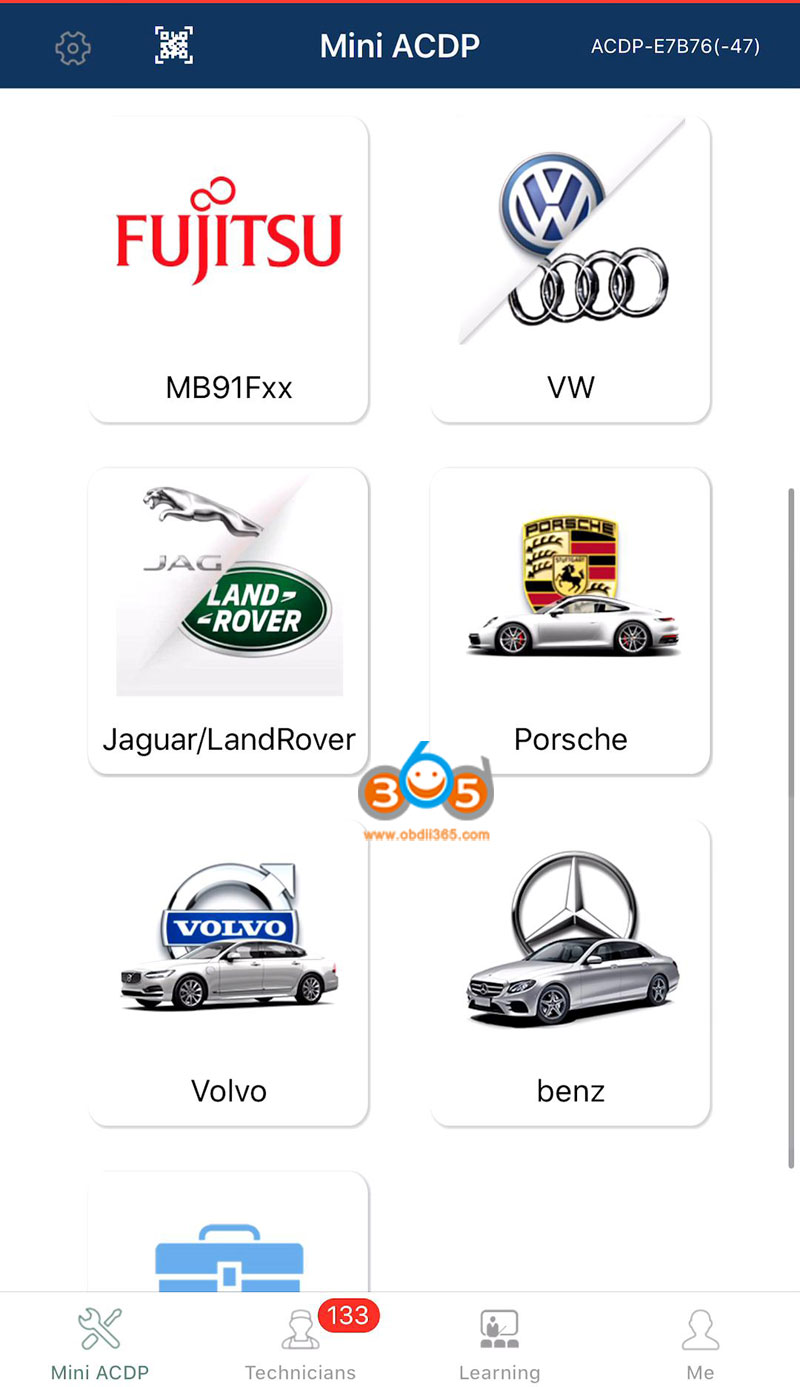
Open Mini ACDP (on your phone or on your computer), it will pop up there is new update, just click on Yes to update to the newest version.
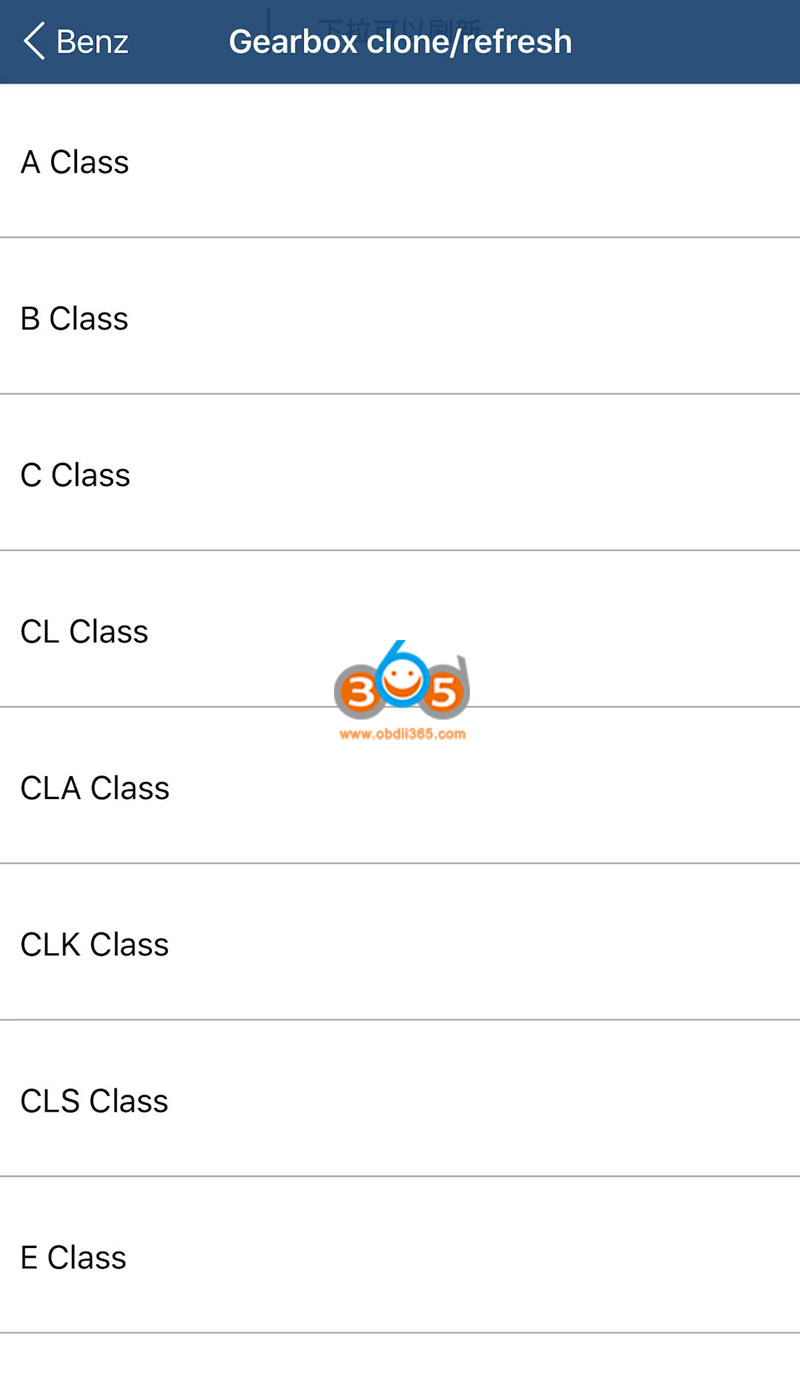
Select Benz function-> Gearbox clone/refresh->C class->VGS2-NAG2->Refresh->


Loading hardware program to 100.
As you can see, it will show if the device is connected successfully, so that you can go the next step.

It will have prompt "Please connect ACDP with gearboxâ€.
Connecting system, please wait…
Reading system info, please wait…
Have the system info.
Personalized: Yes
Activated: Yes
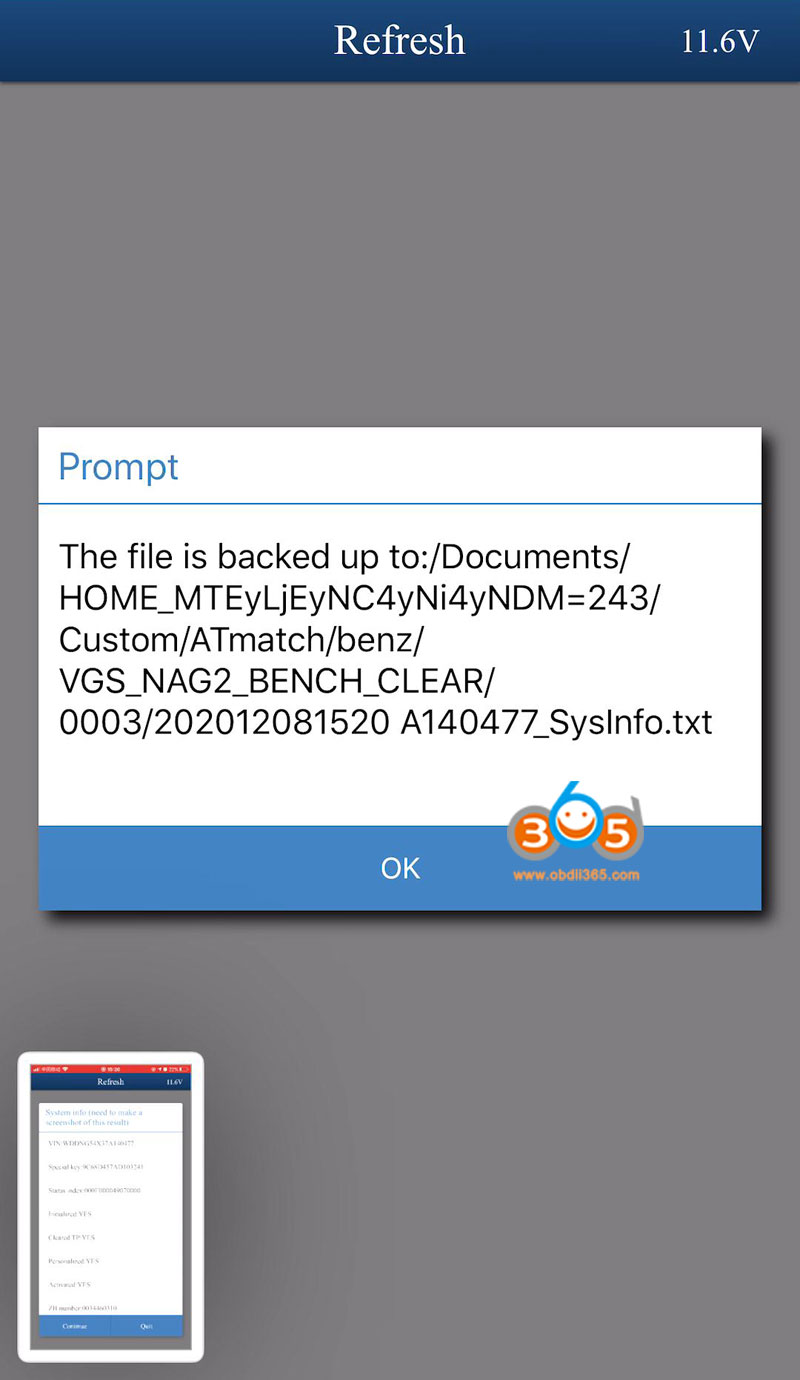
Note: Please screenshot the result.

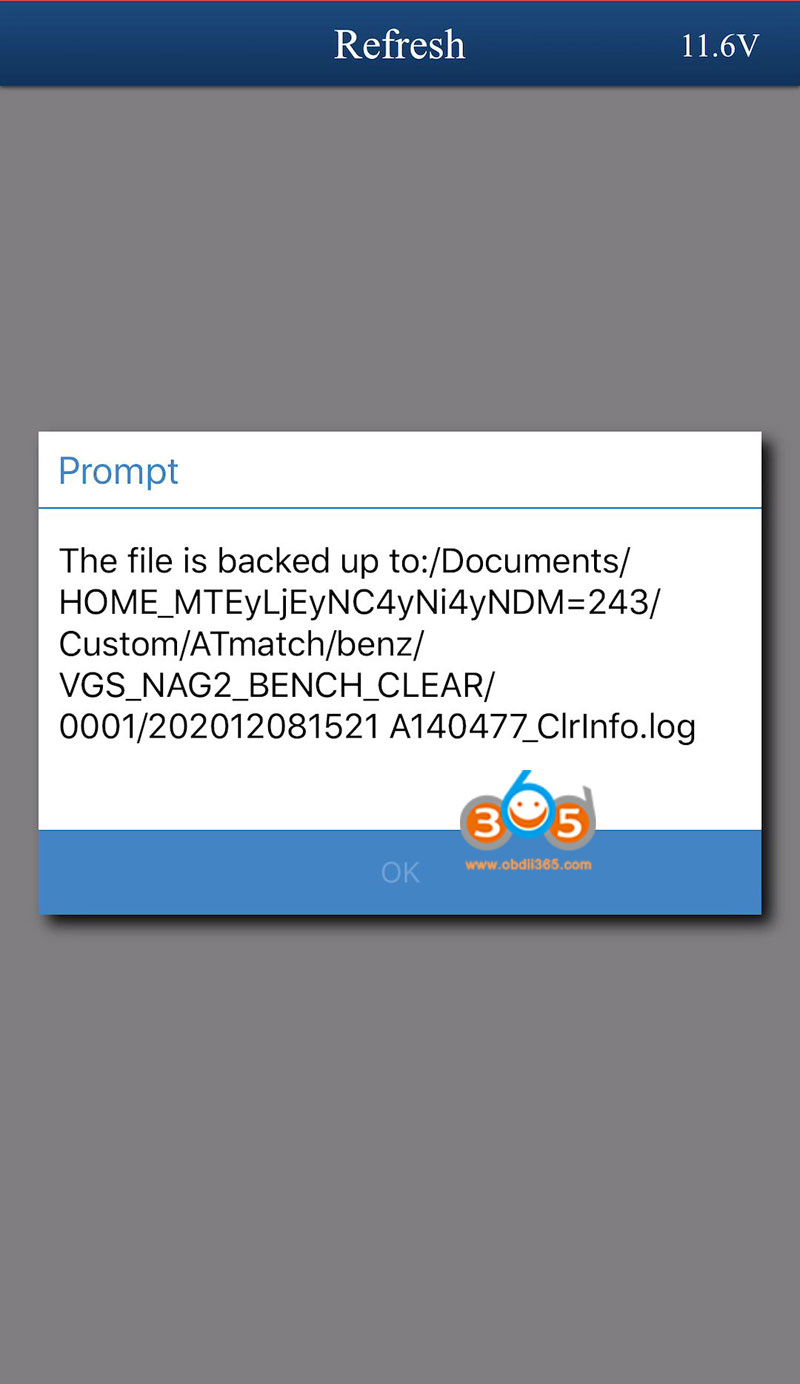
Back up the file (it is very important)
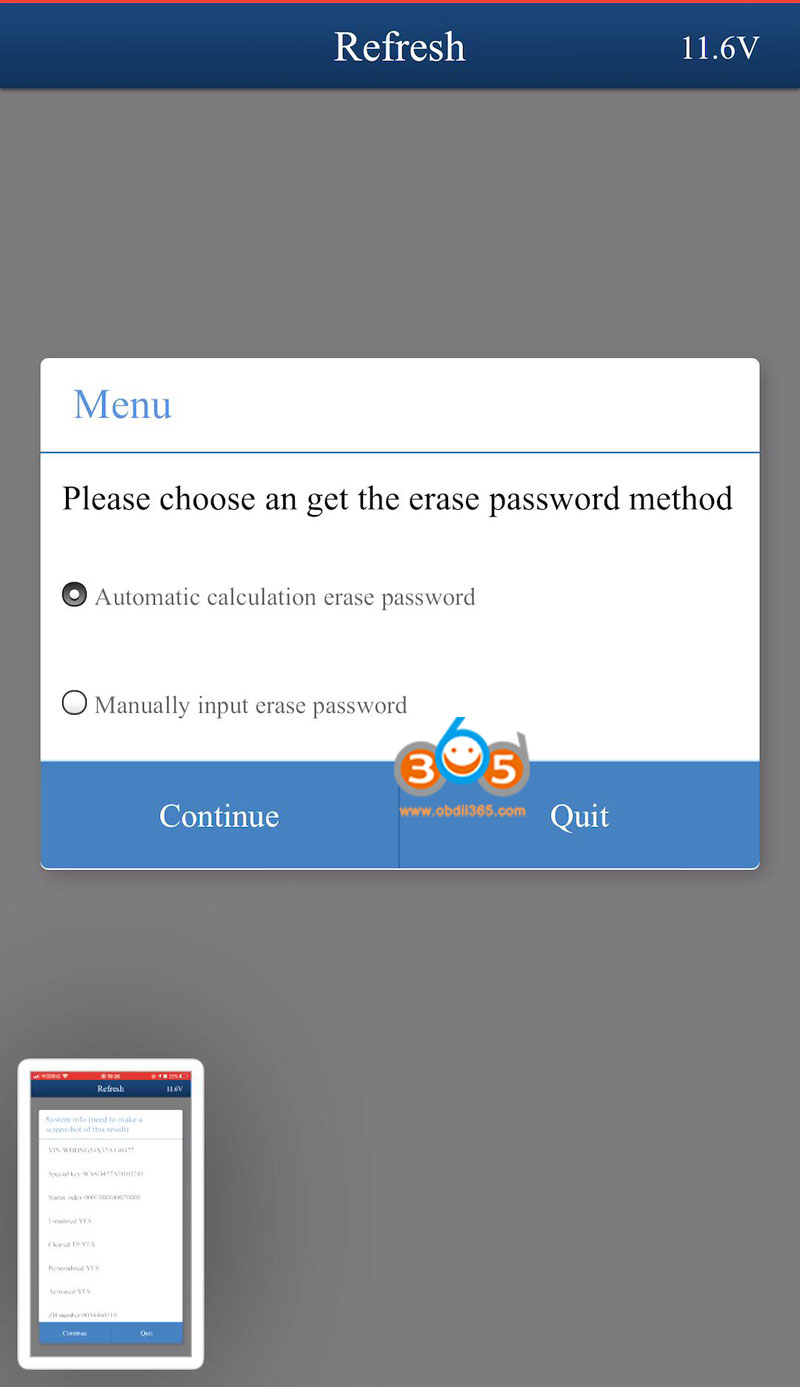
Next is to get the erasing passwordby automatically or manual.
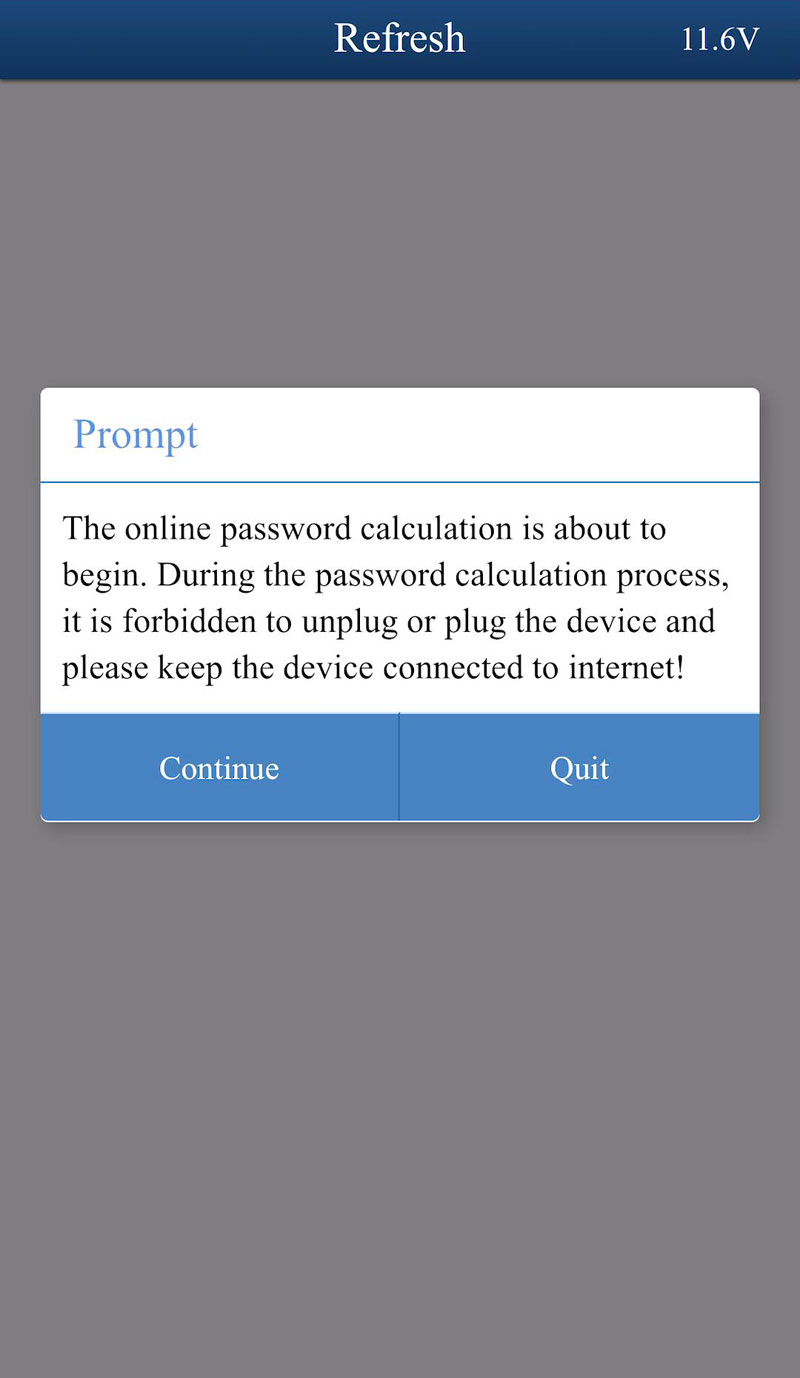
We select "Automatic†and follow the prompt not to unplug or plug the device during the online password calculation process.
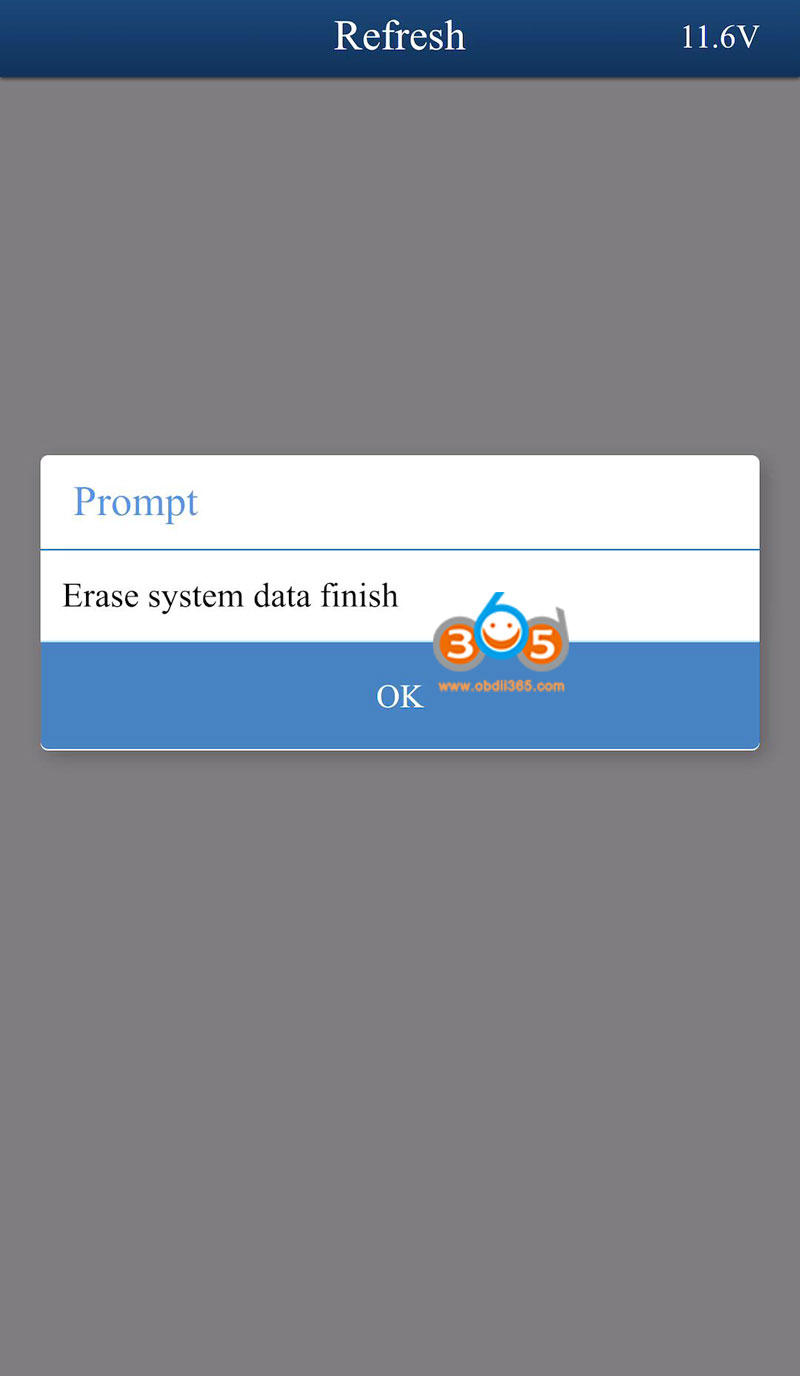
Erase system data until finish.

Generate the logs.
Back up the file.
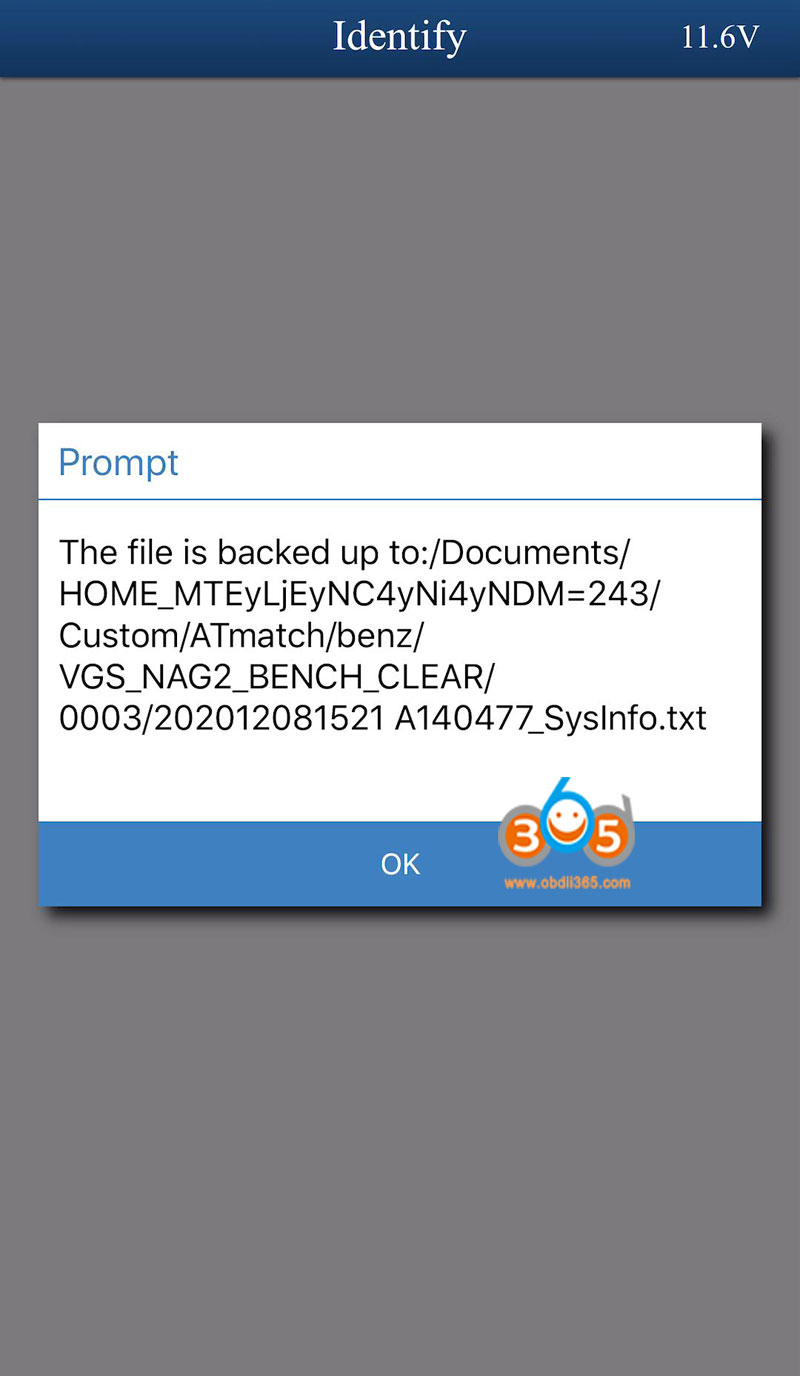
It shows Refresh yes, click on "Indentify†to confirm.

Alright, it really works, as you can see:
Personalized: NO
Activated: NO

Back up the file;
Identify system information finish.

Mercedes-Benz 722.9-2 (VGS2-NAG2) gearbox refresh usingYanhua ACDPsuccessfully.
Please back to read on how to clone Mercedes-Benz (VGS-FDCT/ VGS2-FDCT) dual-clutch gearbox and Mercedes-Benz 722.8 (VGS2-FCVT) gearbox.
Enjoy!
https://www.obdii365.com/service/yanhua-mini-acdp-clone-benz-gearbox.html
Posted by: jean at
06:24 AM
| No Comments
| Add Comment
Post contains 315 words, total size 15 kb.
December 08, 2020
ISN reading is required to make a new key or dme cloning. Here’s some clue on reading/write ISN from BMW DME MSD80/MSD802 using different tools.
Yanhua Mini ACDP
Read OK
Write OK
For E series
Yanhua Mini ACDP is a perfect solution to BMW MSD80/MSD802 DME ISN read & write.
All you need:
Yanhua ACDP Mini main unit
ACDP Module 3(only read MSD802)
MSD802 ISN Interface Board(if you need to write)
Notes:
1.Please connect ACDP with DME properly, don’t cut the power nor pull out the device during the programming, carefully backup the ISN data;
2.Programming is needed for reading the DME ISN, and it may cause risk, please consider before moving ahead;
3. If reading the ISN ended with an error, please use Winkfp or ISTAP to program the DME to work status, then proceed to read ISN again.
Okay, here we go for procedure:
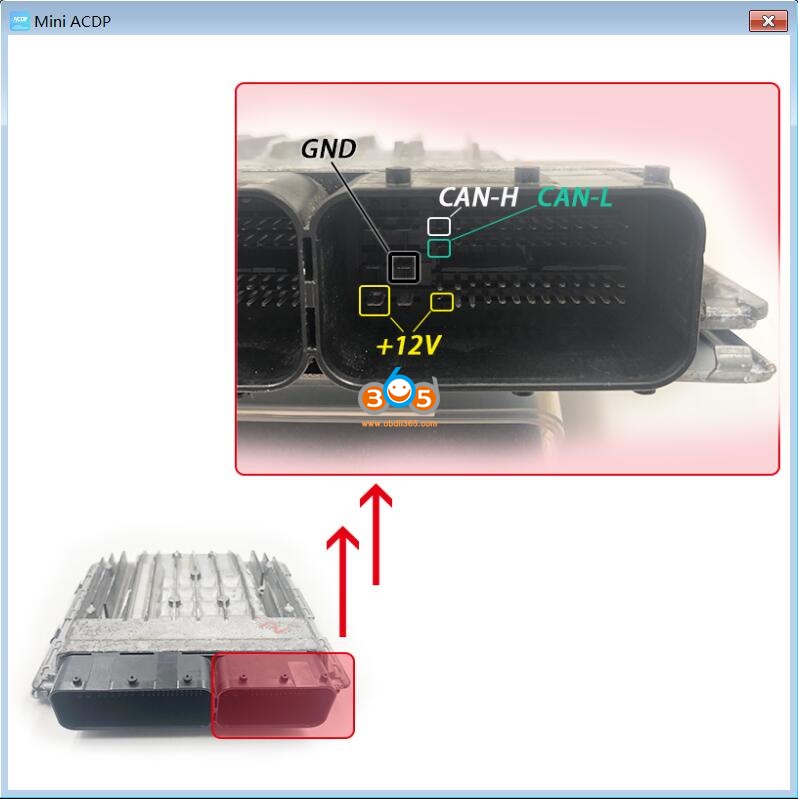
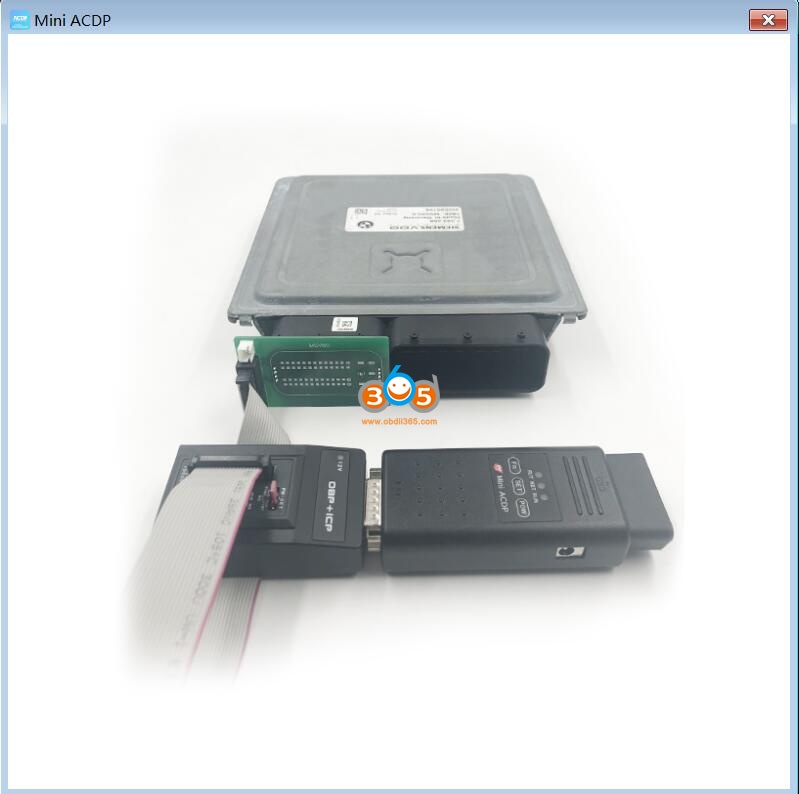
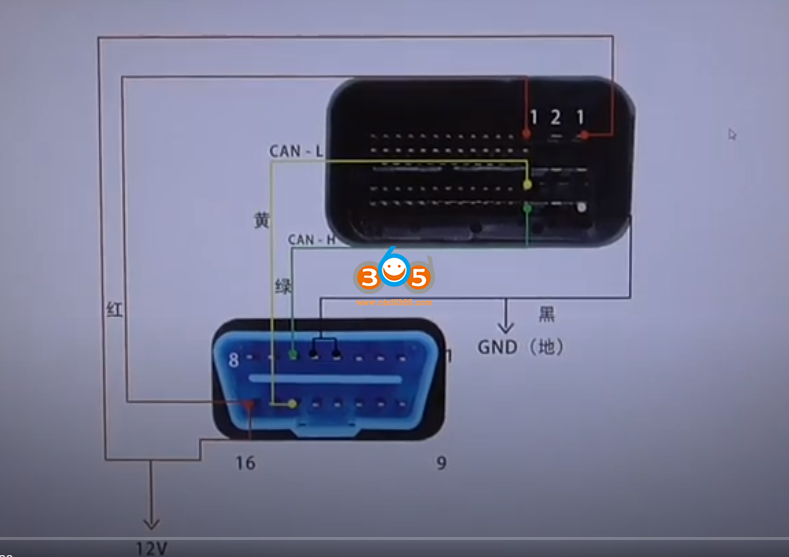
Step 1. Please prepare ACDP, OBP+ICP adaptation, PCAN line and DME.

Step 2. Connect the PCAN line correctly to the DME interface as shown.
Step 3. Short the CAN resistor on the OBP + ICP adapter to the "CAN-R Joinâ€.

Step 4. Connect the ACDP, OBP+ICP adapter, PCAN line and DME.
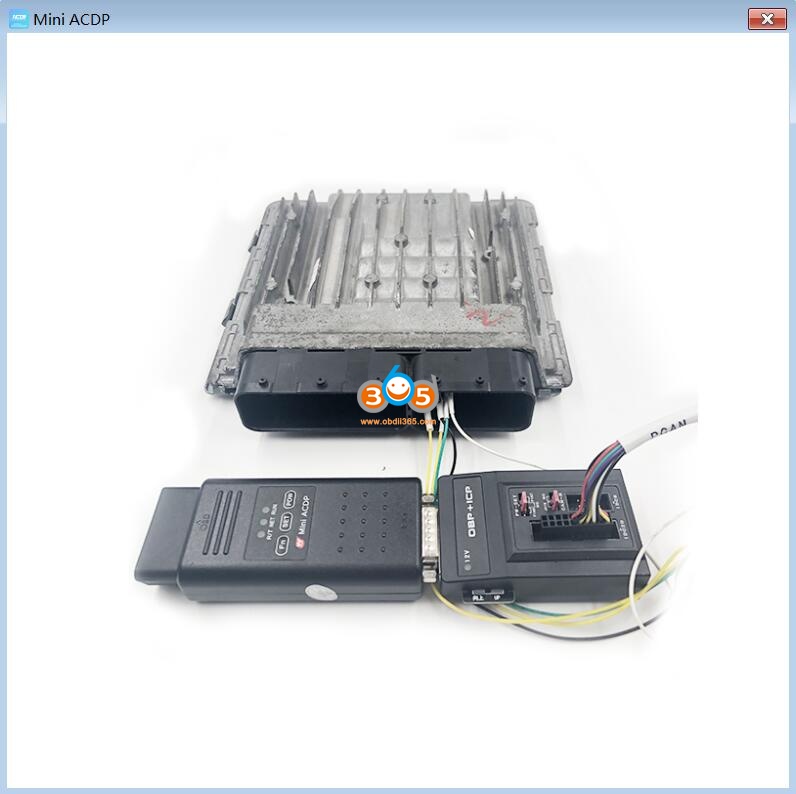
Step 5. Connect ACDP, OBP+ICP adapter, interface board and DME.
Run Yanhua ACDP software on mobile phone or PC
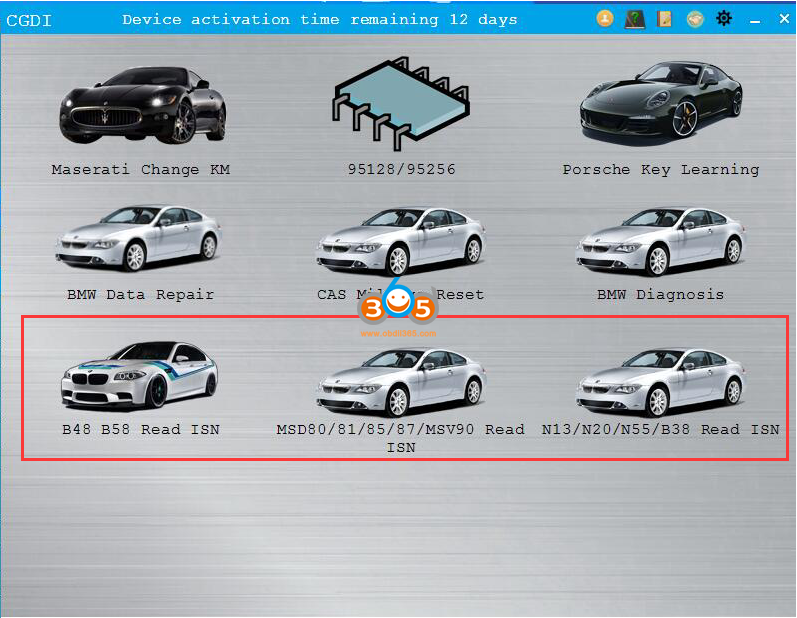
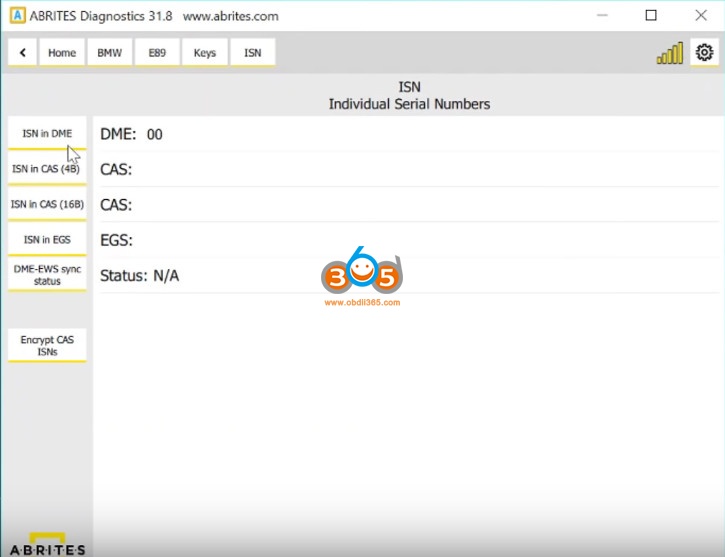
Look at Mini ACDP software menu below, click on "BMWâ€.

Click on "DME ISNâ€.

Click on "OBD / CAN Mode Read / Write ISNâ€.
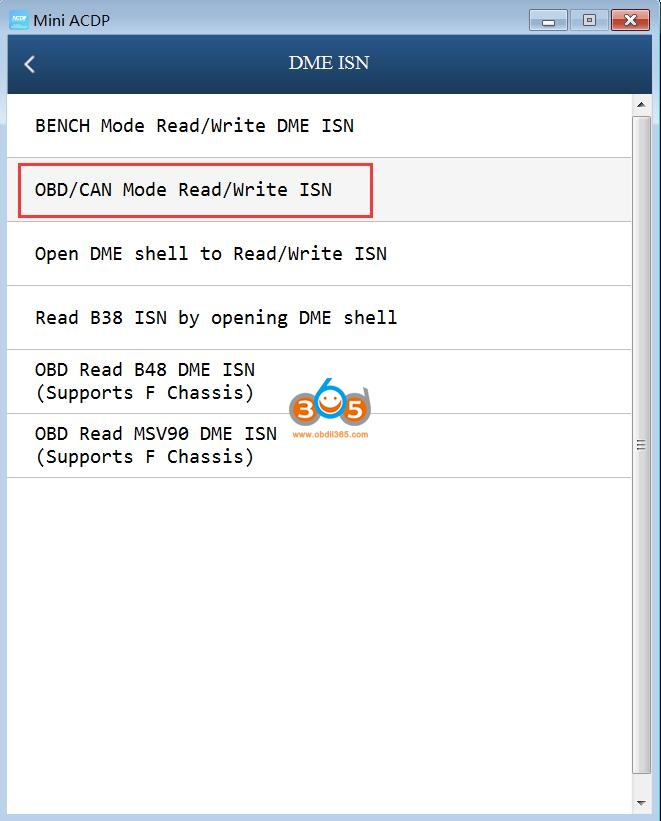
Click on "Read MSD80 / MSD802 DME ISN (Support E Chassis)â€.

Here are function menu:
ECU Info.
Read ISN /PSW
Backup FLASH
Restore FLASH
Upgrade program
ECU Reset
Modify VIN.
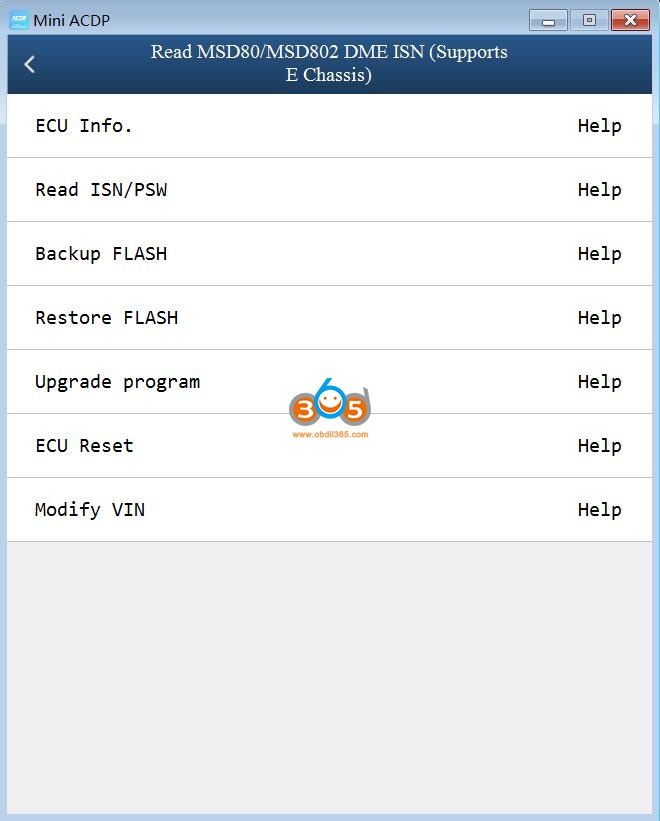
Go on operating by following the on-screen instruction.
Next is to write MSD802 DME ISN with Yanhua ACDP Mini
With one extra MSD802 DME ISN Interface Board Set, ACDP Mini can write MSD802

VVDI2 BMW/ VVDI BMW/VVDI BIMTool Pro
Read OK (only E series)
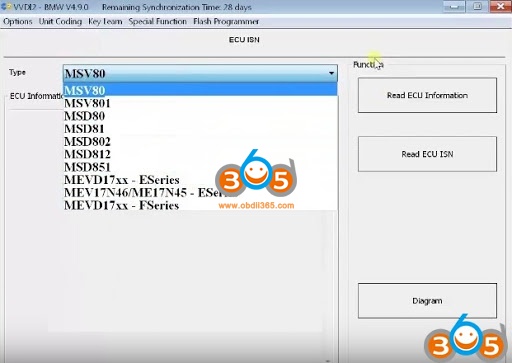
Write Failed
support read DME module information, read ISN and write VIN via OBDII, does not support write ISN via OBDII


Read OK (for E series only)
Write Not OK
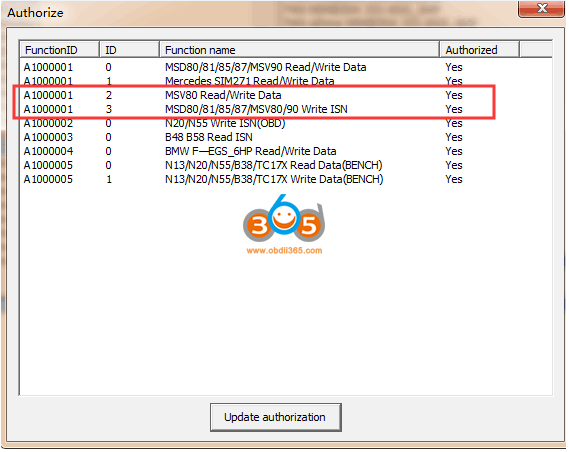
Read MSD80 ISN requiresMSD80/81/85/87/MSV90 ISN license


CG AT-200Programmer
Read OK
Write OK
For E series Only
Write ISN requiresBMW MSD80, MSD81, MSD85, MSD87, MSV80, MSV90 software license
Procedure:
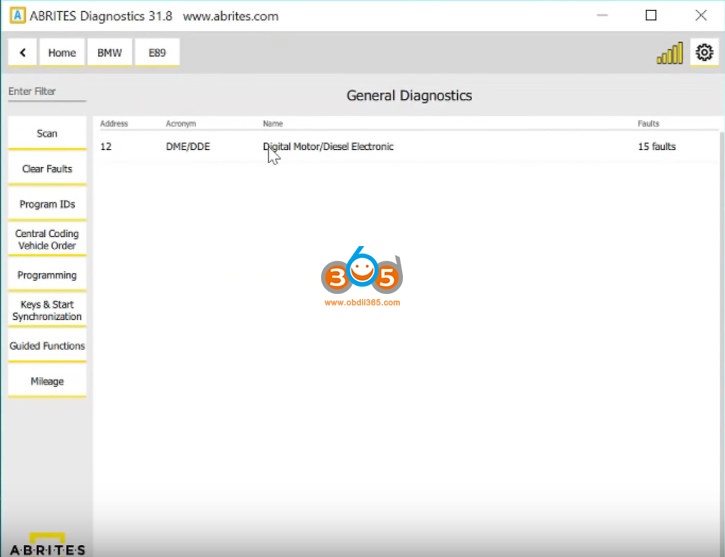
Autohex II for BMW
DME /DDE E Series long ISN (SK):
MSV80, MSD80,MSD81, MSD85, MSD85Y, MSS60, MEVD176K, ME17N45, MED17_2, MED17_2N, MEV17_2, MEV17N46, MEVD174K,MEVD174KW, MV1722, MVD1722, MEVD172, MEVD1724, MEVD1725, MEVD172Y, MEVD17KW, D70N47A0, D70N47B0, D71N47A0, D71N47B0, D71N47C0, D71N47D0, D72N47A0, D72N47B0, D73N47A0, D73N57A0, D73N57B0, D73N57C0, D73N57D0.
Reference: Autohex can read and write MSD80 ISN in bench mode
BMW explorer
Read OK
Reading module ISN MSD80 MSD81 MSD802 MSD812 MSD851 MSV80 MSV801 via OBD
Read & write ISN and VIN for siemens MSV80 MSD80 MSD85 E series
Since version 14.05.31 BMW-Explorer started to read ISN (SK)from Siemens MSD80, MSD85 and MSV80electronic units.
To read the ISN you need to connect to DME, enter Extra options, press ISN/PSW
After DME programming procedure BMW-Explorer will display ISN and also store it in a text file in the logs.
To read ISN from Siemens DME, several conditions must be fulfilled:
- You need to make sure that installed drivers are for the BMW-Explorer exactly
- It is necessary to provide the 12V battery power when programming the DME (because DME programming time is approximately 20-40 minutes)
- If laptop PC used for programming, TURN OFF SLEEP MODE !!! of laptop PC.
If the ISN reading fails, make flash-update DME withWinkfpor SSS and repeat the ISN reading again.
Supported DME MSD80
75688427573796757587575767197578020
75784417583332758693875886207594305
7595235759601776113967611397
Supported DME MSD802
75756657580279758322575853037593038
75951828672565


Posted by: jean at
06:32 AM
| No Comments
| Add Comment
Post contains 669 words, total size 20 kb.
December 07, 2020
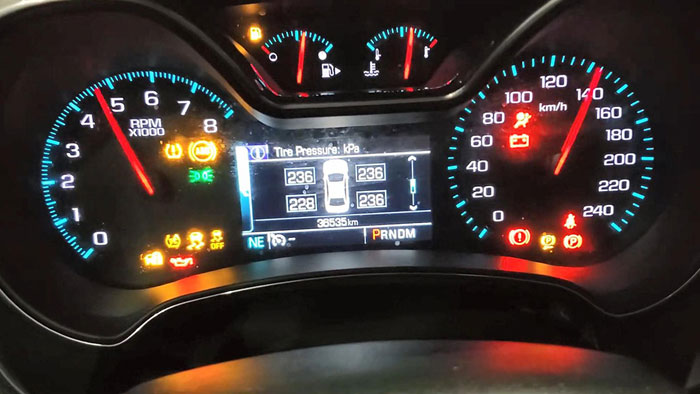
Hi, I’m going to be doing a demo and a quick review of thisAugocom El-50448 TPMS relearn tool, so this will work for GM vehicles that are approximately 2011 and newer and I’ll be doing this procedure on my2019 Chevy impala.

So the way these cars work every time you change tires or change TPMS sensors, you have to do a re-learn and you do require an external tool. On some of the older cars, I think there was some sort of memory,but on the newer cars, you’ve got to use a tool.
I bought this El-50448 from Chinaand there’s a number of identical looking units, I’d actually originally bought a different identical one but it didn’t work, so I returned it and bought this one, this has got some branding on it "Augocomâ€,this one works really well I did it when I put on my snow tires.

So anyways I’ve just taken off my snow tires and put my all sensors back on, so we’ll do a bit of a demo.
So, another thing which is kind of cool about thisEl-50448that the other one I got didn’t have is a little manual it’s not really required, but you know.
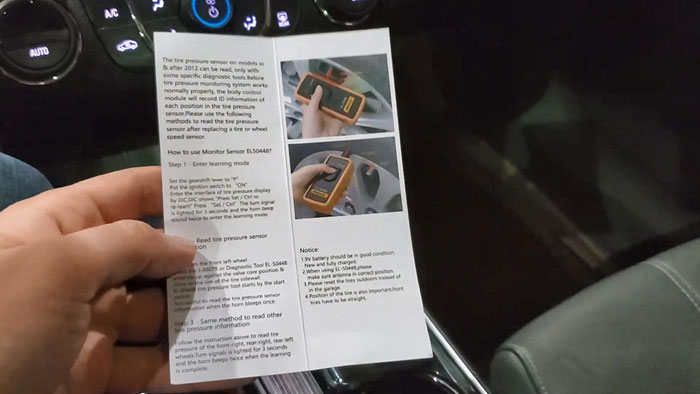
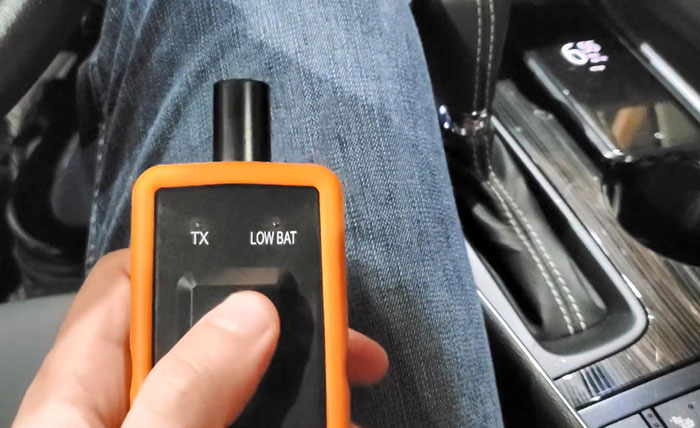
So the tool itself is pretty small, it’s got a nice little cover on it and it’s powered with I believe it is a single 9 volt battery which is not included.

And it comes with just a single button. And even though it looks like you should just be touching it, and then letting go. What I found is you actually have to be holding the button until each tire learns.

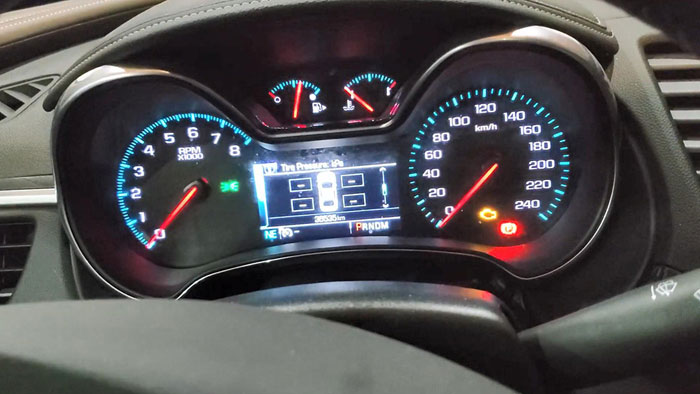
So, before I start I’m just gonna turn on the car just so that you can see that nothing’s programmed right now, so there’s a service tire pressure monitor system warning and you can see that there are no pressures shown. So I’m just going to turn that off.

And let’s enterlearning mode,so in my 2019 Chevy Impala and I’m assuming many similar GMs to do that.All you have to do is hold the start / stop button for five seconds.
but do not press down the brake during this time.


So now it goes into thisdiagnostic modeand just a couple other things to point out when I had the other sensor that didn’t work I was trying to troubleshoot.Some people were saying that you want the wheels to be facing relatively straight for it to work, so that’s just a tip I guess andthe other thing is I put my key fob in the car so that when I go out to do the re-learn, the car isn’t confused that the key fob is gone I don’t really know if that’s required but I figure I might as well.

So now we’re in here and all I’m going to do is hold the check Mark until it goes into re-learn mode. So now we’re doing tire learningand we’ve got to start withthe front left (tire), so you just put this right beside the valve stem and hold until the car beep.


Then we’re gonna go to thefront right tireand same deal.
so you can see, it’s not consistent timing, sometimes you have to hold it for a little while before it registers.

Then therear right, and then the last is therear left. Okay, and so those last two beeps.

We’re just saying that it was successful and if I get in the car I can see that I’m getting readings.
Now to finish everything, we can just hit the stop / start button.
And then we should be good to go. So I’m just gonna start the car.
And we can see the tire pressures are all shown there and I’m just gonna shut it off because I’m inside the garage and that’s all you have to do.
Now one last thing I just want to mention no matter what brand you get, make sure you put this Augocom El-50448 somewhere that you can find it. It’s fairly small and it took me an embarrassing amount of time to find before making this demo and review.
So I mean El-50448 is obviously a pretty simple device, it sells for $12 dollars here:
https://www.obdii365.com/wholesale/augocom-el-50448-buick-tpms-relearn-tool.html
If you have one of these GMs with the TPMS, and you change your tires, it’s definitely worth the investment.
http://blog.obdii365.com/2020/12/07/el-50448-reprogram-2019-chevy-impala-tpms-sensors/
Posted by: jean at
09:09 AM
| No Comments
| Add Comment
Post contains 735 words, total size 15 kb.
December 04, 2020
The RCA Cambio (…Only $110.00 on Amazon) has a (6) Hour Battery Life and is Very Lightweight… with a VERY Small Foot Print that will allow it to sit on the Center Console or be rotated into a Tall Rectangle for ease of Touch Screen use inside the Cab. Also… it is nice because all of the other Windows 10 Apps still function and you can Install HP Tuners (The Latest Blue Tooth Version) on the same Tablet with plenty of room to spare for easy Data-Logging.
The RCA Cambio has both the Touch Screen and Wide Touch Mouse Pad options built into the included Magnetic removable QWERTY Keyboard that sports NICE BIG Keys and is nice and crisp when typing. The Screen quality …even at 1280 X 800 Pixels is Clear and Bright.
This solution for Direct CD Installation should work on ANY Windows 10 Computer that supports the (32) Bit Operating System as a Fresh Installation.
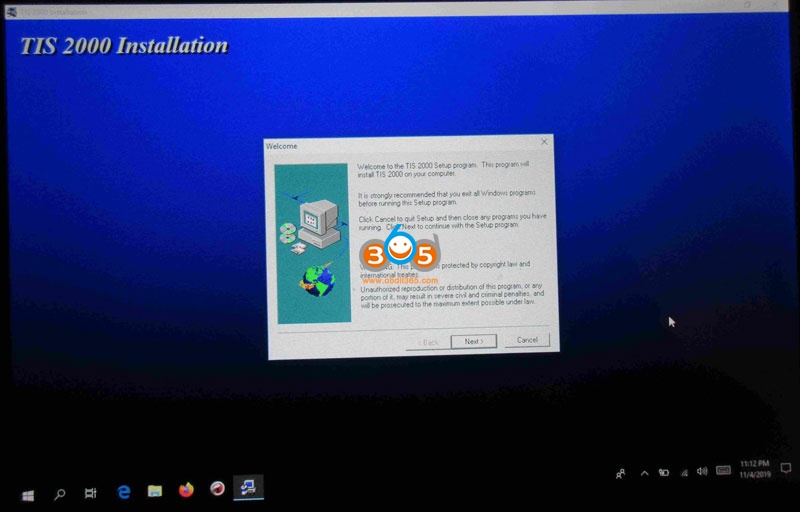
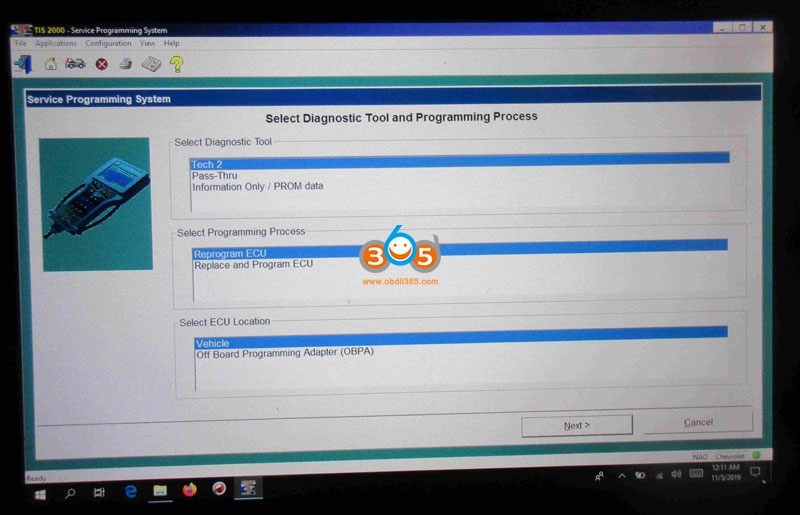
How To Install TIS2000 on an RCA Cambio Tablet 10.1â€
Procedure(Windows 10 (32) Bit Operating System ):
(1) This Technique will NOT work on ANY of the 64 Bit Flavor Windows 10 Computers.
(2) Visit the Link Below and Follow the Instructions, On Screen Prompts and Screen Prints to Wake Up the Native (16) Bit Capabilities of Windows 10:
http://techgenix.com/16-bit-applications-windows-10/
(3) Reboot the Tablet and Turn Off the WIFI, Firewall and Anti-Virus Apps.
(4) Use a Rioddas Standard USB External DVD Burner to Install the (3) TIS2000 Disks (NO PS Required). The RCA Cambio comes with One Standard Size 3.0 USB Port on the Side Plane.The Rioddas Unit is SWEET and STABLE.
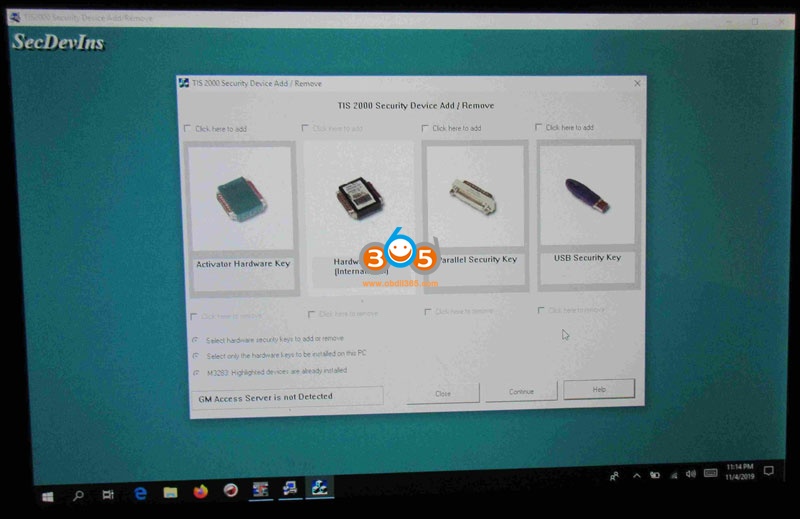
(5) Use the Latest Flavor of TIS2000 (3) Disk Set of Installation CDs. Note that during the Final Disc Install… the 3rd Mini-Disk has a Properly Working Dongle Crack available as a single .DLL File to Copy/Transfer to the cosids/bin sub-directory. Rename the Old .DLL before doing this.
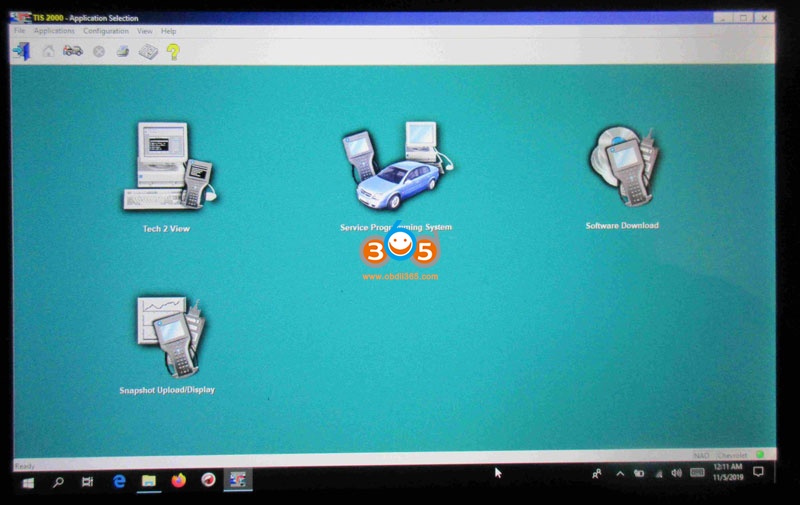
(6) Reboot the Machine and then, after turning on the WIFI, Firewall and Anti-Virus Programs, Select the TIS2000 Icon from the Desktop and put the App through its Paces to ensure that the SPS Program Functions properly… without any AV or FW interruptions that might harm the Tech 2 Hand Held Scanner. A GOOD USB to Serial Port Adapter WILL be required.
(7) That’s all there is to it… No Complicated VMWARE… No Weird ‘Windows Magic’… and No Entanglements. It is just a Direct CD Installation using the Hidden (16) Bit Drivers Native to the Windows 10 (32) Bit Edition to coax things along.

Done.
Posted by: jean at
06:28 AM
| No Comments
| Add Comment
Post contains 439 words, total size 6 kb.
December 03, 2020
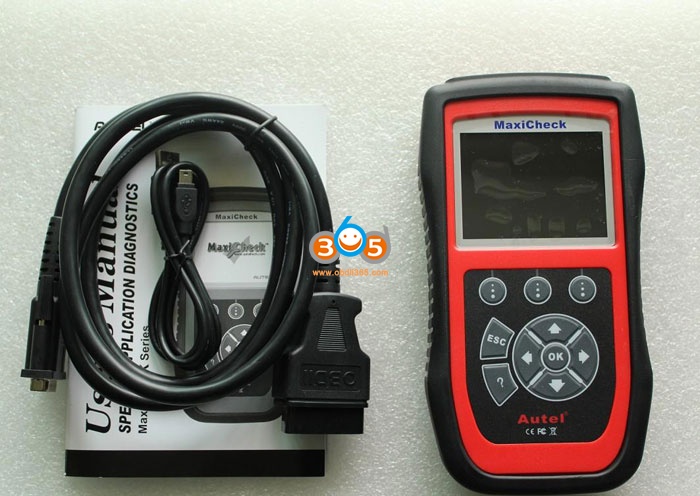
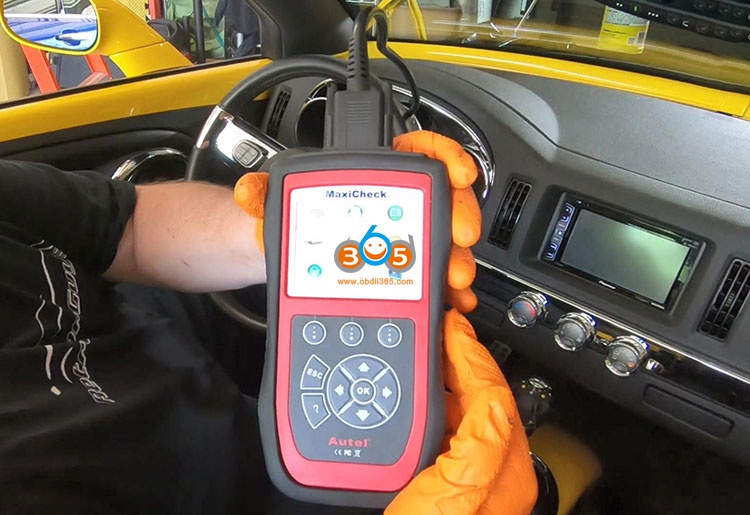
I’m going to be reviewing thisAutel MaxiCheck Pro code scanner, it is probably a bit too limiting as far as what can perform that it has downloadable updates from the Internet from the manufacturer, and it lets you work with a long list of vehicle manufacturers from around the world. So it’s one of the big benefits, it also has program modules that you can load onto the units memory card that lets you test and perform specialized functions on the various subsystems in your vehicle. So that’s what I’m going to be trying to do with it. Today I’m going to be using it toperform an ABS module automated brake system bleed on my 2004 Chevrolet SSR, so after the intro, I’ll show you the software used update to the memory card, and then we’ll get into performing the automated system bleed and see how it works.
Let’s get to it.
Please review the automotive information repair and modification guidelines on the screen below, seek the advice of a repair professional, if you’re unsure how to perform any repair or modifications safely and correctly, all repairs and modifications are performed at your own risk.

Here is the Autel Maxi PC suite software running on my Windows 10 laptop, this is used to update the memory card that is provided with the maxi check Pro since that contains all the program support modules that are used by the maxi check Pro to perform the various functions that it performs.
So you need to download the software either from their website or access the software on the cd-rom provided with the device.
And install it on your computer, the additional thing here is you need to have an account, so if you haven’t signed up for the Autel website, go ahead and click on signup and establish that user account. And then once that’s established, you will be able to go ahead and login here, but notice over here, it shows that it is found on my D Drive my memory card, it also displays a serial number for the device which I’ve lured out here so you should see one corresponding to your particular device.
So I’m going to type in your username and password which you can’t see mine here but they’ve been cleared out, let’s go ahead and type those in and login.

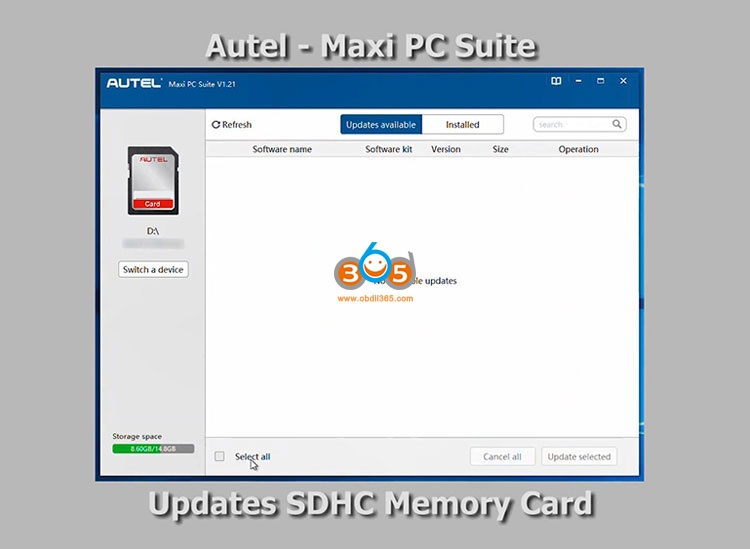
And it is interrogating the updates available and right now there are no updates available for this particular device.
I updated the memory card earlier this morning, so apparently nothing has been released since then.

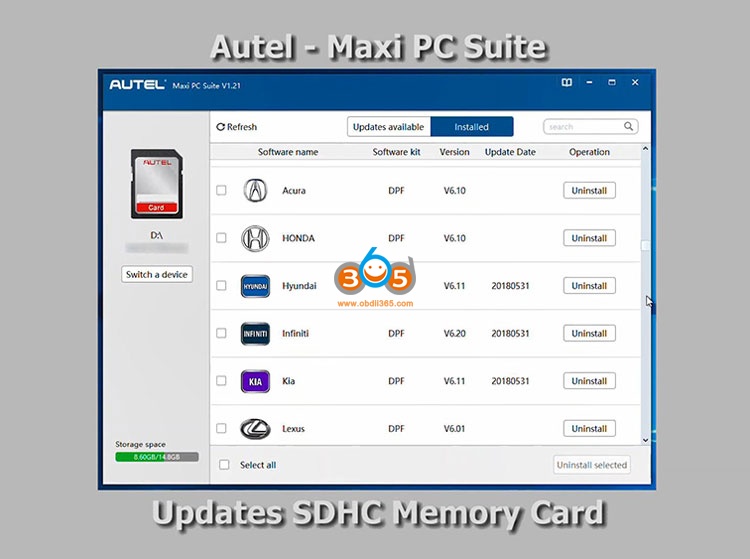
Let’s click on the"Installedâ€button up here and we can see a large number of software kits for the various models, basically the program modules that are run by the Maxi check Pro to perform those functions, and there’s a large number of auto manufacturers from throughout the world that are supported by this device, so you can see that virtually every car out there, that has a OBD2 port should likely be supported by this particular device.
And the software kits corresponds toABS SRS is for the ABS and supplemental restraint system.
And we get into theBMSfor battery management system.
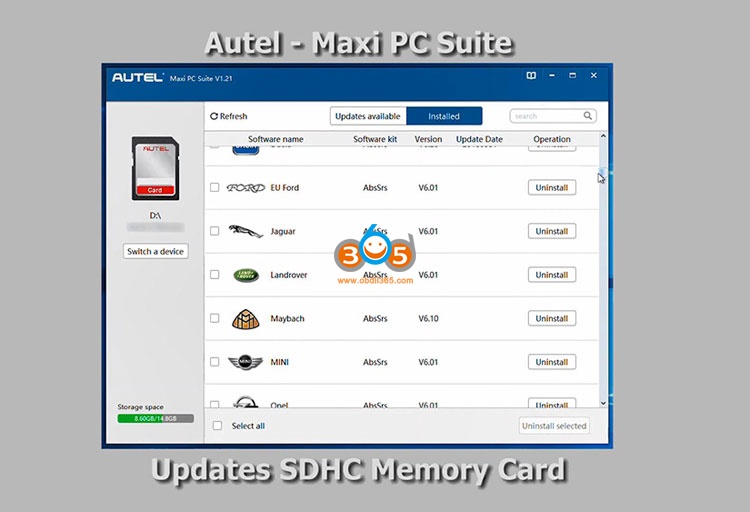

TheDPFis for the diesel particulate filter management system.
AndEPBis for electronic parking brake, you can perform calibration on electronic parking brakes with certain auto manufacturers vehicles.


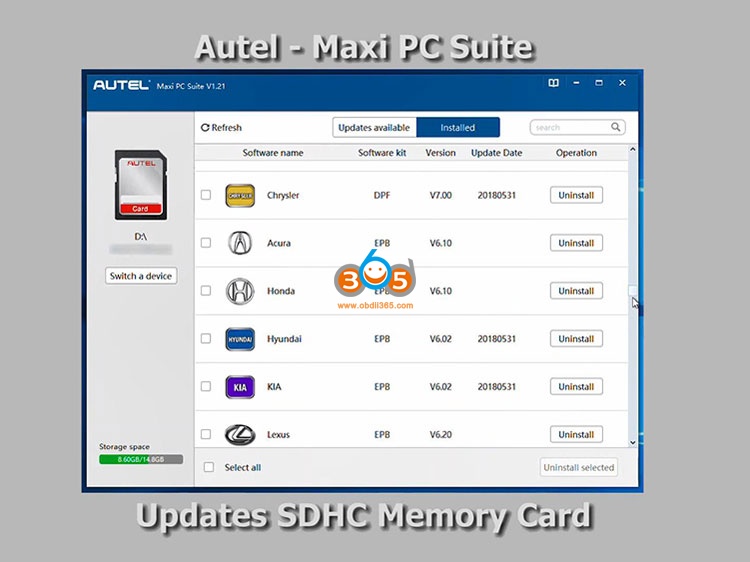
And thenoil resetsand various other whatever functions are provided for each of the auto manufacturers which you’ll sees an overview later.
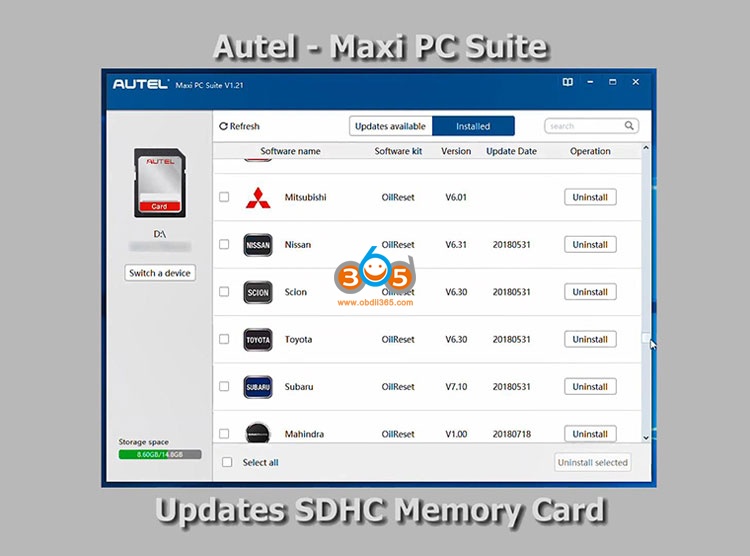
But all of the corresponding functionality provided by the Maxicheck Pro corresponds to a file on this memory card. So if there is an update available, you would see them "Updates available†and then you would select which ones you wish to have downloaded and then you would click on update selected and it would download and install them and then those would appear as the updated the install version over here on this panel.
So from this point you go ahead andexit this program "Maxi PC Suite "by clicking the close button on the upper right on Windows, then after you’ve exited the program you then unmount the drive from your Windows laptop or PC in a safe manner to make sure all the changes have been flushed out to the memory card, and then put the memory card back into your maxi check Pro.
Here is the main screen for theMaxicheck Prowhich lists the various software kits that are available on it.Top left we have the "OBDII†(the main diagnostic module for this unit);
Top center,we have the "ABS /SRS service†which is the anti-lock brake system and supplemental restraint system, this is the module I’ll be using today with my Chevy SSR to perform the automated bleed of the anti-lock brake system.
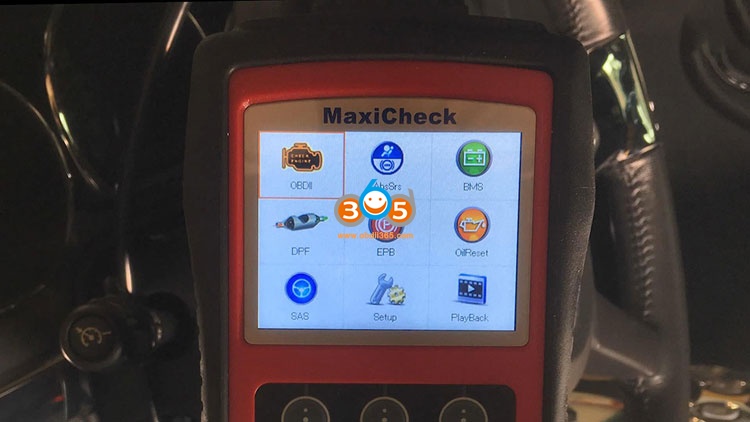
Top right, we have the battery management system;
Center left we haveDPFfor diesel particulate filter management system;
Center we have theEPBwhich is an electronic parking brake which will have a module that can potentially calibrate the operation of that unit;
The center right is theoil resetsfor oil management and tracking systems on various vehicles you need to reset that indicator a system when you change the oil in the vehicle that can be used to do that for you;
The bottom left isSAS steering angle sensor calibrationcan be performed with that particular module, if your vehicle is supported;
The center bottom is the"Setupâ€such as language selection and various other options for the maxi check Pro;
The bottom right is the"Playbackâ€of any recorded data that was captured by the unit while connected to your vehicle.
Let’s now move on to performing that automated bleed using ABS SRS software kit on my Chevy SSR.
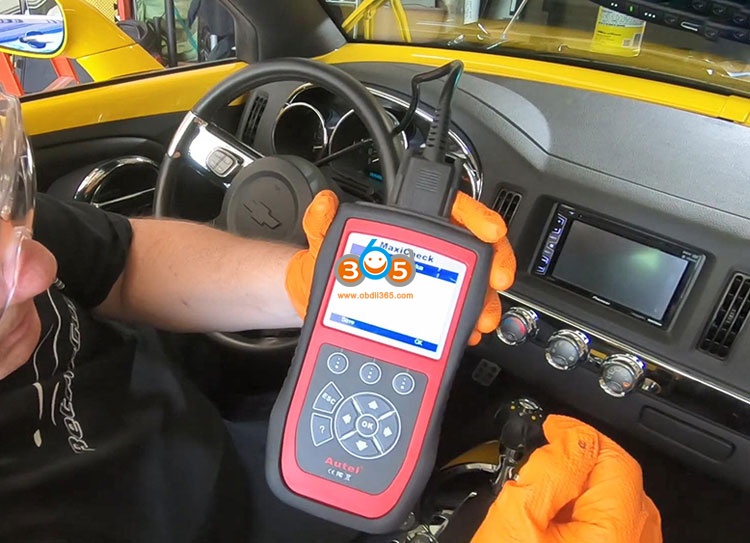
I have an Autel Maxicheck Pro now in my Chevy SSR, are going to go ahead and plug it into the OBDII port, so you have ignition starting in the off opposition, plug the device into the OBDII port and then you turn the ignition on, but do not start the vehicle, so proceed with that.
This should power up once it receives voltage from the vehicle which has and now I will initiate the ignition on sequence, so here we have the main screen for the maxi check Pro and the various subsystems and tests that can perform a interrogate, so I’m going to go ahead and check the main OBDII port, right now just to make sure I’m starting off with nothing in the no codes to start with.
So now I’m cleaned to begin with. So let’s go ahead and select OK.
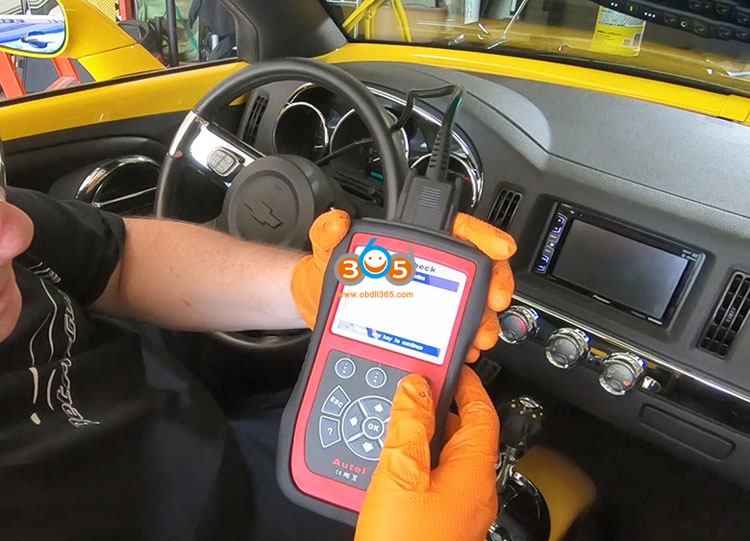
And it’s interrogating the database to figure out which protocols being used by this particular vehicle.
And it should be in 1850 to 1815 VPW 4 number right ok, it’s on that one now.
And it’s now showing that my system status is a little status for them malfunction indicator light is off, there’s zero code founds, there’s three monitors on this vehicle which are not available. The monitors that you can have for readiness of emissions testing the monitors that are okay are seven and monitors incomplete are zero, so there are no monitors and incomplete state or pending state so that’s good.
So let’s go OK to that and I’m going to go ahead and read code just to see if there is any stored codes and there are no stored codes. If there’s any attending shows on the vehicle.
And there are none.
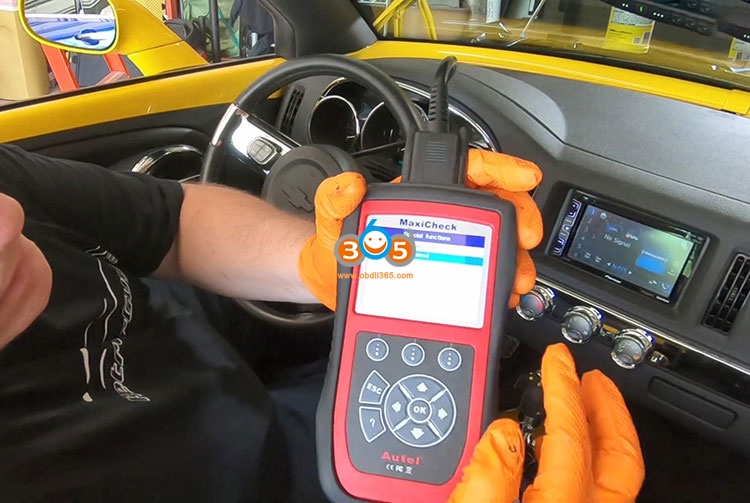
Alright, so I’m gonna go back out to the main screen wherethe ABS SRS module for this particularMaxicheck Pro so I’m going to go over one and select that.
And I’m going to go toUSA, then GM. And you need to identify the vehicle that you have ,so you can do use the proper program to check and verify and perform tests, this is a 2004. And it is a light duty truck, it isChevrolet. And hopefully we find aChevy SSRare on this list.
Let’s read the trouble codes, make sure again we’re starting with no fault codes, so I don’t want to perform a tester function on something, I’ve got problems with but there are none.
So let’s get back out to "live data†on with this device, I’m going to go down into special functions.
And I’m not changing my tire size calibration, I’m going to do an automated bleed so here is the automated bleed function that I’m going to be utilizing.
Important: referred to the service menu for more instructions. I’m going to continue.
So I am Ihave the parking brake set. And I have already checked my fluid level, so let’s start shift transmission into park slash neutral, it is currently in park.
Apply and hold the brake pedal for test activation, I will brake conducting.
No DTCs is audibly completed.
Alright, so let’s go out one level, make sure go back into an SSR, and again look for any trouble business to make sure it wasn’t just representing that and no fault codes detected.
Alright. So that’s one function that I’ve never been able to perform with any of the other code scanners that I’ve had for the SSR not.
On the bottom, there is a USB connector, so if you want to power with a usb power source, you can do so, and here’s the memory card that is where all the modules and actual functionality is stored is 16 gigabyte memory card, that’s where it plugged into the device, and I believe there’s also a power port on the top for optional external power supply.
Conclusion: So what do I think of the Maxicheck Pro?
so far I’m very happy with it,it does what it says it’s supposed to do, it does have the automated bleeding procedure for the ABS module on this 2014 Chevy SSR.
The version of the test that documents in the manual is which an example actually shows some screens where it has you open up the brake line in each of the four wheels to perform an actual brake line leed the GM version apparently at least for the SSR, it has an implementation where you are just holding the brake pedal and it performs the test so that doesn’t seem it doesn’t support the individual brake line bleed at each wheel.
So after the procedure was done I tested the sponginess of the pedal and I actually got a little bit worse, a little concern, so I decided to perform a full system bleed after the automated bleed I wasn’t expect to get any air out of the system, but much to my surprise, each wheel I got a hit of air out of the line which I have never been able to get out with those lines before I usually do a brake system bleed about every two years and full system flush and usually there’s no air in the system.
This time after the automated blade I actually did the air out of the system in each of the wheels, some wheels had a little bit and I think in the driver side rear, I actually got a good couple inches of in the clear tube. I could see a couple of inches of air, so I believe we may have to purged the system finally of that extra air , may have been there the whole time.So I’m hoping the automated ABS belief for this vehicle is in beneficial and so far the brake pedal is about 70% firmer than it was before much better response out of the break after I took it on a test drive in performing both the ABS motivated one and the manual system, really much better.
So what I say the Autel Maxicheck Pro is worth it for what it can do, I would say 165 dollars it’s a Bargain, you can interrogate the codes for the generic code for any vehicle. It seems to have under specific or vehicle specific code, it can interrogate also the various substances like the ABS subsystem and the supplemental restraint system.
Wide variety of things it can do and 465 dollars you can bind other code scanners that don’t do half of what this one does.
So I highly recommend this if you’re into using a hand held scanners for your vehicle I might recommend you go out and find theAutel Maxi check Proand give it a try for yourself.
http://blog.obdii365.com/2020/12/03/2004-chevrolet-ssr-abs-bleeding-with-autel-maxicheck-pro/
Posted by: jean at
07:20 AM
| No Comments
| Add Comment
Post contains 2076 words, total size 25 kb.
December 02, 2020
Car model and year:BMW E36 1996 – 2002
Symptom: Seats airbag light on
Take the seats out and have them reupholstered why the car is sitting. I ended up starting the car during the procedure of removal. Now the seats are out and the airbag light is on
How to reset BMW E36 Seats airbag light on?
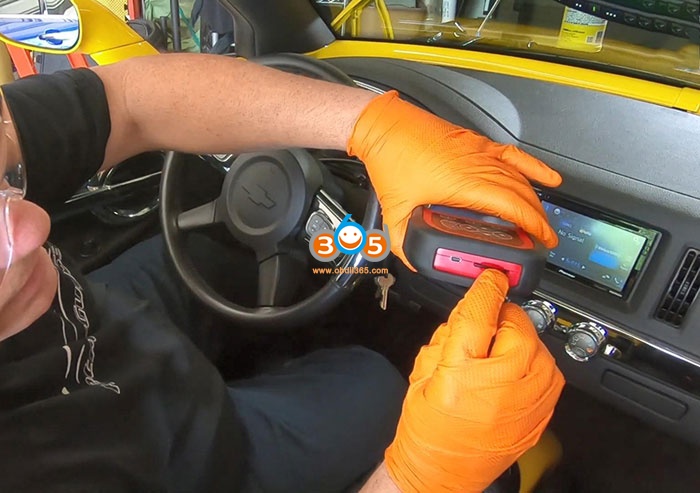
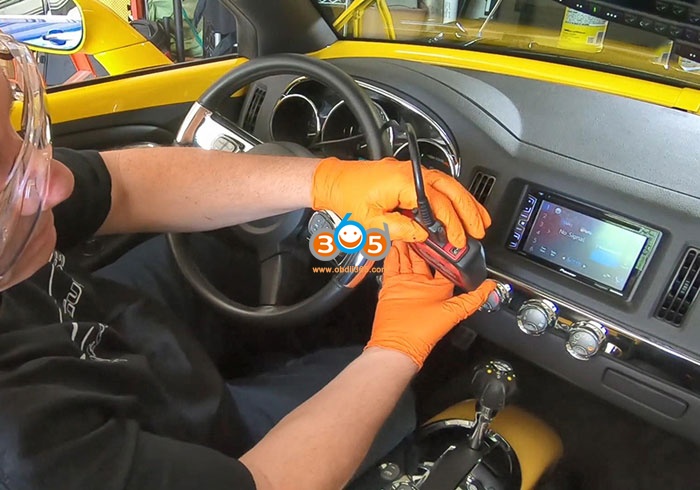
You need INPA or a diagnostic tool (I.E Foxwell nt530) to clear it. Airbag lights are not self-clearing. Once the cluster light illuminates the error needs to be corrected (reattach the wiring in this case) and the trouble code erased.
Which current market tools can read the error codes?
- Inpa: Confirmed
INPA software has reset the light a few times. That’s why I loaded it onto an old laptop. It’s free, except for cost of cables, about $20. Here’s the inpa cable link:
https://www.obdii365.com/wholesale/bmw-inpa-k-can-with-ft232rq-chip.html
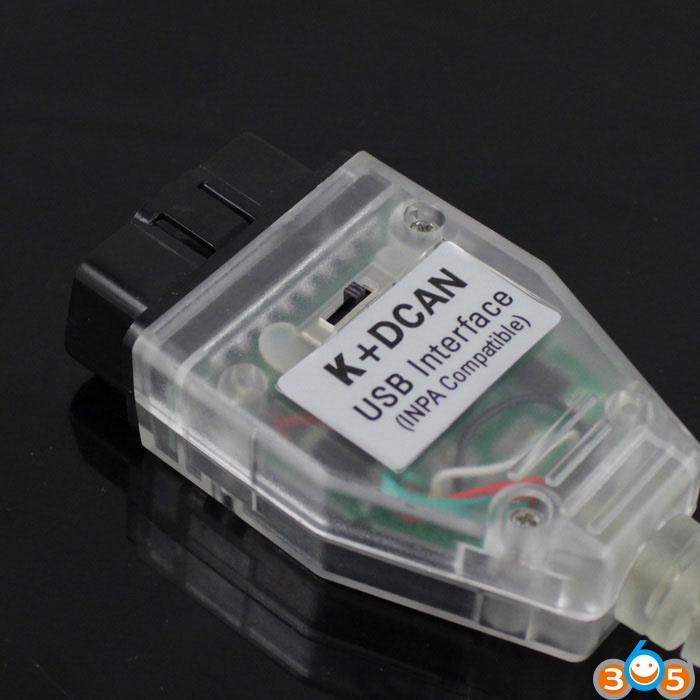
INPA is a factory tool that BMW still uses today. Not dealer, factory. We have access to an older version that snuck out the side door years ago. It provides all the functionality you could need or ask for for this era of BMW. Of course, it needs to be installed on a laptop, but compatible machines can be obtained very cheaply if you dont have one just laying around.
- The Peake tool: has bug
The Peake tool is NLA, the entire company is gone… about a decade too late. It is a 1980’s grade tool that they kept trying to limp into this century with marketing. The Chinese offering off Aliexpress and Amazon/eBay is a clone of the Peake circuitry and software. It has a nasty bug in it that has cost many people much time and $$$ chasing the wrong fault. That bug was copied from the Peake tool.
Go INPA
- Foxwell N530 BMWscanner: Confirmed
I have the Foxwell N530 tool and it also resets the SRS light as well as OBD2, maintenance minder, and other modules. Not as capable as INPA but it is a self contained handheld unit and doesn’t require a laptop.
I just sold my Peake SRS tool.
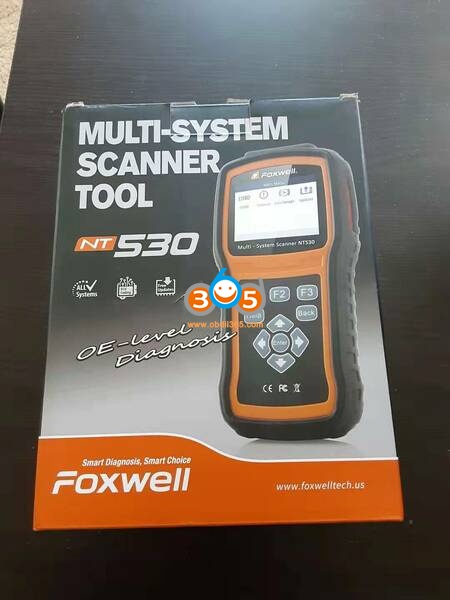
PS: Get a Foxwell tool along with theround 20 pin connectorfor about $170 and you will have a capable scan tool for this and future work.
Good luck!
Posted by: jean at
03:27 AM
| No Comments
| Add Comment
Post contains 382 words, total size 4 kb.
32 queries taking 0.0461 seconds, 200 records returned.
Powered by Minx 1.1.6c-pink.

