


March 28, 2020
How to install ''BMW Standard Tools'' package
How-to: install ''BMW Standard Tools'' package (Ediabas, INPA, NCSexpert, WinKFP and etc).
I recommend to use only Windows 7 32-bit, because on 64-bit version NCS Expert won't work. In case you won't use it for ECU and modules flashing, you can use Windows 7 64-bit OS.
InstallationINPA- EDIABAS FULL:
1. Delete ALL versions (in case you have old versions or want a new fresh installation) from your computer or rename all INPA-ADS folders. For example ''INPA'' into ''_INPA'', ''EDIABAS into ''_EDIABAS'' and so on.
2. Extract the downloaded file with Winrar to desktop (or anywhere you like). Please note, it will require approx. 50Gb of free hard drive space.
3. From extracted folder ''BMW Programming'' open the folder ''inpa 2012 new'' and copy all files from this folder to any Memory Card, Flash drive (USB stick) or ect, anything with File System - FAT. Please note, it is very important to do this step to avoid error later on during installation steps! From now on futher installation steps will carry on from your Memory Card, Flash drive or ect as I've mention above!
4. Open folder ''Step_1\''. Copy folder EC-APPS onto your disk С:\
5. Run file --> Step_1\NFS\Entpackt\disk1\SETUP.EXE
While installing choose User Mode
Further choose in opening windows:
- Parametrieren einer neuen Konfiguration ohne Daten
- OBD
- Kein API-TRACE
- Kein IFH-TRACE
- Komfort (.IPO)
!!! RE-BOOT YOUR Computer !!!
6. Run file --> Step_2\INSTALL\Instprog.exe (this is the step where you would get an error if you wouldn't use a Memory Card or ect.):
- Choose ENGLISH, press Continue, then press Continue again
- While choosing the HDD disk for initial setup do not change letter C:\. Your installation must be on drive С:\ ONLY !
- Choose configuration BMW Group Rectification programs UK, press Continue.
- Activate all spare boxes with : EDIABAS 6.4.3 - UPDATE, INPA 5.0.1 - UPDATE,
NCS Expert 3.0.8 - Complete
- Press Continue.
7. Run file --> Step_3\INSTALL\Instprog.exe:
- Choose ENGLISH, press Continue, then press Continue again
- While choosing the HDD disk for initial setup do not change letter C:\. Your installation must be on drive С:\ ONLY !
- Choose configuration BMW Group Rectification programs UK, press Continue.
- Activate all spare boxes with: INPA 5.0.1 - UPDATE, NCS Expert 3.0.8 - UPDATE
- Press Continue.
8. Please delete the intalled ''EDIABAS'' and ''NCSEXPER'' folders from your computer drive C:\ (futher steps will simply replace these folders with the newer versions)
9. Open folder ''BMW Programming'' --> inpa 2012 new\inpa V5.02\ find a winrar file ''NCSEXPER'' and extract the ''EDIABAS'' and ''NCSEXPER'' folders into your computer drive C:\
10. Please open C:\EC-APPS and delete ''INPA'' folder
11. Open folder ''BMW Programming'' --> inpa 2012 new\inpaV5.02\ find the same file ''NCSEXPER'' like from Step 10. Open it with winrar and extract ''INPA'' folder to C:\EC-APPS
12. Find the file from С:\EC-APPS\INPA\CFGDAT\ named inpa.ini and replace it with the file inpa.ini that is in the root directory of ''BMW Programming'' -->inpa2012 new\inpa V5.01.
13. Open the folder ''BMW Programming'' -->inpa 2012 new\ and find a pdf file ''Inpa Installation Guide''. Open it with PDF reader and perform a 8 and 9 Steps from this guide. Please IGNORE any futher steps from this guide as I already modified necessary files from futher steps.
14. Open folder ''BMW Programming'' -->inpa 2012 new\ and find ''obd.ini'' and ''Ediabas.ini'' files. Copy ''obd.ini'' file to your computer C:\Windows folder. Copy ''Ediabas.ini'' file to C:\Windows\System32 and ''C:\Windows\System32\drivers'' folders.
15. Connect your car to computer with OBD K + Dcan cable you should have and install drivers manually from the folder ''BMW Programming'' -->inpa 2012 new\inpa V5.01\Driver_D_CAN_USB
16. Open your computer Control Panel --> System --> Advanced System Settings --> Environment Variables...
- from ''System variables'' find ''Path'' edit it and rewrite (copy&paste) all value to ''%SystemRoot%\system32;%SystemRoot%;%SystemRoot%\System32\Wbem;%SYSTEMROOT%\System32\WindowsPowerShell\v1.0\;C:\Program Files (x86)\QuickTime\QTSystem\;C:\EDIABAS\Bin'' (without '')
- from the same ''System variables'' find ''TEMP'' edit it and rewrite (copy&paste) all value to "C:\Windows\Temp;C:\EDIABAS\Bin" (with '')
17. Run file from ''BMW Programming'' -->inpa 2012 new\inpa V5.01\Driver_D_CAN_USB\OBDSetup.exe
1) RE-BOOT your Computer !
2) Use the following order of using adaptor:
- Plug the Adaptor into spare USB-port
- Plug the Adaptor into OBD-II connector of BMW
- Turn the Ignition into ON position
- Rune the INPA with file С:\EC-APPS\INPA\BIN\inpaload.exe or use shortcut on your desktop created.
- Choose the model of BMW and type of modul you want to see
- Close theINPAand disconnect the Adaptor from USB-port each time you change the car connected
18. To update WinKFP to v5.1.6 open ''BMW Programming'' --> WinKFP v5.1.6 and run ''setup25.exe'' (right-click on it and choose properties, change compatibility to Windows XP). Fallow the steps and tick/choose ONLY WinKFP / NFS, otherwise INPA will stop working!
Good luck!
Posted by: jean at
06:14 AM
| No Comments
| Add Comment
Post contains 799 words, total size 6 kb.
March 16, 2020
Fixed! 2011 BMW Z4 headlights not raising to the proper height
Car model and year:2011 BMW Z4 E89
Problem and BMW scanner to use:
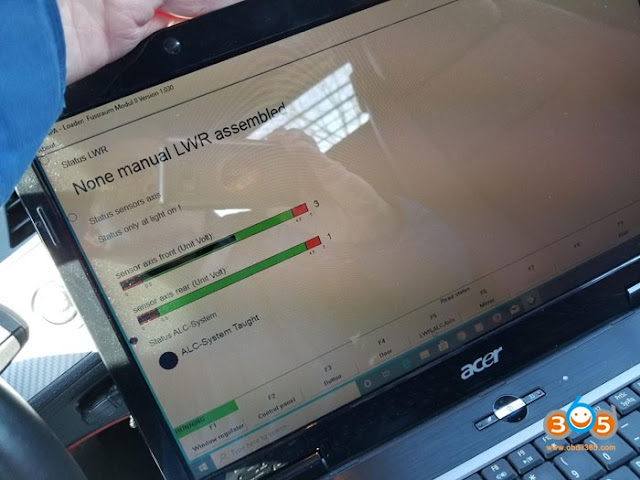
the rear axis sensor is very near its low limit. Therefore my headlights are not raising to the proper operating height. When I start the car the lights dip and then return to the default low position. Checked it out withBMW INPAand apparently the rear sensor is reading very low. Jacked up the car and wiggled the rear sensor and confirmed the lights move, as they should.
I have working copies of both INPA andNCS Expert.

Image 1: the sensor output of my car with stock suspension on level ground.
Solution:
03-02-2020 update:
Ordered a new rear leveling sensor.
Installed new read level sensor and now I’m getting a reasonable reading of 2v. Automatic leveling is working correctly, but lights still too low. Before adjusting the mechanical height adjustments, I should mention the following. My headlamp housing was damaged and had to be replaced. The collision center, transferred all my internal components to the new housing and did a less then satisfactory job of aligning my headlamps. Actually, I didn’t think they did any adjustments. So, do I need to reinitialize the AHL via INPA by doing an "activate� Or, since nothing was replaced except the housing, just proceed to mechanically align the lights?
03-10-2020 update:
Now that the sensor is replaced. I manually adjusted the lights to a 4″ drop over 35 feet and all is well.
Posted by: jean at
07:31 AM
| No Comments
| Add Comment
Post contains 252 words, total size 2 kb.
March 09, 2020
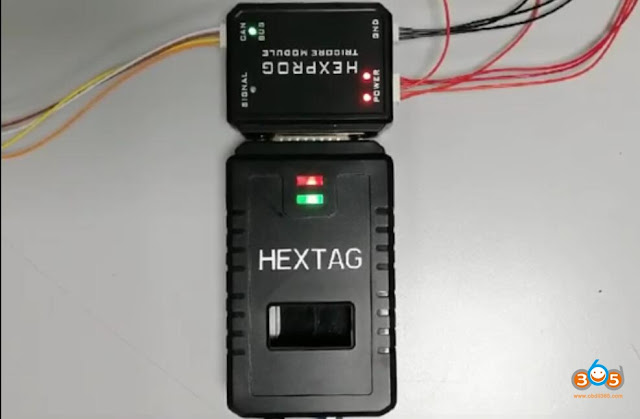
Cloning BMW MG1 and MD1 (MDG1) by Hextag

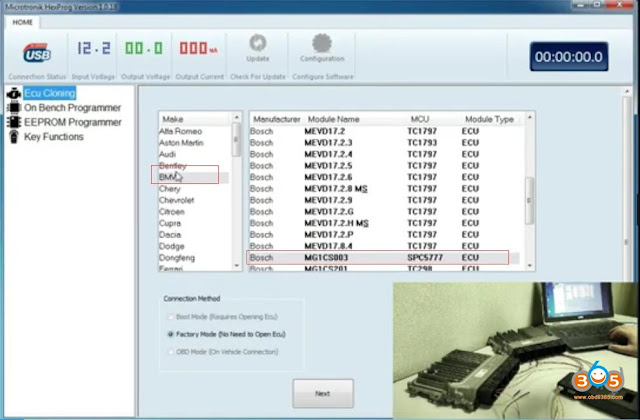
Select BMW->Bosch MG1CS003 SPC5777 ECU->Factory Mode (No Need to Open ECU)

Check MG1 wiring connection
Follow wiring to connect ECU with Hextag and power adapter without opening ECU
Press ECU Info
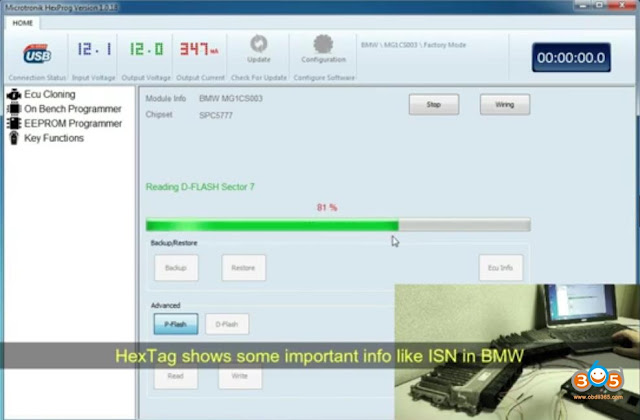
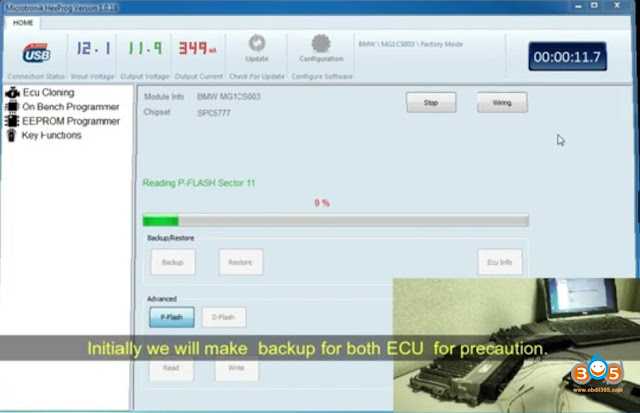
Reading very fast
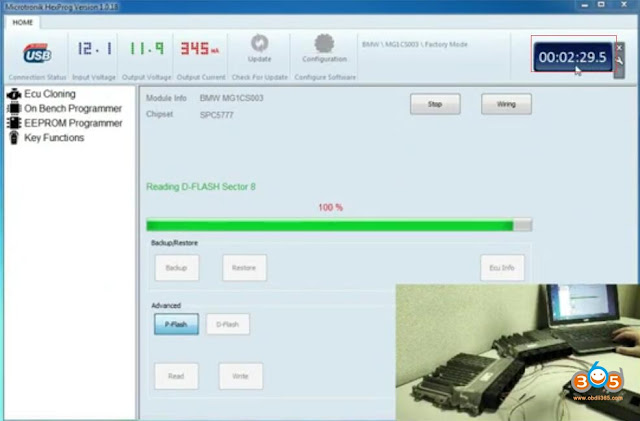

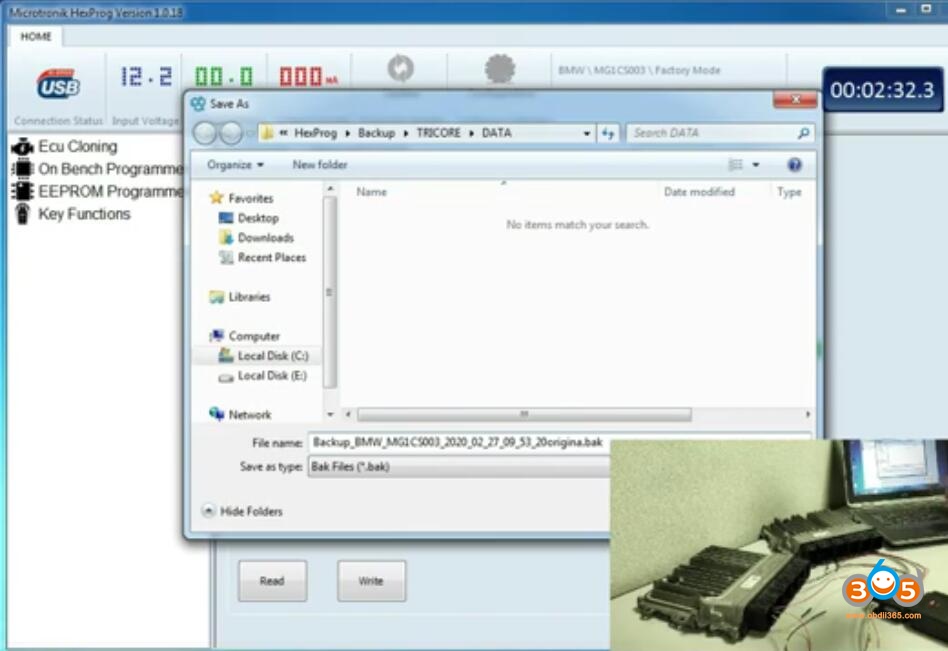
Read data completed. Save original ECU data
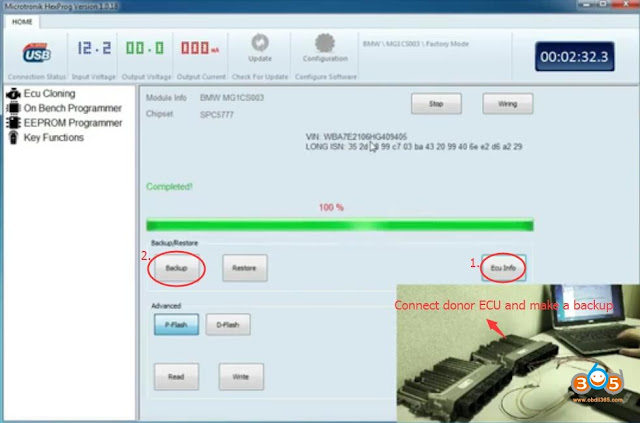
Now we connect the donor ECU and make a backup
Check ECU info
Press Backup
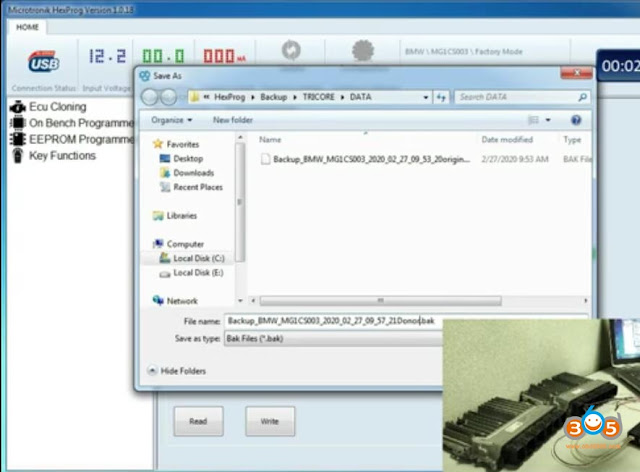
Save donor ECU data

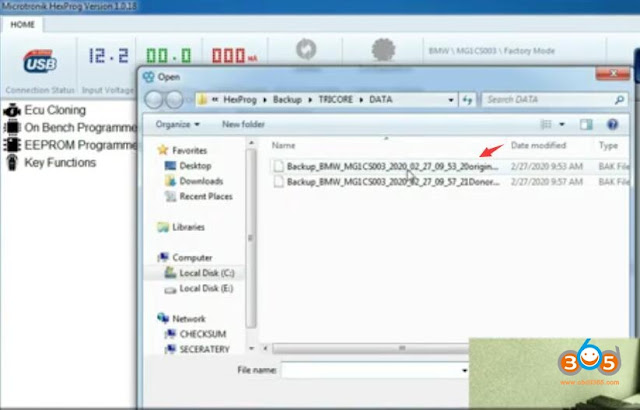
Choose original ecu data
Writing is slower than reading. Depends on flash contents

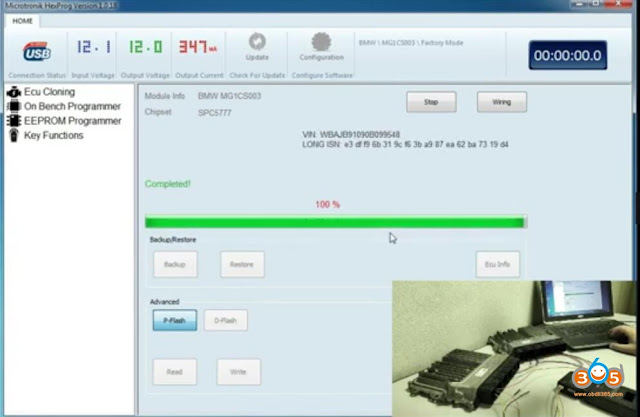
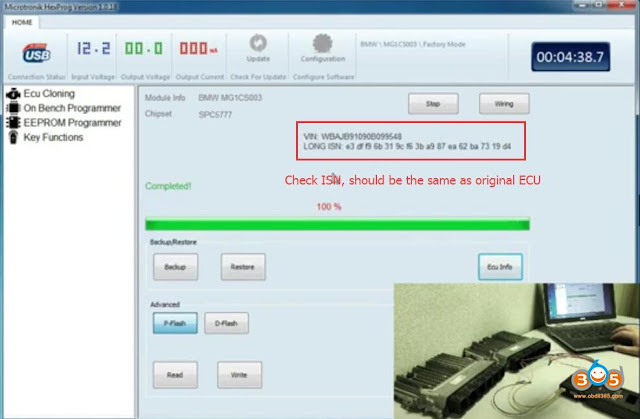
Write completed.
The newly developedTricore moduleenablesHextag programmerto clone many ECUs without opening ECU (factory mode). Here’s an example of cloning Bosch ECU MG1SC003 in factory mode.
Main steps:
1.Backup original ECU data
2.Backup donor ECU data
3. Clone ECU
1.
OpenHextag software

Select BMW->Bosch MG1CS003 SPC5777 ECU->Factory Mode (No Need to Open ECU)
Press Writing
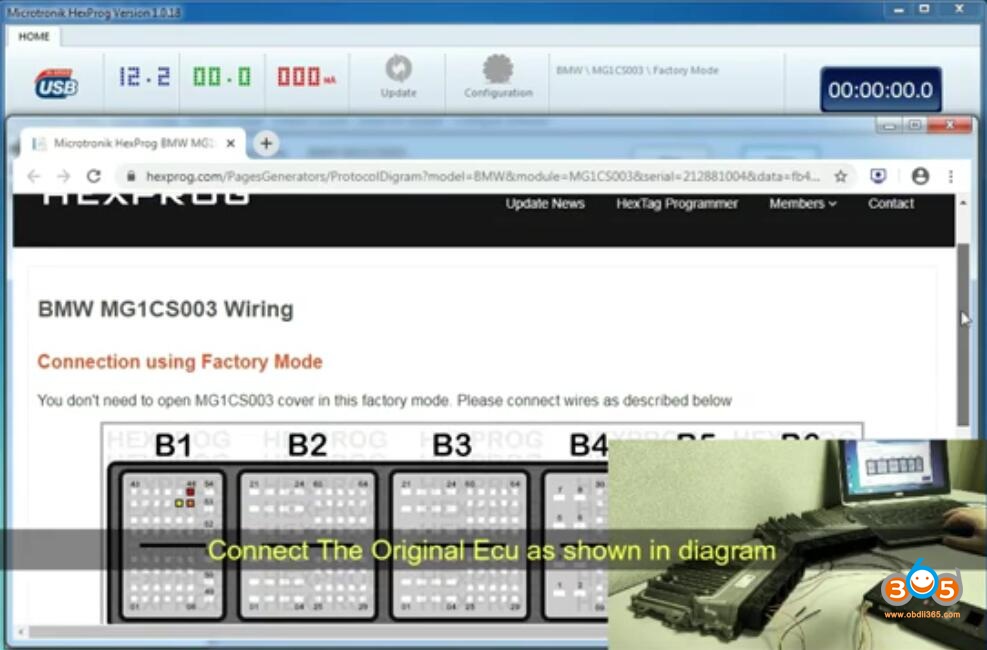
Check MG1 wiring connection
Follow wiring to connect ECU with Hextag and power adapter without opening ECU
Press ECU Info


Reading very fast

Read data completed. Save original ECU data
2.

Now we connect the donor ECU and make a backup
Check ECU info
Press Backup

Save donor ECU data
3.
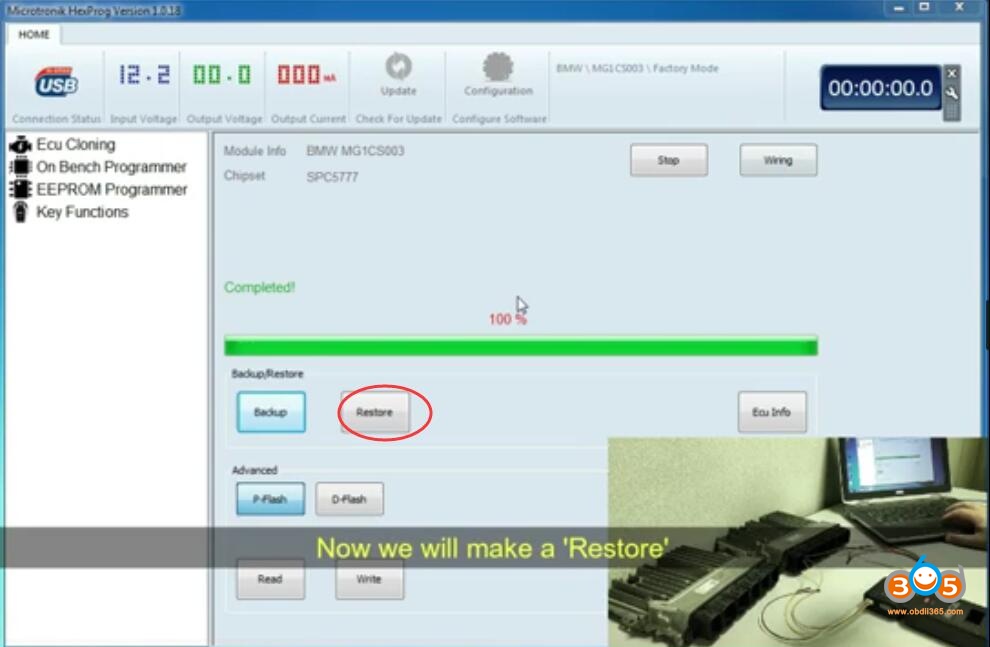
We will make a "Restoreâ€

Choose original ecu data
Writing is slower than reading. Depends on flash contents
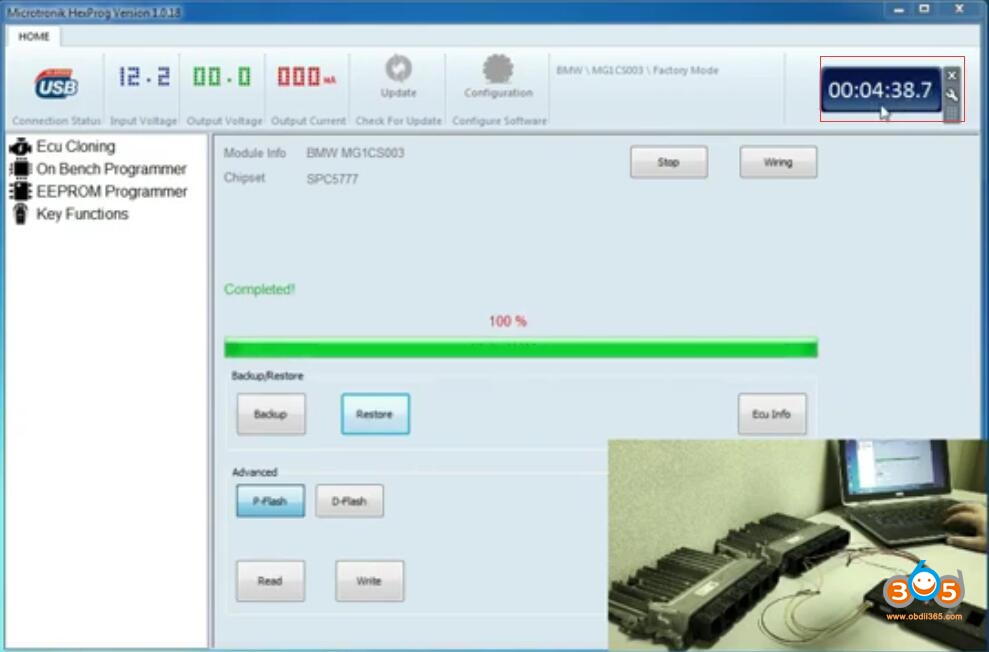
Write completed.

Check ECU info and check ISN, should be the same as original ECU.
Done.
Posted by: jean at
06:40 AM
| No Comments
| Add Comment
Post contains 173 words, total size 10 kb.
<< Page 1 of 1 >>
37kb generated in CPU 0.0173, elapsed 0.0627 seconds.
32 queries taking 0.052 seconds, 196 records returned.
Powered by Minx 1.1.6c-pink.
32 queries taking 0.052 seconds, 196 records returned.
Powered by Minx 1.1.6c-pink.

