


January 24, 2018


- Vehicle identification for specific vehicle management
- Information research for repair and maintenance
- Guided troubleshooting
- Software repair
- Software Update
- Control Unit Replacements
- Retrofits / conversions
- Minimum system configuration is now hard coded into the program, although the standalone versions have this check removed.
- 2.2Ghz CPU – 2 core minimum, core i5 or i7 recommended
- 4GB RAM, 8GB recommended
- Minimum 20+GB HDD free space for ISTA+ Diagnostics with ONE language, and minimum 100GB for Programming Data.
- This version has hardware check removed, however, future versions MAY not have this feature. A faster system is required.
- This version discusses included English Databases only. If more required, add to SQLiteDBs folder, which will need more space.
- Visual C++ Redistributable Packages for Visual Studio 2013
- .NET Framework 4.6


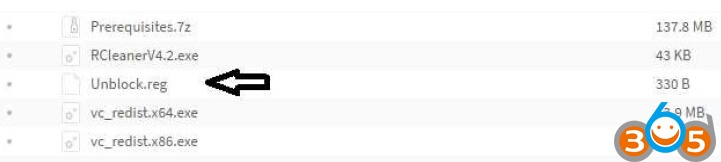
- From the Mega site, download and run the following two registry files: o Ista-prog-x64.reg
- Also run the following registry fixes from the C:\Rheingold folder (scroll all the way to the bottom to see these files):


Posted by: jean at
05:53 AM
| No Comments
| Add Comment
Post contains 873 words, total size 12 kb.
January 22, 2018
This is the screen.
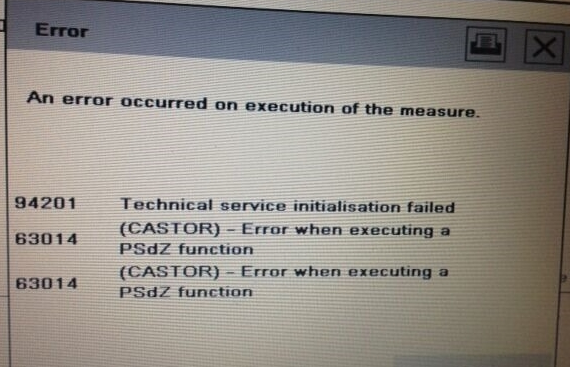
Maybe you've seen this error at least once you useISTA-P
Most likely EDIABAS or PSDZ errors.
1. Exit ISTA-P first and exit the program.
2. Disconnect ICOM connected to OBD terminal of vehicle.
3. Remove the battery terminal of the vehicle for about 10 minutes.
4. Reconnect the vehicle battery terminal.
5. Turn on ignition of the vehicle.
6. Connect ICOM to OBD terminal of vehicle.
7. Run ISTA-P Loader to select ICOM.
8. Run the ISTA-P program.
If you do this, most of the work will be done.
(Assuming that EDIABAS and the rest of the programs are in place)
If the same error is repeated in other ICOMs as described above,
Most of them are EDIABAS, so try patch,
If you still have symptoms, you will need to reinstallISTA-PBMW Diagnostics, Programming, etc.
Posted by: jean at
09:18 AM
| No Comments
| Add Comment
Post contains 160 words, total size 2 kb.
January 15, 2018
***************** How to backup *****************
1. How to backup with SVT
Read SVT actual from VCM -> Save
1-1. How to recover the whole
Load -> Code
2. How to get backup by module
Read SVT -> Read Coding Data by Module -> C: EsysData / CAF -> Copy and Paste Same CAFD.ncd file into folder you want to save
Read Coding Data If a new window pops up, you can save it without closing it.
2-1 How to recover by module
Read SVT -> Read Coding Data by Module -> Replace with saved CAFD.ncd file into C: EsysData / CAF -> Code FDL
3. How to get a backup of all modules at once
Read SVT -> Root SVT -> Read Coding Data -> C: EsysData / CAF -> Copy and Paste All CAFD File into folder you want save
3-1 How to recover all modules at once
Read SVT -> Root SVT -> Read Coding Data -> Replace with saved CAFD.ncd file into C: EsysData / CAF -> Code FDL
It is often called the factory reset when an error occurs.
Therefore, it is recommended to set the backup as default.
At this time, the meaning of the code is not the meaning of the original, but it is more likely that it means that the coding values ​​are reset to factory reset.
If an error occurs, you can erase it with a scanning device that can be scanned or erase the fault code using BMWHAT or useBMW ENET cableE-sys software.
www.obdii365.com
Posted by: jean at
09:42 AM
| No Comments
| Add Comment
Post contains 271 words, total size 2 kb.
January 10, 2018
836 Electronic immobilizer control unit (EWS-3)
|
Number |
X-pin,color |
Description |
|
X1659 |
13-pin, Black |
Plug connector Electronic immobilizer control unit (EWS) |
Pin assignments at plug connector X1659
|
Pin |
Type |
Description/Signal type | Connection/Measuring notes |
| 1 |
A |
Terminal50 |
Starter |
| 2E | Terminal30 |
Ignition switch |
|
| 3 |
Not used |
||
| 4a |
Activation, drive-away protection |
DDE control unit, DME control unit |
|
| 5E |
Signal, ring coil ignition lock |
Ring coil |
|
| 6E |
Signal, gearshift position L2 |
Gear position switch |
|
| 7th |
Not used |
||
| 8 |
Not used |
||
| 9E | Terminal31 | Connector terminal31 | |
| 10E | Voltage supply terminal30 |
Fuse F12 |
|
| 11E |
Terminal R |
Fuse F37 |
|
| 12E | Signal, ring coil ignition lock |
Ring coil |
|
| 13E / A |
K-bus signal line |
Instrument cluster (IKE) |
|
EWS-3connection:
13pinconnector:
p.04 – DME / DDE
p.05 – coil
p.06 – + 12v (EGS) – necessary if the EWS is coded under the ACP
p.09 – GND
p.10 – + 12v (30)
p.ll – + 12v ( R)
p.12 – coil
p.13 – K-bus – when connecting "on the tableâ€, pull up to + 12v with a resistor of 4.7-10 kOhm
ControllerMC68NS11EA9:
p.01 – Vss GND)
p.02 – Vdd (+
5v)p.03 – ModA
p.05 – E-clamp
p.17 – Reset
p.20 – RxD
p.21 – TxD
p.22 – ModB
p. 25 – Vss (GND)
p.26 – Vdd (+ 5v)
In-circuitprogramming thecuttingpath,connectingRxDandELMOS.
EWS-3 BMWTNR 8.380.138 HW: 01 SW: 03
Dump:
| In600: | 0F 3F 01 02 03OA00 05FF FF FF FF FF FF FF FF |
B600-B60F – Fault codes |
| B610: | FF FF FF FF FF FF FF FF FF FF FF FF FF FF FF 04 FE | B61E – Fault code number |
|
B620: |
88 38 01 38 01 81 81 07 32 97 06 55 F0 00 F0 FF |
B620-B62A – ID EWS |
| B630 | FF FF 00 40 FF 0A 01 0A 0A F8 10 38 00 19 5C 24 | B63B-B640 – Password |
| B640: | 14 C3 04 9E AB 07 F8 F5 B2 F2 AD 47 93 64 A0 El | B641-B657 – KEY 0 |
| B650: | 98 DB 41 OF EC 05 02 00 C3 04 9E 26 B6 01 DE 96 | B658-B66E – KEY 1 |
|
B660: |
84 0E DA 6A FC 21 6D B2 0F 9A 23 6A CE FC 00 C3 |
B66F-B685 – KEY 2 |
| B670: | 04 52 36 EB 49 88 FF 64 25 EC 66 1F 02 A3 E6 89 | |
| B680: | B7 D6 E7 D9 11 00 C3 04 49 C6 D3 6D F1 8B FE 5B | B686-B69C-KEY 3 |
|
B690: |
18 0B 5A 66 F7 99 B5 1E 67 46 31 C7 00 02 04 EB |
B69D-B6B3 – KEY 4 |
| B6A0: | 8A 6F B6 38 55 OS 76 FF FF FF FF FF FF FF FF FF | |
| B6B0: | FF FF FF FF 02 04 64 5EA0 39 38 21 0D AE FF FF |
B6B4-B6CA-KEY 5 |
| B6C0: | FF FF FF FF FF FF FF FF FF FF FF 02 04 57 9E CA | B6CB-B6E1 – KEY 6 |
| B6D0: | 9E 63 28 DD 3E FF FF FF FF FF FF FF FF FF FF FF | |
| B6E0: | FF FF 02 04 80 68 FOR 81 A9 F8 D6 F5 FF FF FF FF | B6E2-B6F8 – KEY 7 |
| B6F0: | FF FF FF FF FF FF FF FF FF 02 04 60 F3 7E 5E 34 | B6F9-B70F-KEY 8 |
| B700: | 91 C9 D0 FF FF FF FF FF FF FF FF FF FF FF FF FF | |
|
B710: |
02 04 B4 53 00 E0 11 41 EA 60 FF FF FF FF FF FF |
B710-B726 – KEY 9 |
| B720: | FF FF FF FF FF FF FF 00 01 4A 44 02 01 8C 00 00 | B729-B72B – Odometer 1 |
| B730: | 00 2B FF FF FF FF FF 20 2C A3 4D 18 10 01 00 B6 | B737-B744 – FGSTNR |
| B740: | 03 10 82 06 59 FF FF FF FF FF FF FF FF FF FF FF | |
| B750: | FF FF FF FF FF FF FF FF FF FF FF FF FF FF FF FF | |
| B760: | FF FF FF FF FF FF FF 53 61 00 00 32 00 01 08 00 | B767-B77A – Coding |
| B770: | 04 80 14 04 45 00 00 7F E7 F6 56 FF FF FF FF FF | |
| B780: | FF FF FF FF FF FF FF FF FF FF FF FF FF FF FF FF | |
| B790: | FF FF FF FF FF FF FF FF FF FF FF FF FF FF FF FF | |
| B7A0: | FF FF FF FF FF FF FF FF FF FF FF FF FF FF FF FF | |
| B7B0: | FF FF FF FF FF FF FF FF FF FF FF FF FF FF FF FF | |
| B7C0: | FF FF FF FF FF FF FF FF FF FF FF FF FF FF FF FF | |
| B7D0: | FF FF FF FF FF FF FF FF FF FF FF FF FF FF FF FF | B7E4-B7E6 – Date of prog. |
| B7E0: | FF FF FF FF 05 09 97 FF 4A 44 02 19 44 00 00 19 | B7E8-B7EA – Odometer 2 |
| B7F0: | 44 5D 00 00 19 44 5D FF FF FF FF FF FF FF FF FF | B7EB-B7F6 – DME Code |
Odometer: 148554 km (read from right to left – 02444A (hex) – convert to DEC)
Used keys – KEY 0 – KEY 3 (sign – the presence of changing code)
In the controller dump
KEY 0:
B640: .. SZ 04 9E AB 07 F8 F5 B2 F2 AD 47 93 64 E1
B650: 98 D8 41 OF EU 05 02 00 .. .. .. .. .. .. .. ..
– NW 04 – header (key is adapted)
– 9E AV 07 F8 F5 B2 F2 AD – permanent key code (8 bytes)
– 47 93 64 E1 98 D8 41 OF EU 05 02 – changing code (12 bytes)
KEY 5:
B6B0: .. .. .. .. 02 04 64 5E A0 39 38 21 0D AE FF FF
B6C0: FF FF FF FF FF FF FF FF FF FF FF FF .. .. .. .. ..
– 02 04 – header (key not adapted)
– 64 5E AO 39 38 21 0D AE – permanent key code
– FF FF FF FF FF FF FF – FF code is missing (the key was not used)
BMW EWS Key Programmer AK90+ for All EWS
Posted by: jean at
06:12 AM
| No Comments
| Add Comment
Post contains 1034 words, total size 16 kb.
January 03, 2018


Posted by: jean at
07:30 AM
| No Comments
| Add Comment
Post contains 482 words, total size 6 kb.
20 queries taking 0.0111 seconds, 37 records returned.
Powered by Minx 1.1.6c-pink.

