


January 29, 2021
Launch X431 PAD Vpowerful diagnostic tool is also able to performOnline Coding Programming on BMW, Mercedes, VW, Audi, Seat, Skoda, Porsche, Nissan, Infiniti. Which covers more car models than Autel. This article is available with the procedure ofAudi A5 2014 Engine ECU LONG CODINGwith the X-431 PAD V. You will feel it is powerful and smart.
Here we go for details:
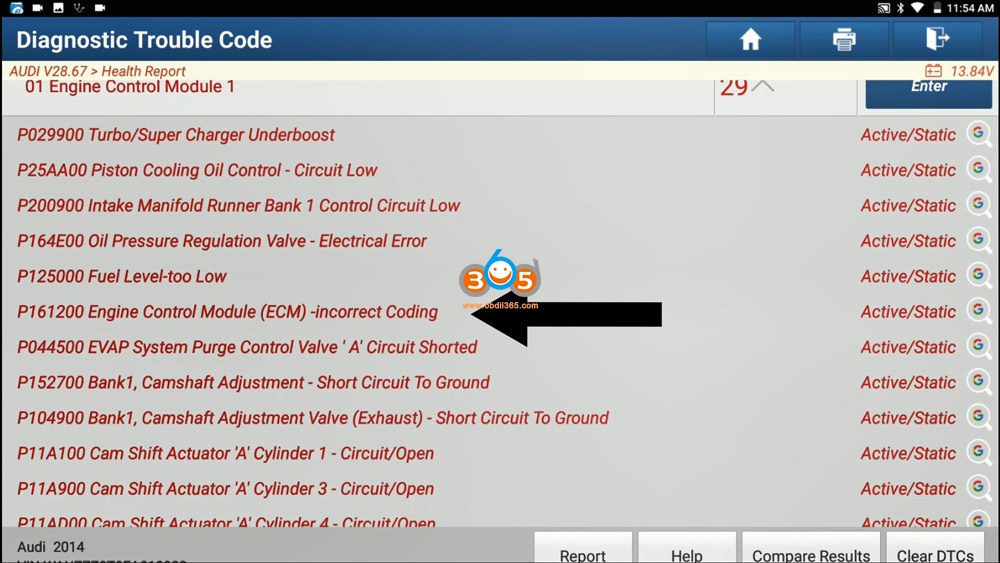
This is the Health Report of Audi V28.67 (newest version), you can see "P161200 Engine Control Module (ECM) -incorrect Coding. ".
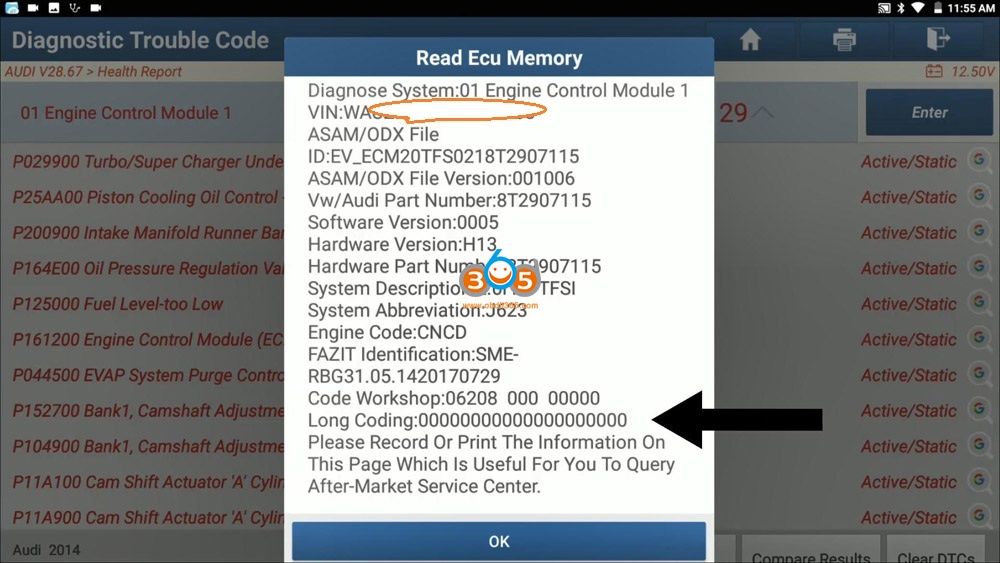
Then "Read ECU Memoryâ€,there is a Long Coding:
00000000000000000000.
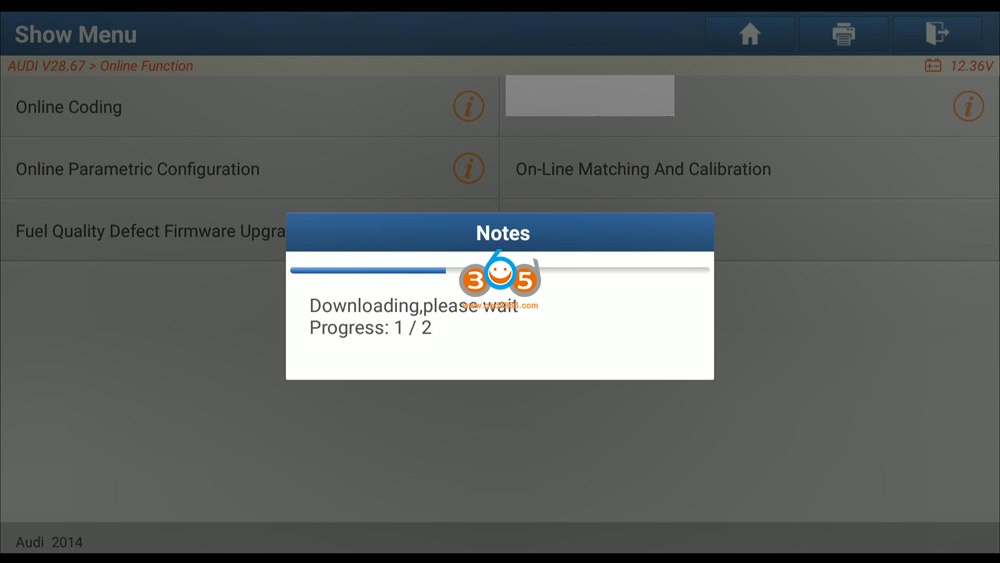
Click on Audi V28.67 -> Menu, click on "Online Functionâ€.

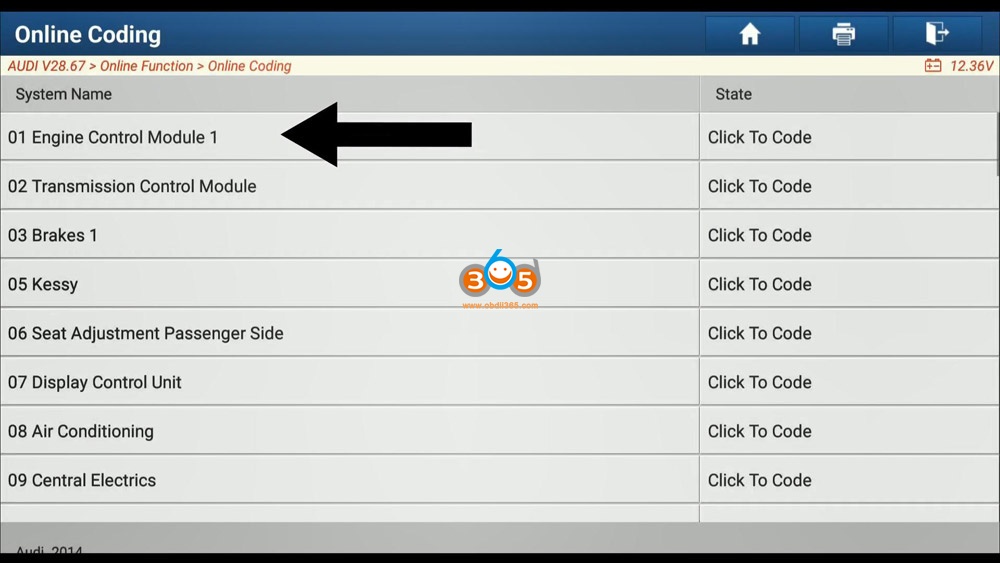
Click on "Online Codingâ€.

It will pop up "This program is about to download a file.â€.
Downloading, please wait…
Loading file…
Single System Mode.

Loading file, please wait.
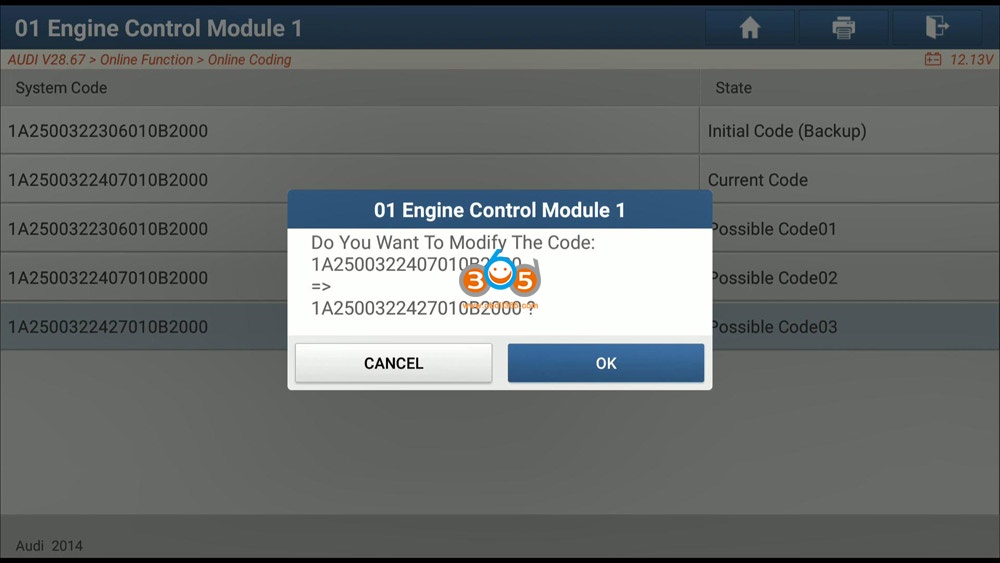
Choose "01 Engine Control Module 1â€.
It will ask †Do you want to Modify the Code: …> …?â€, click on "Yesâ€.
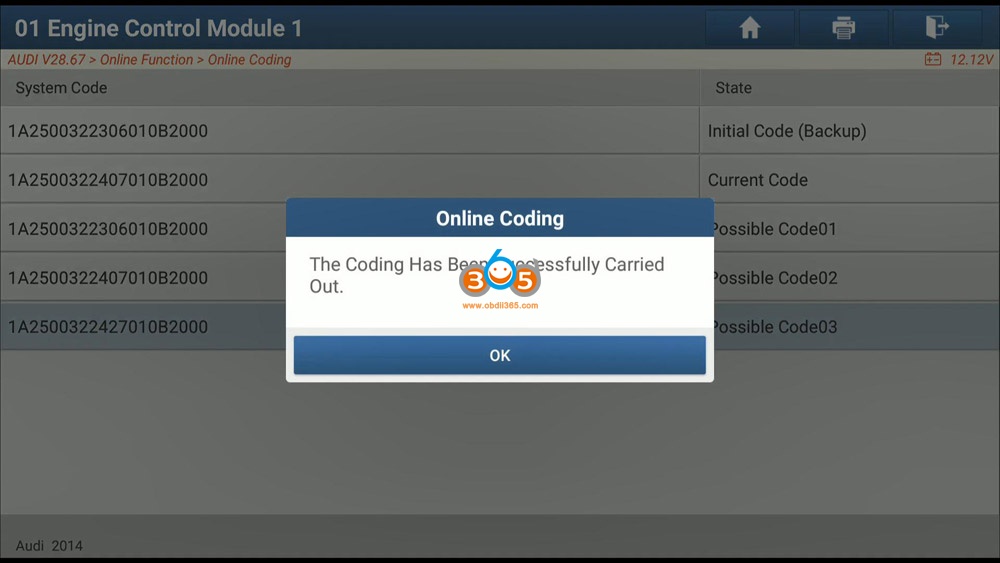
Processing, please wait.
The coding has been successfully Carried out.
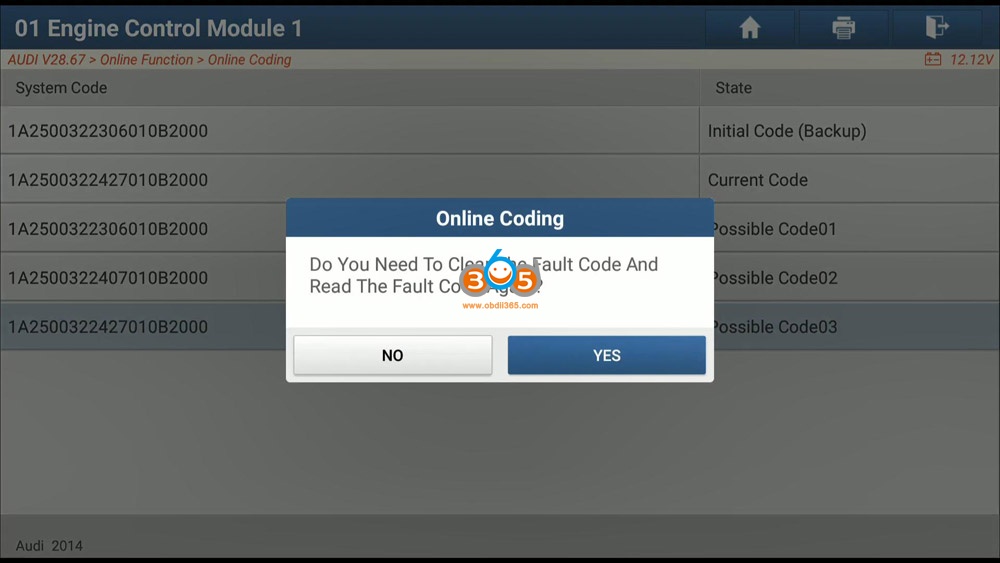
It will ask "Do you need to clear the Fault code and read the fault code again?â€.
Click on "Yesâ€.
Communicating, please wait.
Fault codes cleared, read DTC? click on "Yesâ€.
Communicating, please wait…
Exit online programming.
Back to view "Health Reportâ€, there is no Fault code any more.
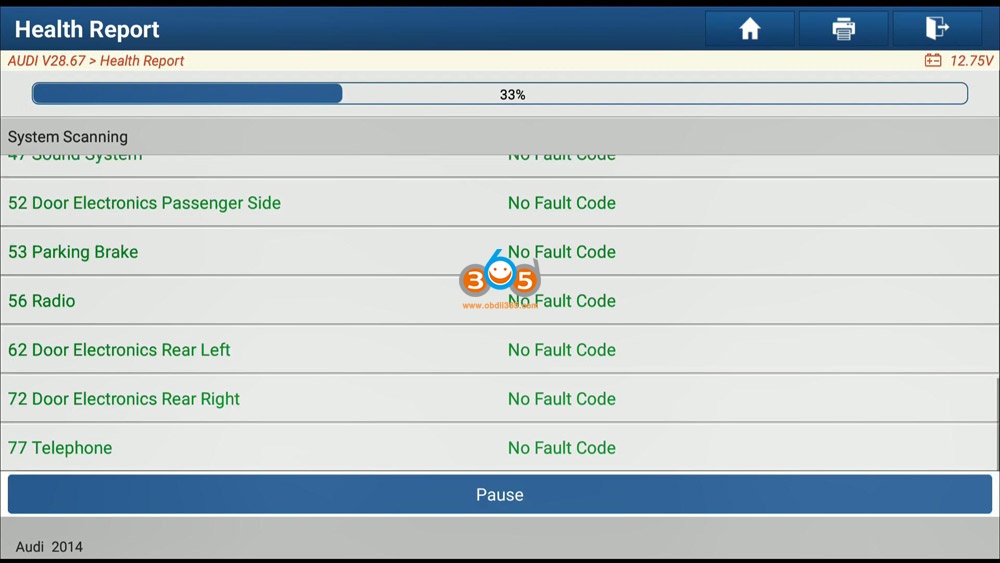

When the process bar run to 100%, it will pop up"Clear Fault Memory Completedâ€.
Alright, Engine ECU Long Coding job is done. WithLaunch X431 PAD 5, the whole process is simple and pleasant.
Posted by: jean at
07:40 AM
| No Comments
| Add Comment
Post contains 255 words, total size 9 kb.
January 28, 2021
Here is the guide to install AnyDesk program to OBDSTAR 5 inch Android tablets and Windows PC separately.
AnyDesk for Android
Applied toOBDSTAR X300 Pro4, Key Master 5,Odomaster5 inch tablets
Launch "browser†app, visite: http://down.appobd.cn/anydesk

Click to download both two apk file

Open with ES Downloader

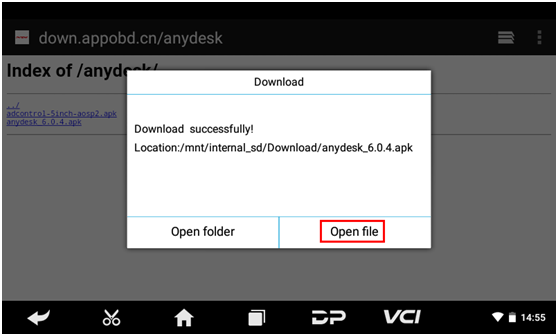
After download complete, Click "Open fileâ€, Then click "Installâ€

Please install bothanydesk_6.0.4.apkandadcontrol-5inch-aosp2.apk
if adcontrol-5inch-aosp2.apk not installed, The device can’t be control by computer.

Install completed on android.
AnyDesk for Windows
Visit https://anydesk.com/en/downloads/windows to download AnyDesk.exe for Windows PC
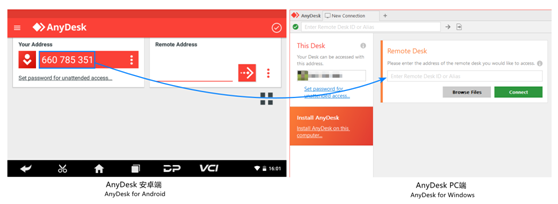
When device have incoming connect request, anydesk will show security warning, please accept.


Posted by: jean at
09:16 AM
| No Comments
| Add Comment
Post contains 106 words, total size 6 kb.
January 26, 2021
To obdstar users: regarding the problem"Unfortunately, DiagProgam has stopped.â€that frequently appears recently, it is caused by compatibility issues.
A newapk version v3.8.1has been released this week to solve this problem. (Note: The solution is applied to any of x300dp,x300 dp plus,odomaster,x300pro4.)
- For the obdstar machine which update service is valid, you can directly upgrade the apk to solve this problem.
- For the obdstar machine which update service expired, please clear the cache to solve the problem, the drawback is that this problem may occur repeatedly, because there is no way to upgrade the new apk v3.8.1 after the expiration, you have to clear the cache repeatedly.
Please look at the last paragraph on how to clear the cache.
And viewobdstar DP Plus One Year Software Subscription
Attention Please:
Never restore factory settings, otherwise the software will be lost and there is no way to restore it.

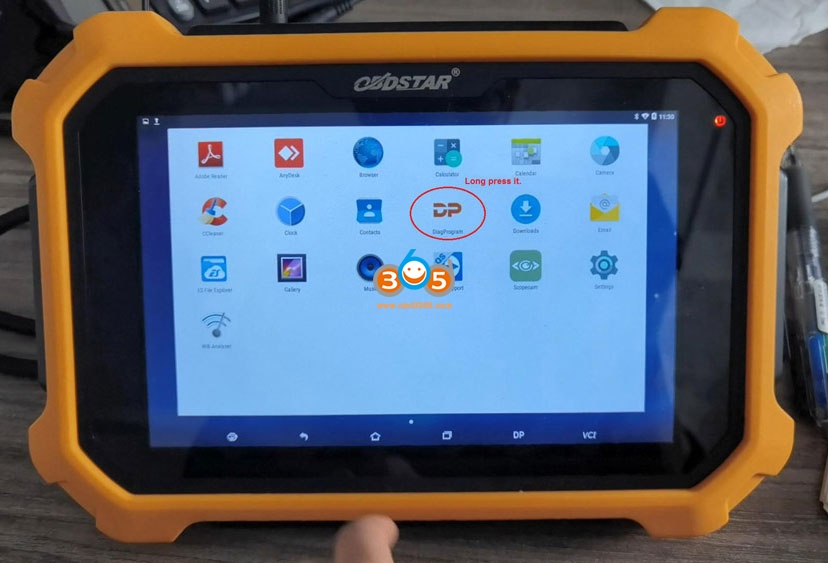
Guide on how to clear the cache:
Enter †DiagProgamâ€, long press it and drag it into "App Infoâ€

In the APP info, tap "Clear data†and "Yes†to confirm.

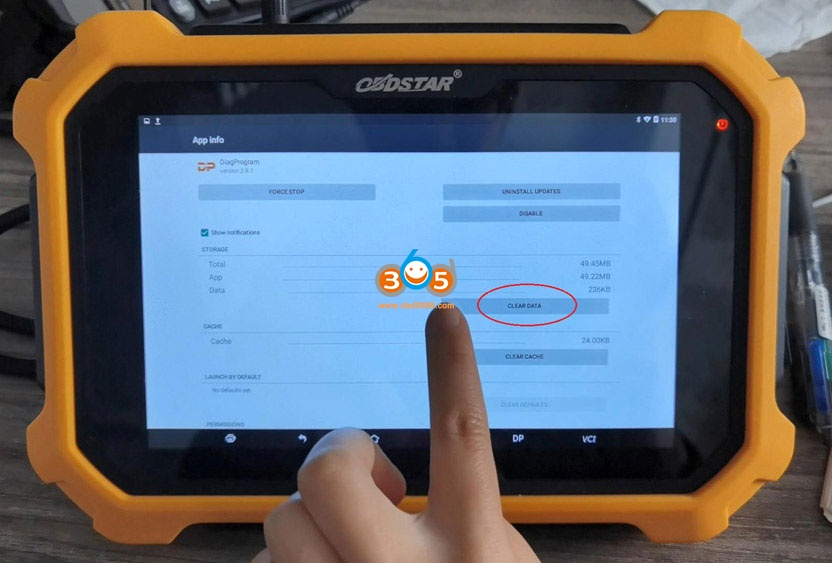
Okay, the catche is cleared, and the problem is solved. However, please keep in mind, better continue subscribing the update service and update the newest APK.

obdstar tech fromhttps://www.obdii365.com/
Posted by: jean at
06:41 AM
| No Comments
| Add Comment
Post contains 213 words, total size 5 kb.
January 22, 2021
What’s going on everybody, I’m super excited to be diving into Chinese knockoff GM MDI 2 Multiple Diagnostic Interface for bench programming an ECM, we will walk through setup, connecting it through ACDelco Tis2Web and then use SPS to program the actual controller.
Now these units are basically the same thing except the MDI2 has a couple extra features as far as the WiFi goes. This thing will allow you to connect to your router as opposed asac delcowhere you’re connected directly to it, so once you’ve connected to the router, you can plug it into your car, pull up the MDI software which we will look at here in a second and remotely connect to it without having to go wi-fi point to point. the other part that MDI2 has over MDI 1 is that this unit will do global bwhich is the latest communications protocol that they’re just now rolling out.So most of you don’t need to spend the extra money, this was less than 300USDfor the Chinese knockoffnow. Brand-new these units from Bosch are about 1400 dollars and it’s kind of an economy a scale thing where bosh has these things, maybe they make a thousand of them ship them out to dealerships and service shops and things like that. Well then the Chinese manufacturer makes 20,000 of them, and they can sell for cheap.

Part 2: Hardware connection
So this should work exactly like the Bosch unit that’s what we’re here to see and on top of that we’re gonna be using our bench force power block too. I love this device, it is my favorite tool right now for doing any kind of bench logging, programming, troubleshooting and things like that. Cool thing about it is it has these nice proprietary Snap on connectors that you’re not going to accidentally disconnect along with your OBD2 port and your power port.
And then your ECM you get a harness like this, this is E67, this plugs into the bench force unit and it’s not gonna come loose in the middle of programming.
I’ve got E99 fifth flash sixth gen five and a half gen whatever you want to call the new 899 for the brand new silverados.
And bench force has been cool enough to send me a third gen for the P01 P59 platform that I’m going to be doing later on.
And let’s go ahead and get everything hooked up and connected and running.
OK, one thing to keep in mind is that MDI2 has to be connected into an OBD2 port that supplies power or else, the unit itself will not power up, it takes about 30 seconds for its power up.
Part 3. Upgrade GM MDI Manager
And I’m going to go ahead and pull up our screen here, this is theMDI manager
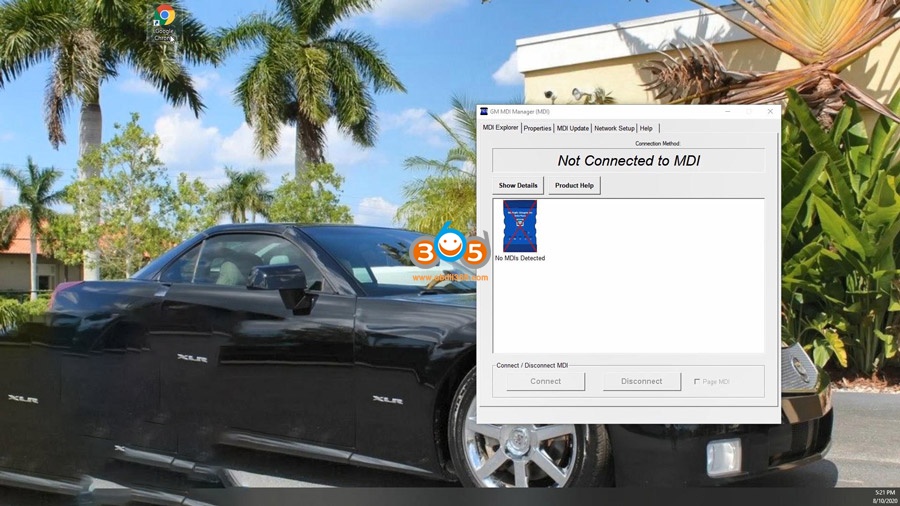
and here’s a quick tip:
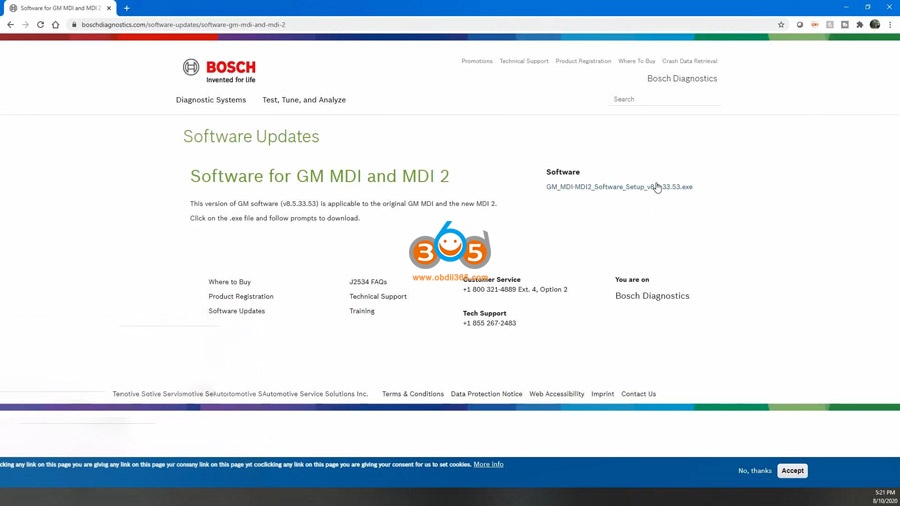
I’m using Chrome Internet explorer whenever you launch this,make sure you run as administrator, it will save you a lot of headache down the road, but we will just search"Bosch mdi 2 softwareâ€, it’s the same software for the MDI 1 and MDI 2.
This is V8.5.33.53.exe which I believe is an older version.
Here’s our unit, now we are showing that we’re connected,you always have to connect up via usb the first time, but once you connect up with usb, you can then come in here, sometimes this thing can be a little, the software is a little finicky and it doesn’t want to connect, if so just kind of power cycle everything and plug it back in and out, I’ve had this happen a couple times and I think it’s the software I don’t think it’s actually the interface itself, but as I said you gotta plug in with USB the first time and then you can come in here.

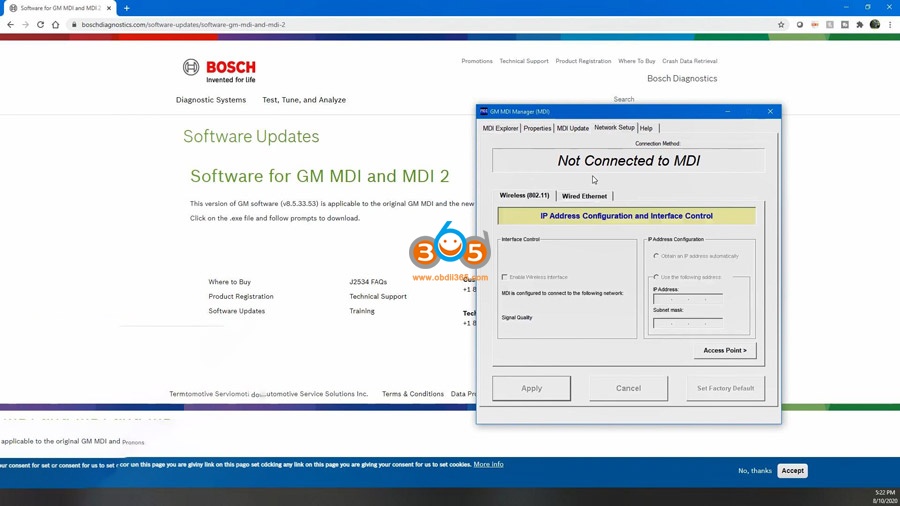
After you get connected to the MDI2,set up your wireless interface, and do your "Access Pointâ€, if you want to do a the wireless side of it, we’re just going to stick to a USB for now and it’s still booting up over there.It is finished, now we can try and connect up, there we’re connected.
We go the "Helpâ€, we can look at the variations, this says 8.5.33.53 that is the version that’s on the website, now I downloaded this version and it actually brought up an earlier version and it may have been the version that was on the MDI itself whenever I connected up through SPS,so keep that in mind whenever you do an update through SPS for this stuff, you may have to reboot I did once.
Part 4. Login AC Delco,GM MDI2program with SPS
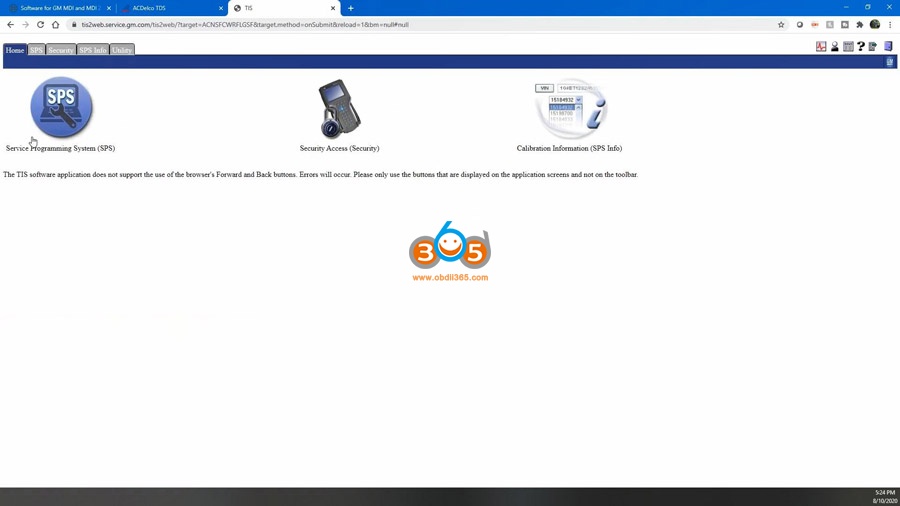
So now we’re gonna go over toAC Delco,let them login.
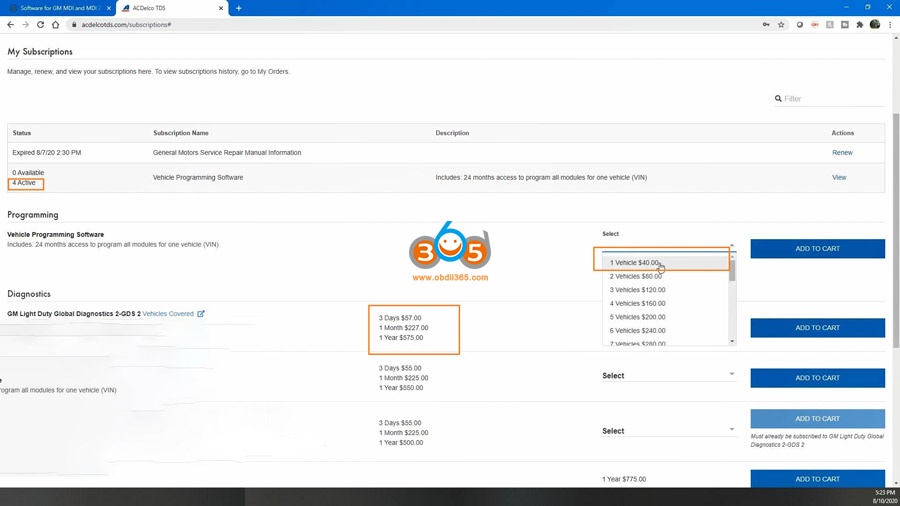
We got a couple options here, SPS is going to be the one that we focus on todayand that is for actually programming modules: ECM, BCM, TCM and things like that and so I actually have four active right now, as you can see over here, we’re gonna use one of my existing actives.
But if you need to do your own programming, you can add a vehicle for two years for 40 bucks and it’s based off of VIN number, you can also use this forGDS2which is the later variation of GM TECH2 for the newer vehicles,GM Tech2only good up until about what 2013on some platforms, some platforms even before that might requireGDS2,and then they’ve got different prices where you can get three days access for 57 dollars for troubleshooting or if you’re serious and hardcore, you’d go for a year 575,same with the Tech2win software where this differs from something like theVCX Ddiagthat software bootleg and so it doesn’t work very well it’s very hard to get those devices to work so byspending the extra hundred dollars for an MDI 2, a you have a device that works like the factory devices that we’re using at GM.So keep that in mind you can save money by going to cheaperbut there’s gonna be some headaches you could go a little bit more expensive, you shouldn’t have any headache.
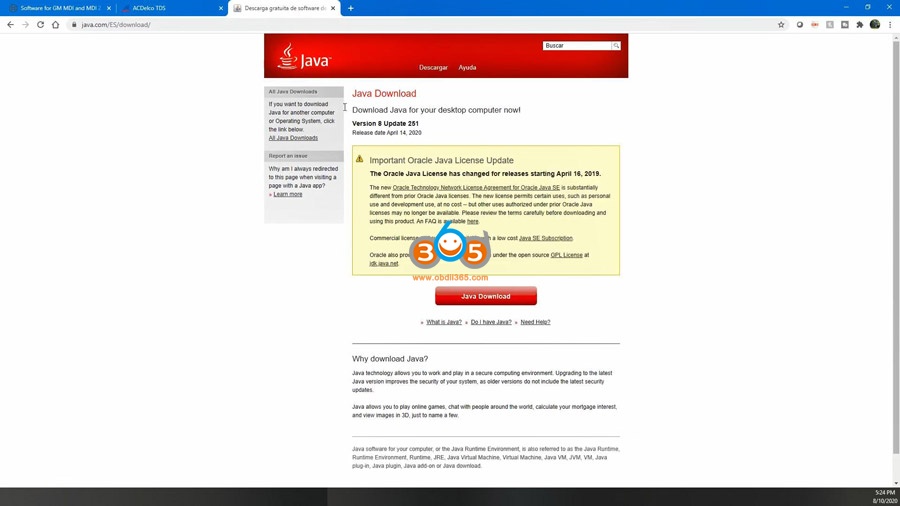
Now I will tell you notice how I right clicked on a Chrome and I chose run as administrator, it will save you headaches down the road, especially whenever you’re updating software, in particular the wrapper for the MDI2. In order to work with SPS, make sure you’re alwaysrunning a administrator and you also need to install Java, but if you just go over the browser and type in Java software, you can go to the Java download, grab this version and it will work, this is the version that I’m currently running.
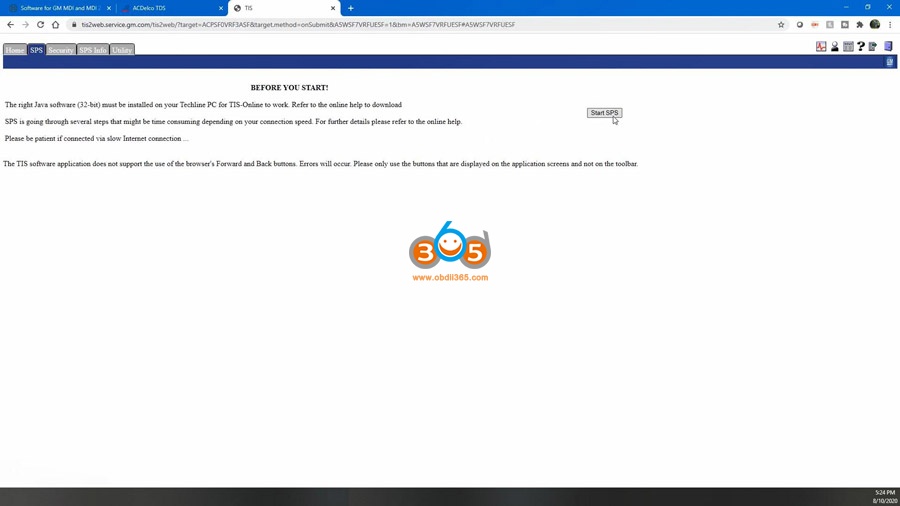
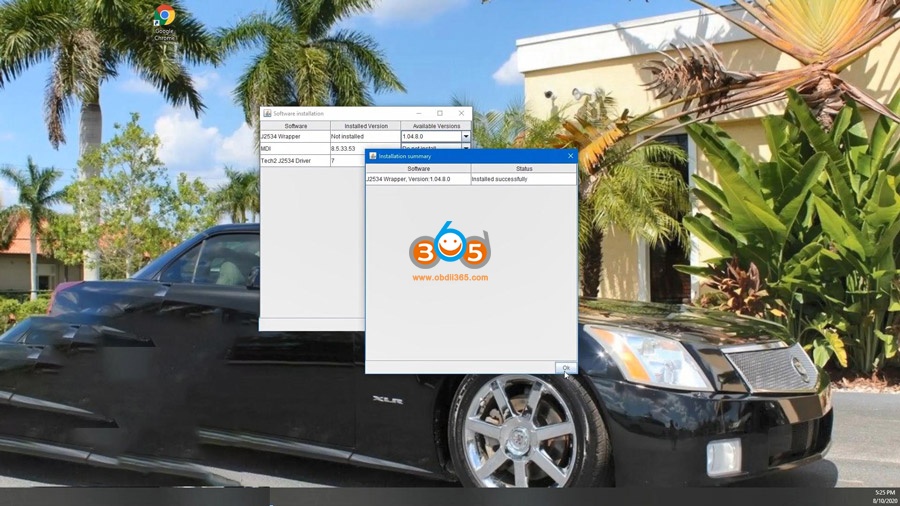
so let’s go ahead, we’re going to grab one of these VIN numbers, this is probably a Cadillac XLR and they’ll say oh I’m sorry I use this because I was logged in previously it’s going to terminate that one and let us open up. So think now we’re going to go into the SPS system and on Chromeit won’t launch this natively on Internet explorer, it will on Chrome it’ll just ask you to download these files, and once it’s done downloading you can click it and it’s going to launch SPS.
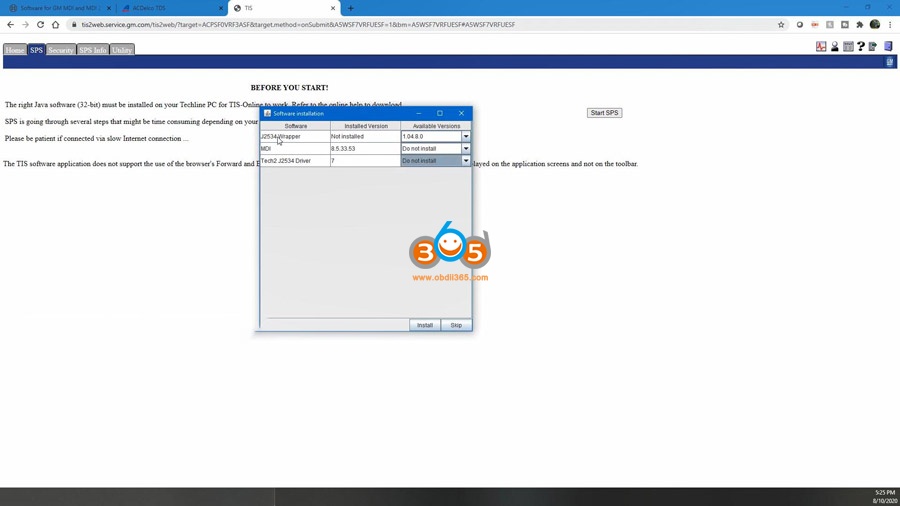
Alright, let’s do this thing in the background, it’ll pop up a software installation table.Now pay attentionyou’ll show your installed version: the Tech2 drivers: 7, MDI: 8.5 and it says available versions make sure you choose "do not install†on these older versions, but weneed to install this J2535 Wrapper, this is what allows SPS to talk to the MDI2and if you do notrun this as administrator, this will not work, trust me I know because I tried.
So now that we’ve read as administrator, you can see that we have installed it successfully.
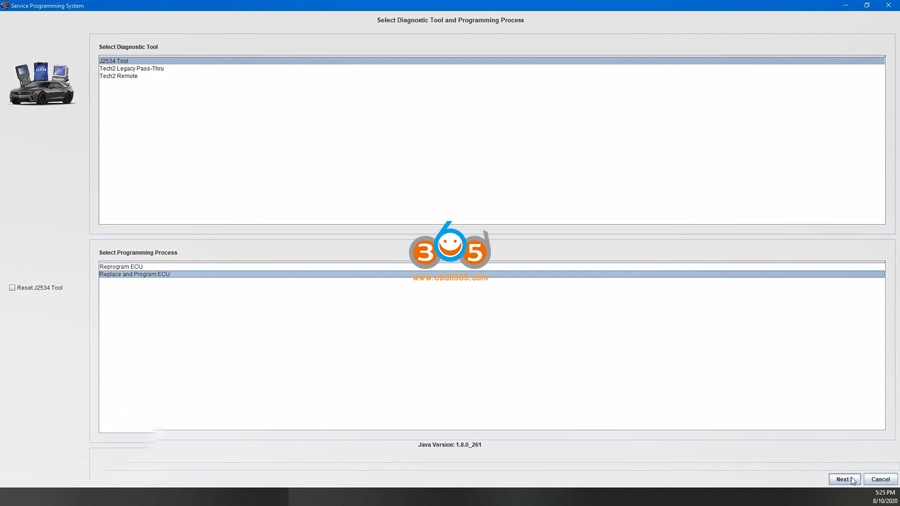
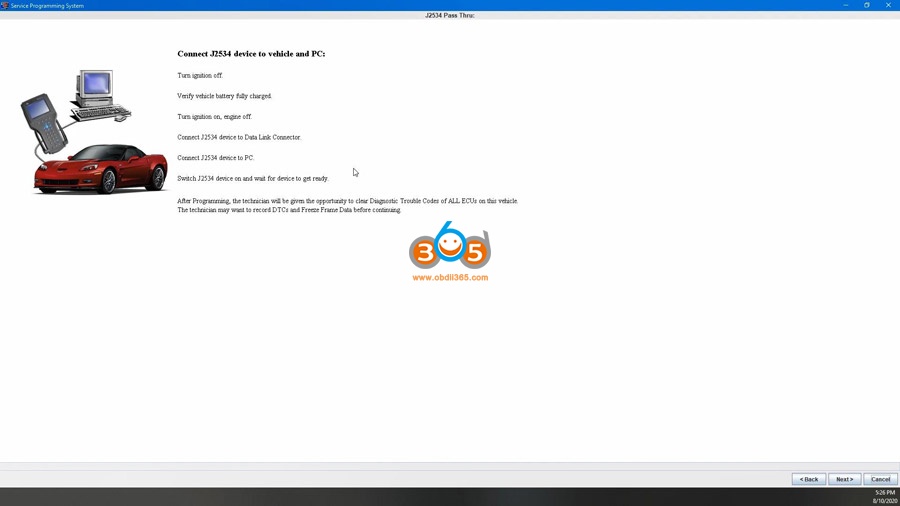
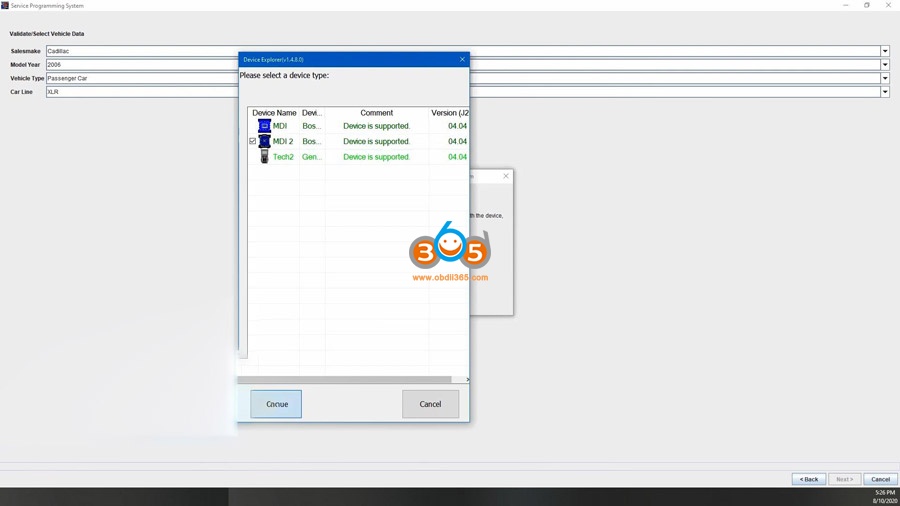
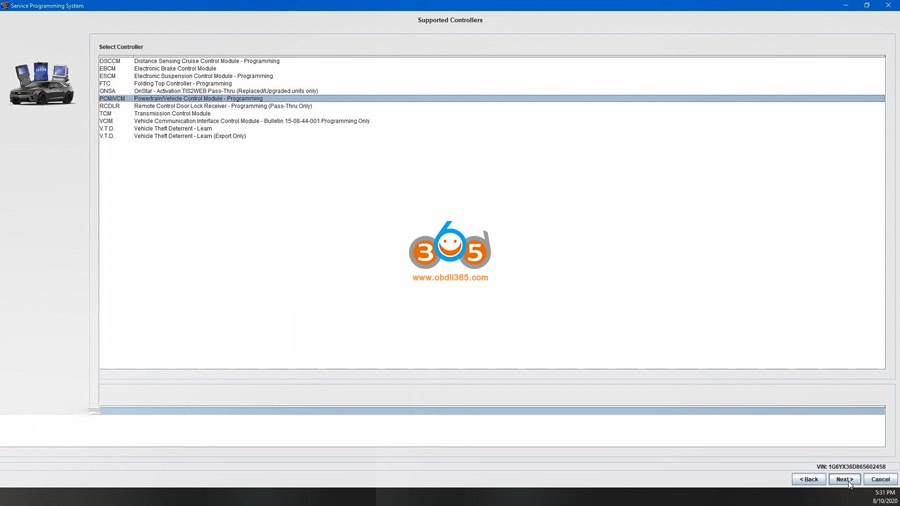
If we hit this button "SPS will pop up, let me drag it over so we can see it and here it is now whenever we select it we’re going to do aJ2534 tooland we are"Replace and program ECUâ€, because we have an ECM that we don’t know that is necessary for this vehicle, I’m going to go ahead and plug it in now, and then we will hit "Nextâ€, should pop up and it will say "OK†we need to connect it to the vehicle, let’s go ahead and we will turn it on, and hit next, so it did not ask us which device that we want to use I’m gonna go back and do"reset J2534 toolâ€, it should pop up and say hey what do you want to use because it should be asking us.
To choose a tool, we will try this anyway, but I have a sneaking suspicion, we may have to restart. Okay, here, it goes now, it finally popped up and saying hey which tool are you using and we’re using the MDI2 in this case, if you have the MDI1 you would choose it, we will hit "continueâ€.
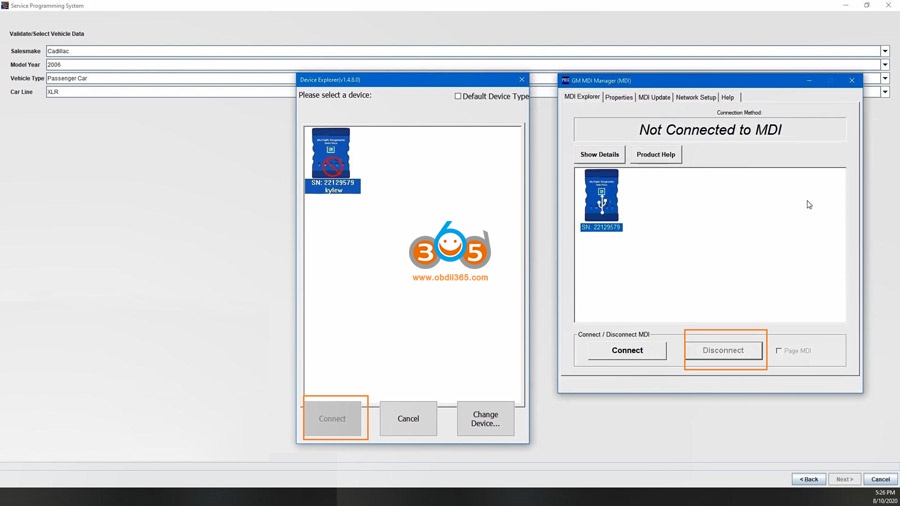
And then now it’s going to pop up a window and say hey choose one of these now I’ve got this device, it is not allowing me to connect. I’m going to disconnect in the background here to make sure that is not causing an issue.
And now we can connect here.
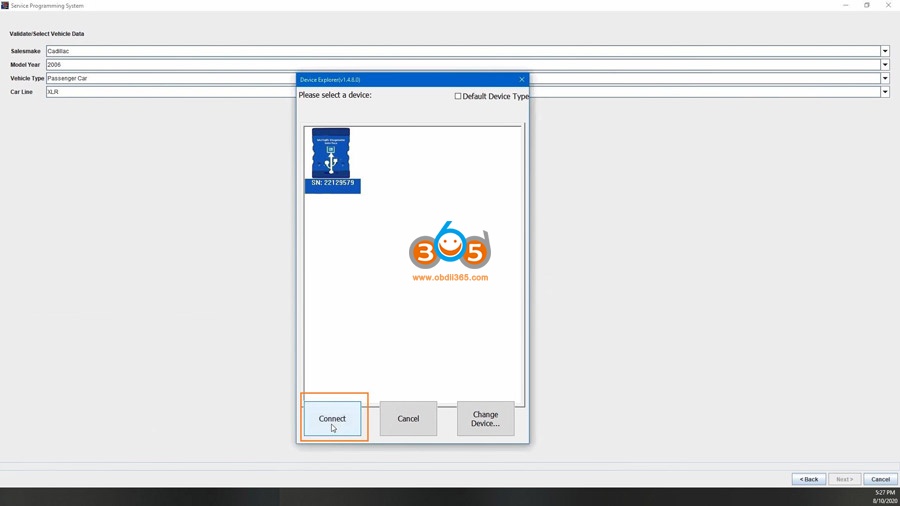
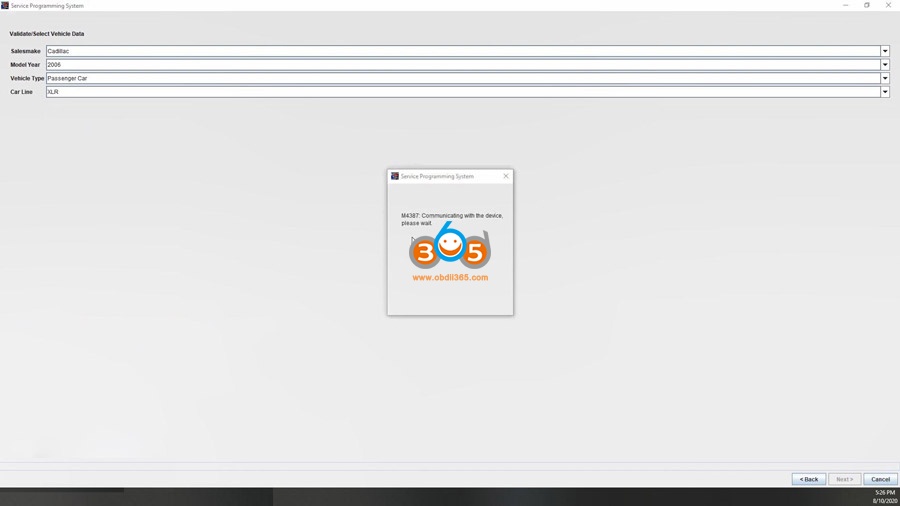
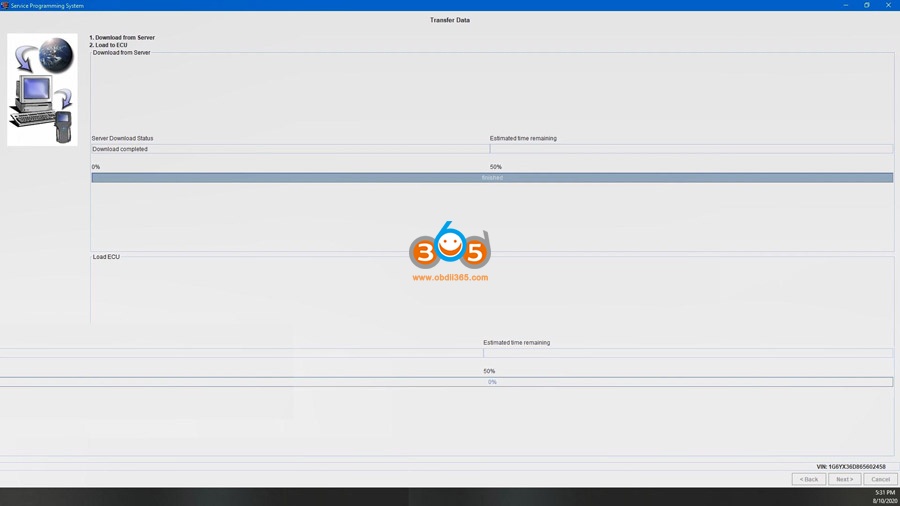
Okay, it is communicating with the device, I show on the device that helps the cars lit up the usb port is lit upon theMDI2and it is connected to a E67 and there it grabbed our vin number that is currently on the E60, actually this is the one we’re programming, so we will collect next year and it’s going to give us. Okay so it says is not a sign.
so this is theVIN numberthat is currently on this, this is 549 VIN, this looks to be a Corvette ZR1.
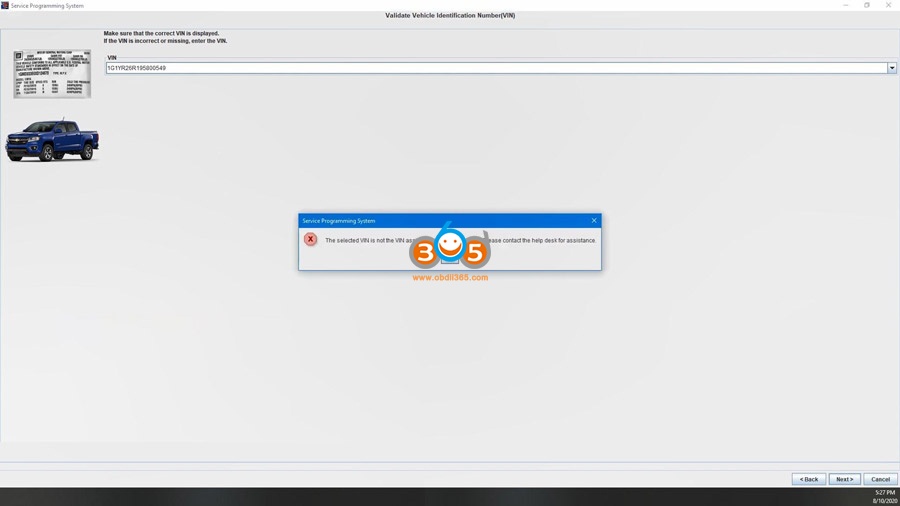
Okay we’re gonna go back, I’m gonna show you what we got put in here and this is the VIN of that is on the ECM. Right now that is for a Corvette, I’m going to paste in the vin number for Cadillac because we’re trying to put this programming and it’s going to take us over to our options here, so this is Powertrain vehicle control module we’re programming that we’re gonna go normal VCI, if you have a specific code from GM Tech line for options, we normally don’t have options to get those code, so we’re just going to be normal and it’s going to tell us turn the ignition off, remove the existing controller from vehicle, we’ve pull it out and put the new one in, turn the ignition back on.
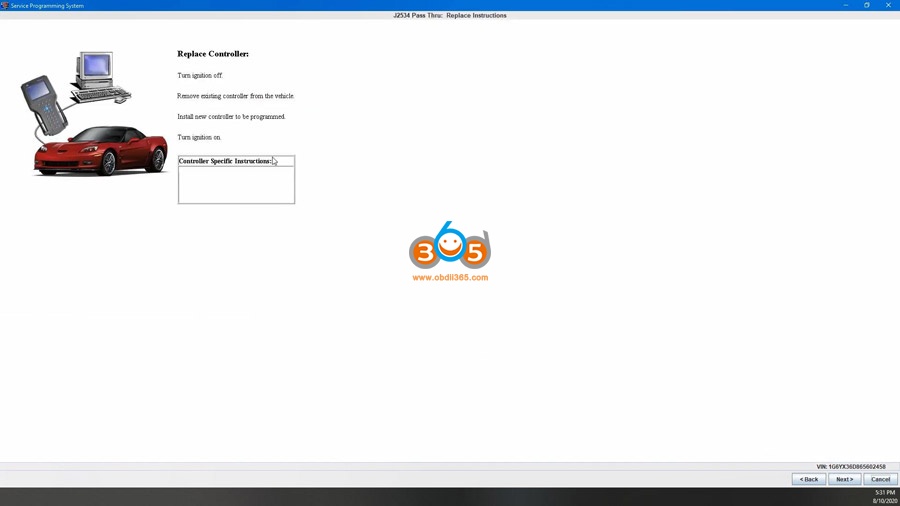
And we’ll go ahead and hit next, it’s going to communicate with the CEM and its gonna write everything in.
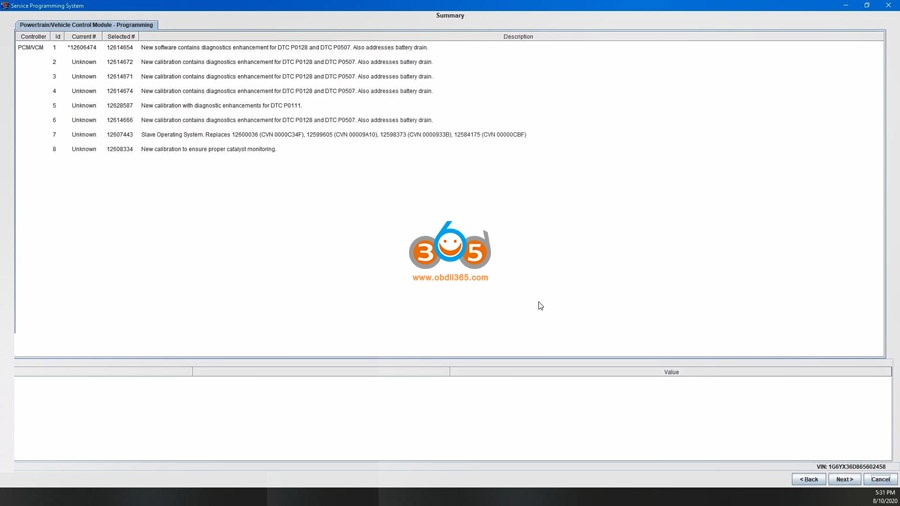
Okay, now showing us the different operating systems for the main operating system that were available, you can go down here, look at the history showing what all they’ve done, you know enhancements for these DTCs things like that we don’t care about any of that because we’re going to be installing the latest grades which is 12614654, we hit next.
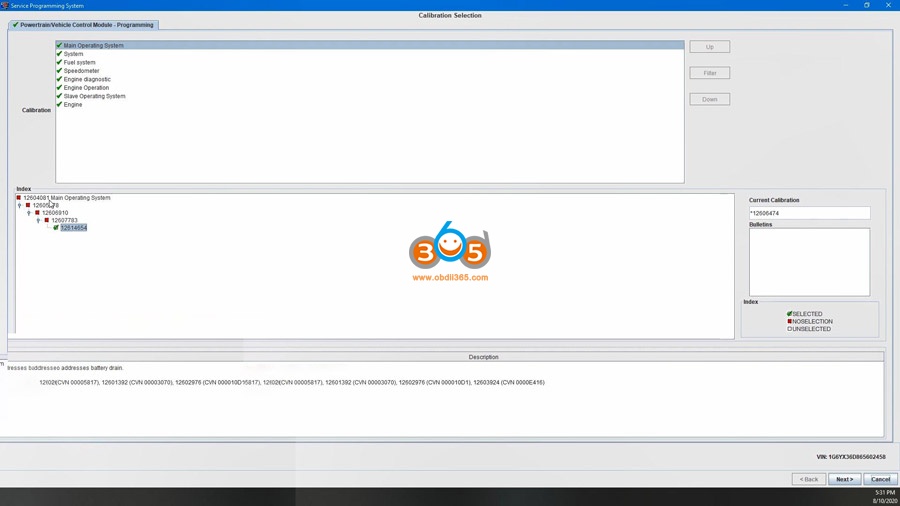
And then next and it’s going to download which is already done, and now it’s going to reprogram.
okay we’ve got 3 minutes left before programming finish. I want to touch on a couple of tips that are gonna help you in the programming process:
- Getting this thing set up as I said the big one;
- Get thelatest version of Javaget that installed do that right away, they’ll help you out.
- Then go out look for theBosch MDI softwarewhether or not you’re using the MDI 1 or MDI2, both of them are the same software platform.
- Now whenever you connect up to SPS the first time it willupdate your device to the latest version of the hardware, so just be prepared for that, and if it has issues connecting after doing updates like that reboot your computer I have to reboot maybe twice to get this thing to work.
- The big one though, make sure whenever you launch your browser that you are right clicking andchoosing run as administrator that will allow you to make sure that all of the software that is trying to load whenever you launch something like GDS2 or SPS gets properly loaded.
- Without thatJ2534 Wrapperbeing loaded this thing just does not work, it will not find the device and as you saw whenever we went in there we actually had to disconnect from the GM MDI manager because it popped up a new window through SPS to connect to it, so if you’re going through and setting this thing up on your network, you don’t have to worry about this, once you get it set up you’re not going to be using the MDI Manager anymore, then whenever SPS is looking for the MDI, it’s gonna pop open that window and say hey which MDI or MDI2 are you trying to connect to.
Ok, so we’re done and as you can see here there’s actually some cool stuff that pops up like the warranty claim code in case you’re replacing this for a warranty. Cool thing about that claim code will show up there are specific warranty updates that come out for special vehicles are certain vehicles I’ve gone through and done recalls on all my own vehicle through that and I have the warranty claim codes, you can call in and say hey, here’s a warranty claim code from this VIN I’ve already completed this, stop sending me those notifications, other than that he’s going to tell you to go ahead and turn off the ignition to reset the controller and then clear any DTCs and then other than that we are done, in fact we can turn this back on hit "Clear DTCs†button, it’s gonna clear DTCs, but we would get a ton more on this device are this ECM because it’s not plugged into anything except for our test setup here.
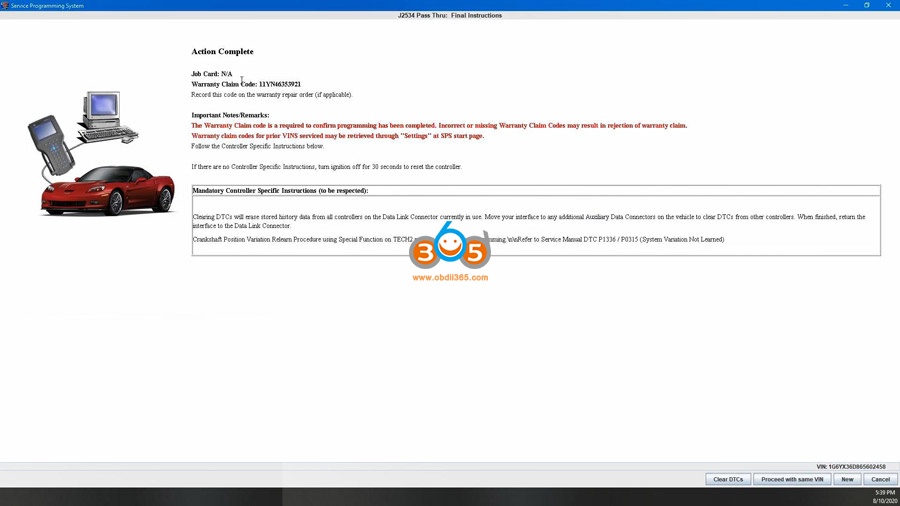
Okay, I’m pretty happy withGM MDI2 clonethere was a couple of steps that I stumbled through on the initial set up, but once I got setup, everything went smooth as silk.
http://blog.obdii365.com/2021/01/21/gm-mdi2-clone-sps-programming-ecm-update-setup/
Posted by: jean at
02:18 AM
| No Comments
| Add Comment
Post contains 2377 words, total size 29 kb.
January 20, 2021
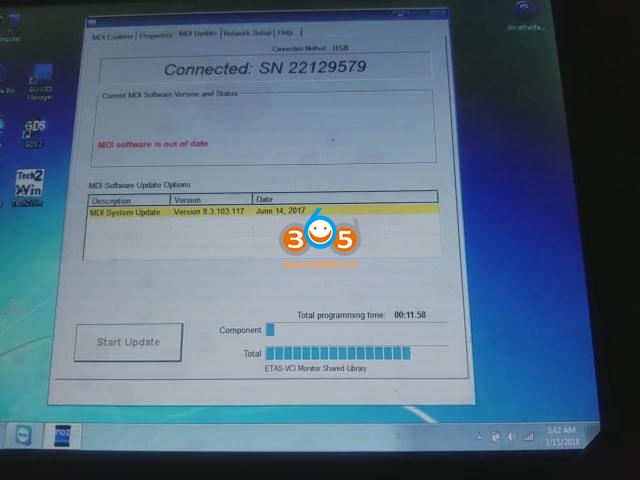
The reason why updateGM MDI/MDI2interface firmware is because it is compatible with the newest original GDS2 software, and only after doing firmware update can the newest v2020.12 Bosch software recognize it.
Here we go for GM MDI Manager update procedure.
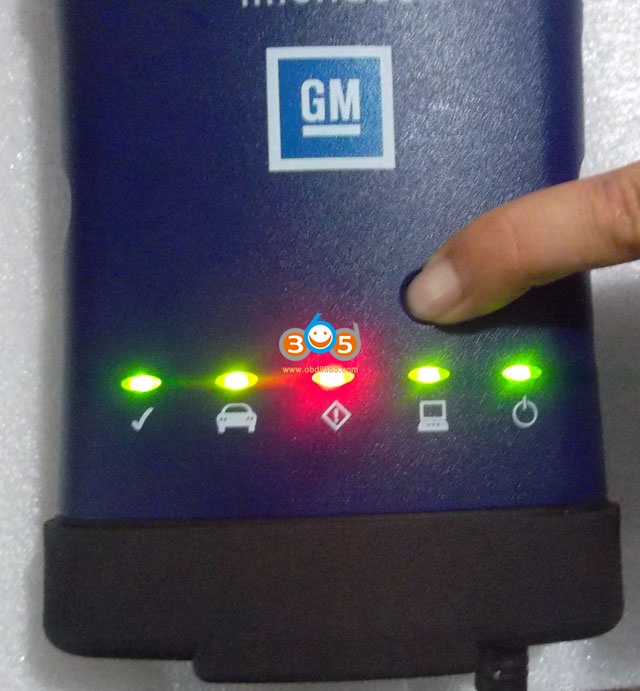
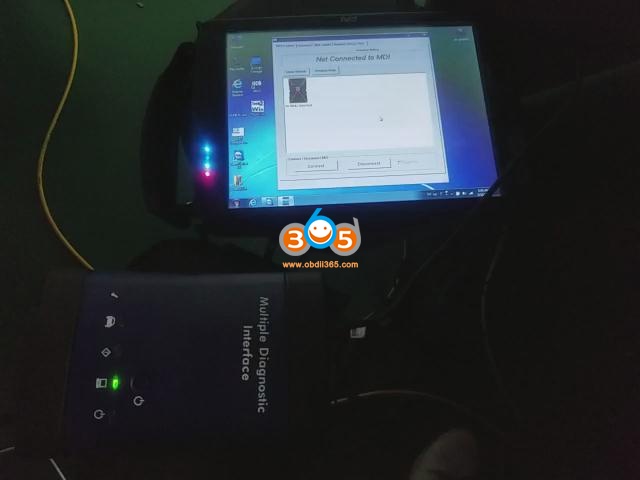
Press and hold the power button on GM MDI 2/ MDI device, meanwhile plug the power adapter to the device, until the power indicators turn green, release the power button.


Then use the USB cable to connect device with computer.

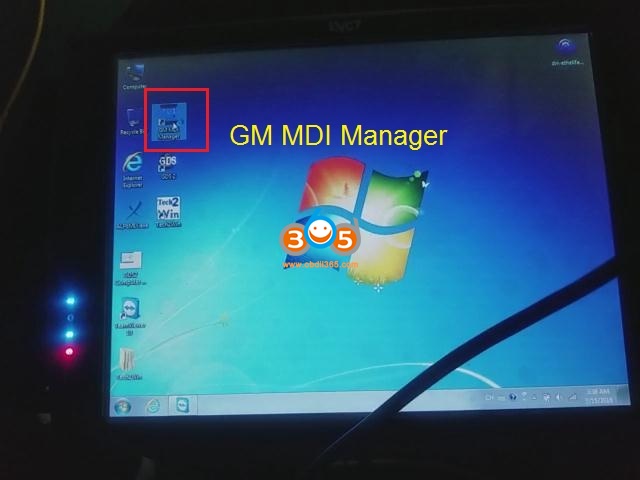
Install "GM MDI Manager 8.5.33.53 (the newest version)†and at the desktop open it.
Click on "MDI†icon and then "Recoverâ€.
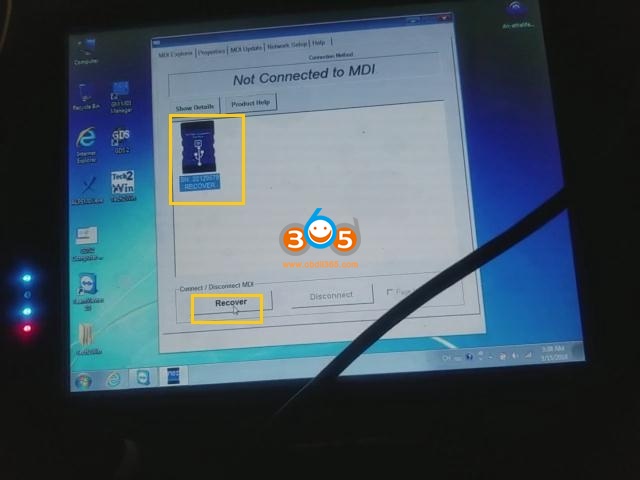
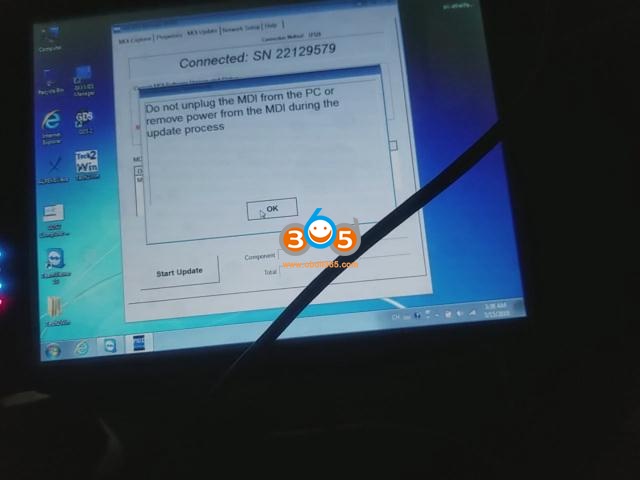
Read the guide "Do not unplug the MDI from the PC or remove power from the MDI during the update process.â€.
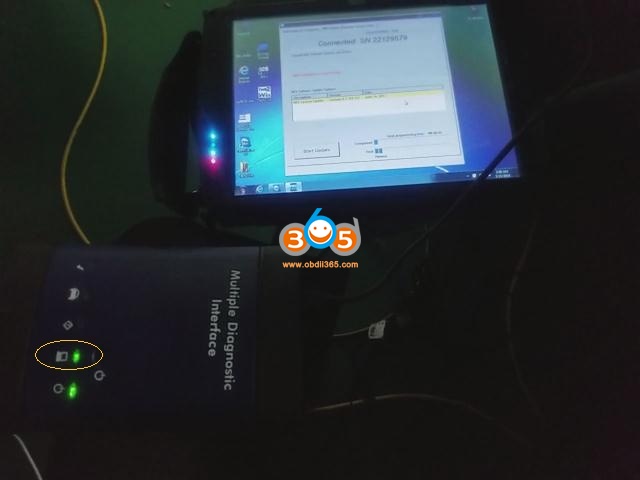
Start… You can see the computer indicator will turn green, it means theMDI/MDI2is communicating with the computer, and you will see the progress bar on the screen.
Alright, the MDI will now automatically restart. Wait until you hear the "Beepâ€, then the MDI s ready for use.
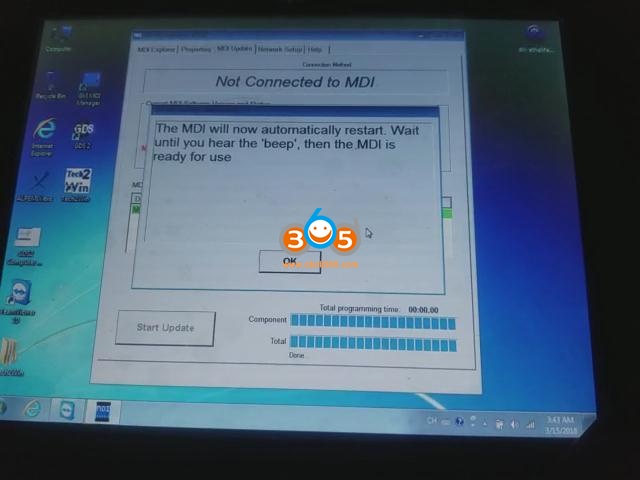
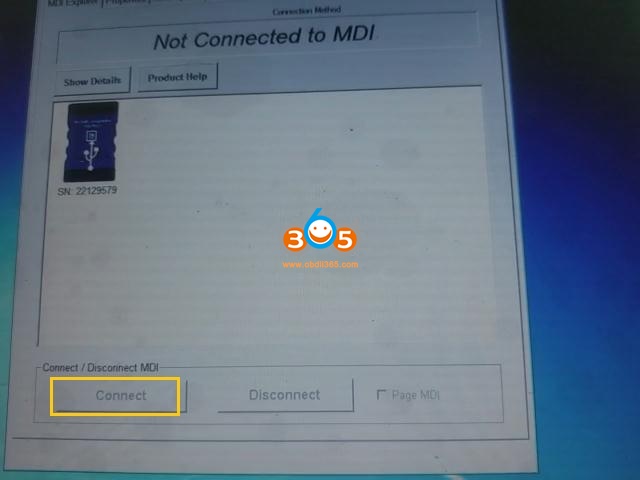
GM MDI Manager update successfully, you can see all of the indicator will turn green one by one, and one you are ready to connect MDI / MDI2.
Enjoy!
http://blog.obdii365.com/2021/01/20/update-gm-mdi-mdi2-firmware/
Posted by: jean at
07:21 AM
| No Comments
| Add Comment
Post contains 206 words, total size 8 kb.
January 19, 2021
This article is available with VVDI Key Tool Plus Tokens and Bonus Points.
The Xhorse token is used for data collection from most MB car models and the password calculation on MB car models.
- How to collect bonus points and obtain tokens forXhorse VVDI Key Tool Plus Pad
1). Bind VVDI Key Tool Plus to one Xhorse key cutting machine including Dolphin XP005, Dolphin XP007, Condor Mini Plus, Condor XC-007, Condor XC-002 (Panda is impossible). And soon it will have a free token, after that, you will obtain 2 free tokens every day.
| The key cutting machine bound with Key Tool Plus | Get free token/day (tokens cannot be added to the second day) |
| CONDOR MINI | 1 free token each day |
| CONDOR MINI PLUS | 1 free token each day |
| DOLPHIN XP-005 | 1 free token each day |
| DOLPHIN XP-007 | 1 free token each day |
| CONDOR XC-002 | 1 free token each day |
| Xhorse Machines * 2 kits | 2 free token each day |
| Xhorse Machines * 3 kits or more | 2 free token each day |
Xhorse Machines *2 kits means –> If you combine 2 machines, for example, by combining a CONDOR MINI and a DOLPHIN XP-005, you will obtain 2 free tokens each day.
However, tokens are not cumulative.
Xhorse Machines *3 kits means –> If you combine 3 machines, for example, by combining a CONDOR MINI PLUS, a CONDOR XC-002, and a DOLPHIN XP-005, you will obtain 2 free tokens each day.
2). Purchase tokens from the dealer (for exampleOne-year tokenssubscription fromobdii365.com)
3). After receiving Mercedes BenzVVDI BE key/xhorse bga fbs3 keyfor the first time, please go to the tablet to collect 200 bonus points, it is free.
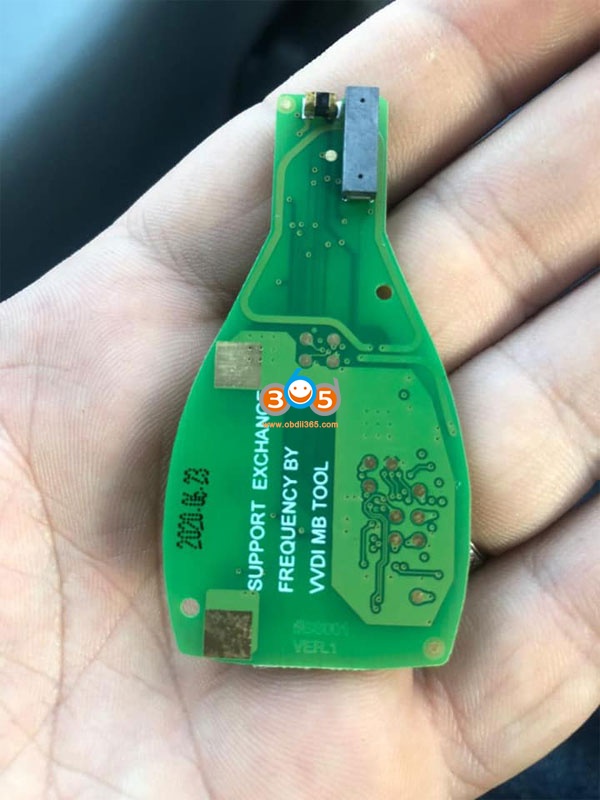
4). When using Mercedes Benz key or generatingXhorse remotefor the first time, the tablet will obtain bonus points (200 bonus points for 1 token)
Wired remote = 25 bonus points
Xhorse wireless remote =40 bonus points
Xhorse super remote =40 bonus points
Xhorse keyless go remote =60 bonus points
Note: Points from VVDI BE Key only can be used for vvdi key tool plus / VVDI MB password calculation. But points from Xhorse Remotes like XK, XE,XS,XN, you can use it for ID48 96bit clone.

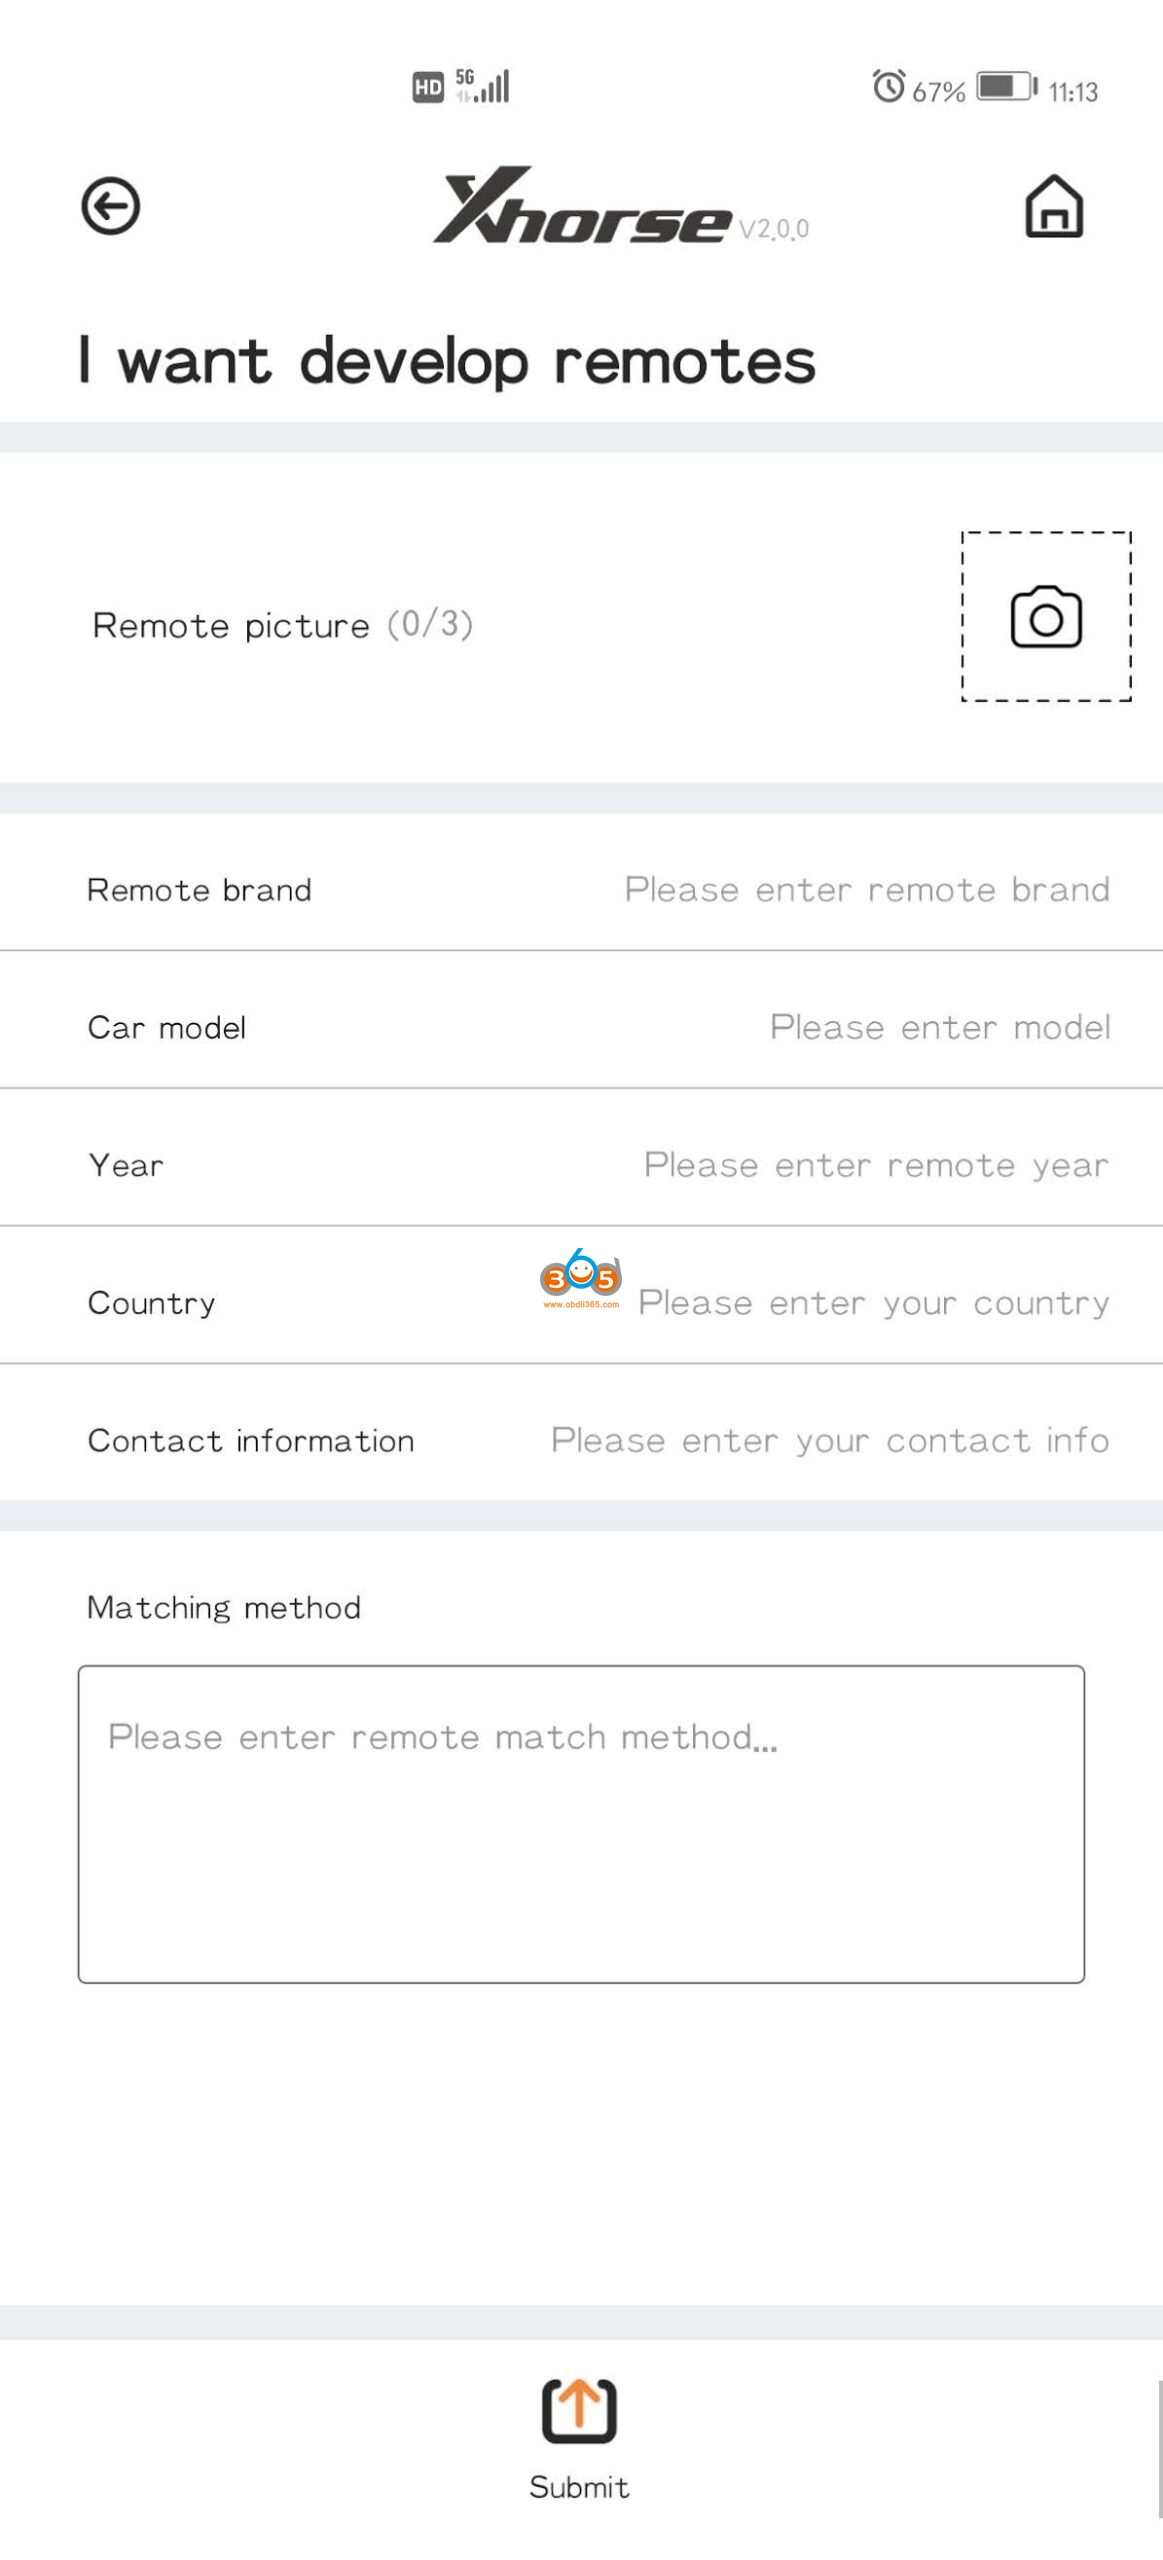
4). Send feedback to Xhorse on App
Step 1: Open the Xhorse App
Step 2: Click "I want to develop remotesâ€

Step 3: Click "I want (to) develop remotes†again
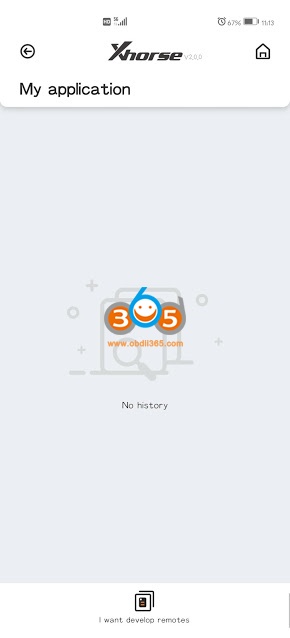
Step 4: Complete information, and then click "submitâ€
Now it’s okay. Bonus will be awarded after Xhorse manual review.
- What you can do with Xhorse tokens?
1) When you use Xhorse Key Tool Plus to calculate password for BENZ vehicle, it will need 1 token to add a new key and 2 tokens to program a key when all keys lost.
| What you can do with tokens | The quantity of token you need(when you have enough tokens)
|
The number of bonus points you need(after calculation, the bonus points will be deducted automatically, when you don’t have tokens) |
| Password calculation (if you have an original remote) | 1 token | 200 bonus points |
| Password calculation (all key lost) | 2 tokens | 400 bonus points |
| ESL NEC chip is damaged and to replace ESL simulator (except motor damage) | 1 token | 200 bonus points |
2.) Complete the transponder clone 48(96bits) process.
All the users can get one free token every day for a whole year after users buy a new device.
Okay, after one year, your free tokens run out.
Now, you complete the Transponder Clone 48(96 bits) in 2 methods:
1). 100 bonus points to exchange one-time Transponder Clone 48(96 bits).
2). When you have no bonus in your account, please buy tokens from your local dealer.
3) Spend a small amount ofmoney and Xhorse bonus points to Exchange Functions.
Users can activate some useful functions by spending a small amount of money and some bonus points.
4) Give your Bonus Points to someone as a gift
All your bonus points in your account can be given to your friends or customers as gifts.
It’s very easy to complete this process.
5) Exchange Xhorse products in Bonus Points Mall
Open your Xhorse App, click on "Shopâ€. Choose the products, then click†Exchangeâ€. Before you exchange the products, please contact your local dealer to make sure your dealer will exchange the product for you.
VVDI Key Tool Plus Pad tech support:www.obdii365.com
Posted by: jean at
06:42 AM
| No Comments
| Add Comment
Post contains 725 words, total size 10 kb.
January 16, 2021
Hey Guys, I will be covering how to configure a used PCM module on a 2012 Chrysler Town and Country. In this article, I will show: -What tools and set up are required to do this procedure. -Important terms applying to Chryslers vehicles. -Identify the Chrysler immobilizer systems. -How to know which procedures that needs to be done after a module has been replaced -How to replace a pcm withAutel MaxiIM im608 Pro.
One of the great things about the Autel im608 Pro compared to other aftermarket scan tools, its ability to do extensive coding, putting on used modules and configuring it right from the tablet. Now the challenge that most of us are facing is after we install that module, what do we do what’s the function route in order to get rid of the error code and it leaves us a lot of us scratching our head, so what I wanted to share with you guys, today is a simple framework that you can be applied onto most Chrysler vehicle.
What I’m gonna be sharing with you is how to install a used PCM on a 2012 Chrysler Town and Country with the Autel im608 Pro.
1.What tools and steps are required to do this procedure.
- Important terms applying to Chrysler vehicles.
- Ientify the Chrysler immobilizer systems.
4.How to know which procedures that need to be done after a module has been replaced.
- How to replace a PCM with the Autel im608 Pro
This is what you’re gonna be needing:
Used PCM
Service information okay.

So let’s cover some of the important terms before we do this:
- PCM Replacement – When a PCM is replaced, make sure the doner module has the same part number as the original module.
- If a doner module comes with a black key it’s a security key, if it’s a gray key it’s a non security key.
- Secret key – is an ID code that is unique to each win module, the code is programmed and stored in the WIN and the PCM, and each ignition key transponder chip. When the PCM or WIN is replaced, it is necessary to program the Secret Key Code into the new module with your Autel diagnostic tool.
- Pin Code – A 4 digit PIN is required to enter the Security Access Mode of the WCM/WIN (aftermarket tools will produce a 5 digit).
- Get the procedure from OEM before servicing vehicle.
Now let me introduce you the Chrysler immobilizer systems.
SKIM /WCM: Sentry key immo module 1998-2006
Skreem /WCM: Sentry key Remote Entry module /Wireless control module 2004-2014.
WIN: Wireless Ignition Node 2008 – Present.
Keyless Go: Keyless Go 2008 -2016
Smart start: Push button Non win module 2011-present.

OEM Repair information : Module replacement guide
If you go to your service information, they’re going to have a module replacement guide and the way this works is the little gears that are white, that means that the existing part that you know already on the vehicle, the ones in green represents the part that’s being replaced the new parts, so let’s just say for example I lost all my keys right so you can see that would be condition one because the PCM still there w theme is still there and then we have the keys and all we do is just go down to the programming order and you’ll see we can use a scan tool to program the key fob, let’s say we had a bad PCM model, a bad wcm model, and also a bad phobic.
Then we’ll do condition three and just go down and you just on the scan tool run these procedures.

How to replaced a used PCM with AutelIM608 Pro?
So let’s go ahead to the vehicle, get this thing configured, so this is gonna be your setup, now we don’t need the XP400, but if you haven’t purchased one of these tools you’re not supposed to plug this into the obd port, this is how the connection is going to be. And then as a rule of thumb, it’s good to connect your J2534 direct with the USB cable.

Now in terms of the PCM location, it’s kind of in an awkward spot, but the way we’re going to take it off is you have to disconnect the negative battery cable going to lift the vehicle up and you can see on step three remove the push pin and reposition the PCM access cover.
Step 4. unlock and disconnect the electrical connectors from the power train control module.
step 5. remove the three bolts and the PM module.

So now we’re to our scanner IM608 Pro.
And this is how we’re going to get in there, we’re go ahead and identify the vehicle.
Accept;
Go to Chrysler;
Ok;
Let this load;
Go to "Automatic selectionsâ€, she’s going to automatically pick up the vehicle so turn on the ignition.


We’re gonna click "Fobik Keyâ€.

And we’re going to follow the prompts to switch the ignition off and then on again, make sure the engine is off.
So this is reading the password. And what’s great is you don’t need to take a picture of this, this password is going to be stuck into the system.
so let me go forward and do any immobilize or procedures that require the password, it’s already be populated for you.

So the first thing I recommend doing is going to the "Immo status scanâ€. You know, the reason why I do this is because this is going to scan all the important modules related to the immobilize a system all these are vital for the immobilizer system and the reason why they’re doing this is if you have certain faults, let’s say on your PCM module that are not immobilized or related, you probably won’t be able to do the key coding procedure until you would say remove those faults, then you’ll be able to proceed with the key coding procedure alright so you scan the vehicle we have the module in the car now let’s go to replace components.


Alright, so it takes us to this menu and we’re gonna go to "Powertrain control module (PCM) replacedâ€.
This function is only to activate and initialize the IMMO parts after replacement of the IMMO module, or to synchronize the VIN code and IMMO data.
If you want to change the VIN directly, please go to "IMMO Module Replacement†menu under "system selectionâ€, execute the "Change VIN Code†function.
The engine module(ECM /PCM) must be programmed before you start the engine control module replaced function.

You’re going to get another prompt.
Alright, so it’s just basically telling us. We only are going to run this procedure, if we replaced the module, if you do this without replacement you’re going to probably end up need to purchase new keys and encode them so only do this procedure, if you replace the PC.

It’s gonna be retrieving theVIN pretty soon.
Okay reading VIN, so current VIN in the wireless control module is that right there and to update the current vin in the current PCM press "OKâ€, so let’s click OK.

Writing the VIN.
Now that was successful.

Now you can start the car at this point, but you might see, there’s a security light on the dash, so let’s go ahead and attempt to remove that.
Let’s re-scan the vehicle.
Click OK.
Once this is done, I’m gonna go up to WCM module.

Let’s go and check what’s in here.
so we have B2205 DTC and C1503 DTC.
So let’s go ahead and try to clear this okay.

If this happens if you’re not able to get rid of this, what we’re gonna do is we’re gonna exit out of here. Because what we need to do is reset the PCM module alright.
So let’s go to the"Diagnosticsâ€menu.

And then let’s go and check to see if that vin was successfully.

Go Chrysler USA.
Okay, that’s just a summary of the vehicle.


Now the fun part, so let’s go to"Diagnosisâ€, then "Control unitâ€, then "Bodyâ€.


And then on the lower left here, you can see wireless control, and click that.

And if we scroll down we see special functions.

And right here "Reset ECUâ€.

So once we do that, I click OK. And ECU has been reset.
And then when you check that security lights should be gone and then from there you can start the vehicle.
So what I want you to remember.
- Make sure the doner PCM OEM part number is exactly the same as the original PCM OEM partner, very important.
- The other thing is before you purchase your doner module make sure beforehand that if that doner module came with a black key, which indicates a security key, if it came with a gray key, which is a non security key.
- Refer to Chrysler’s module replacement guide to know the full procedures after a module has been replaced.
- Learning the Chrysler immobilizer systems to help identify the correct strategy when placing models and doing the key coding.
- And lastly after PCM module has been replaced and the security light is still on go to the control unit -> body ->wcm /TPMS -> special functions ->Reset ECU.
Enjoy!
Order Autel IM608 Pro at
https://www.obdii365.com/wholesale/autel-maxiim-im608-pro.html
Posted by: jean at
06:14 AM
| No Comments
| Add Comment
Post contains 1565 words, total size 28 kb.
January 14, 2021
Is it worth to own oneOBDSTAR MS50 Motorcycle Scanner? The answer is yes. So how is its hardware configuration? Is it easy to register and update for the first time? Is the software user friendly? When I have no idea what’s wrong with the tablet and my operation, can I contact the manufacturer in time to solve it? The answers are in this article, please go forward reading.
First comes with OBDSTAR MS50 hardware configuration:
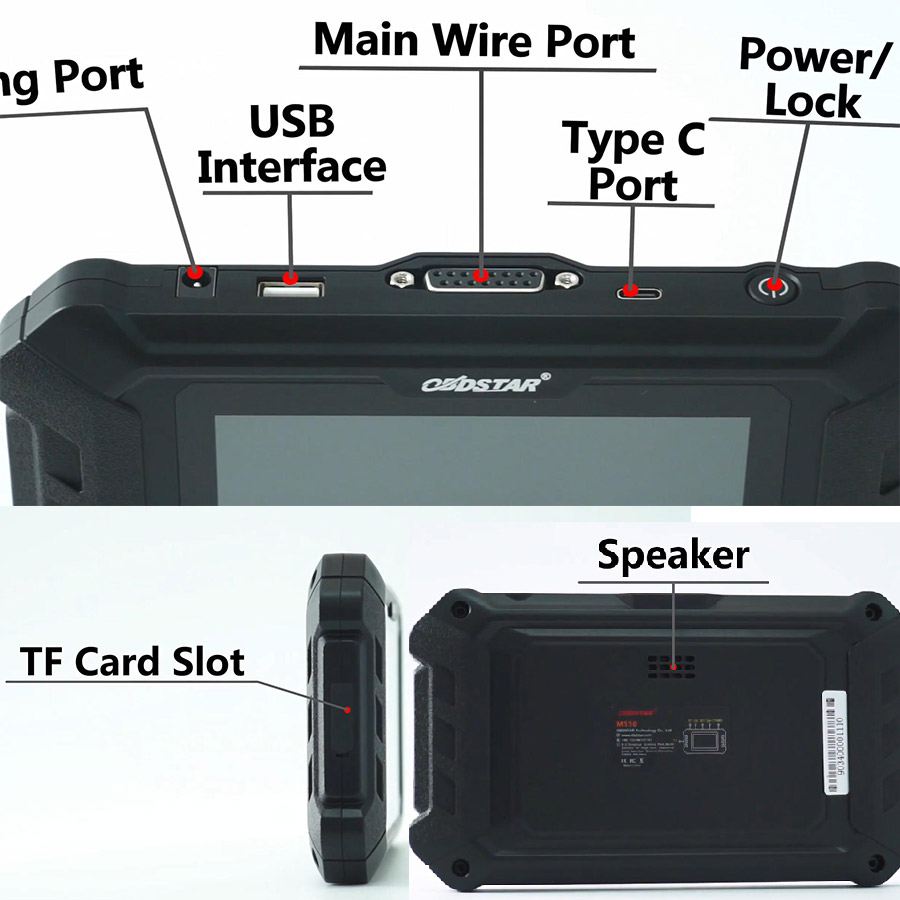
1). From outlook to the main unit.
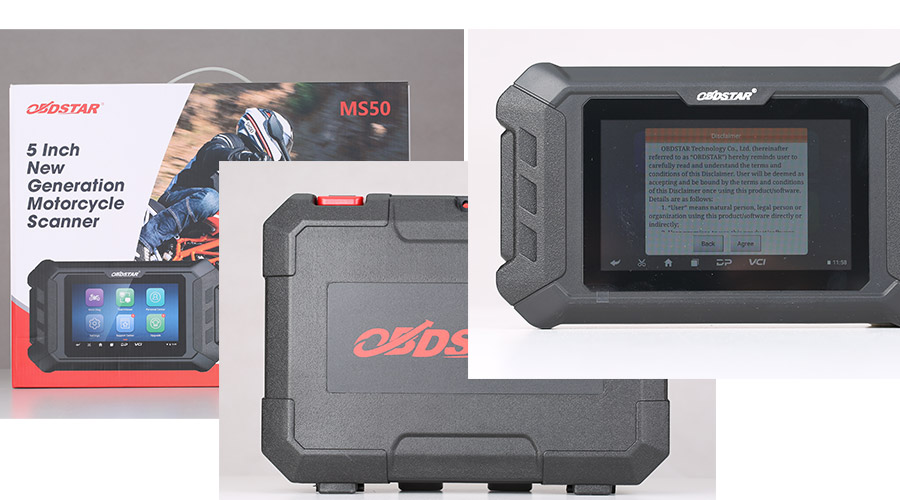
2). Next is the location of TF Car Slot, Speaker, charging port, USB interface, main wire port, Type C port, Power/ lock button.
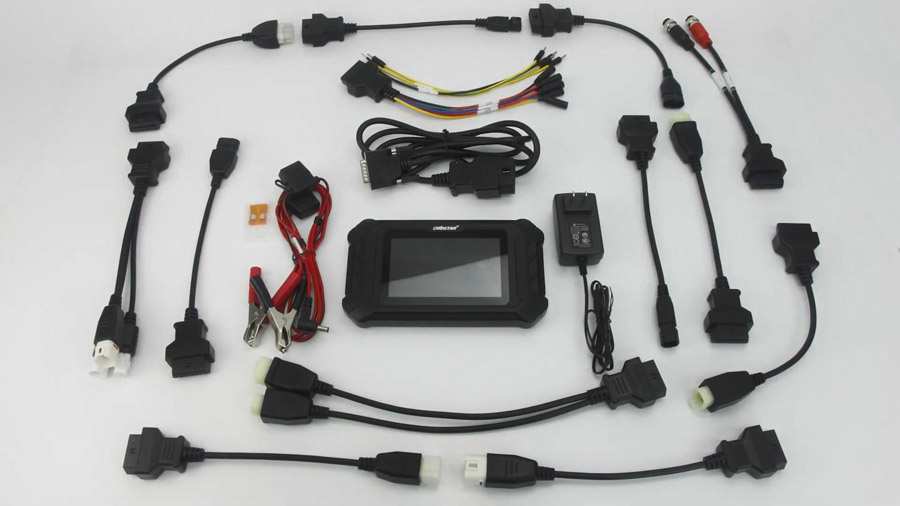
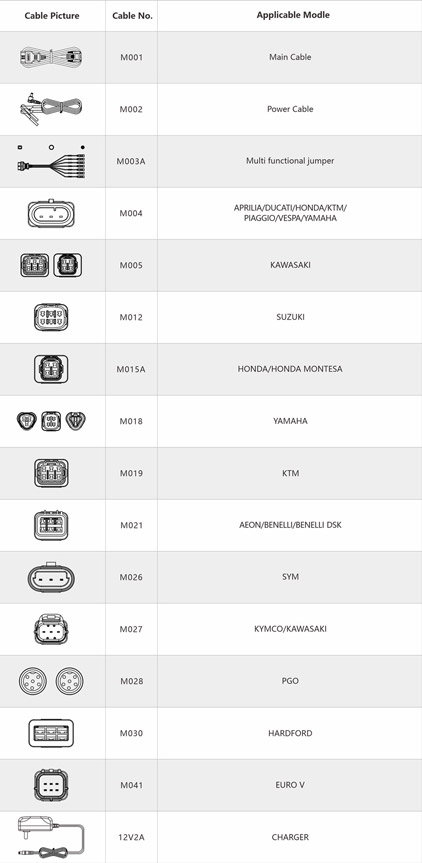
3). The big black box will contain all of adapters, cables and main unit.
The second image below will list all.
Next is on how to register and upgrade OBDSTAR MS50.
Connect power supply before registration.
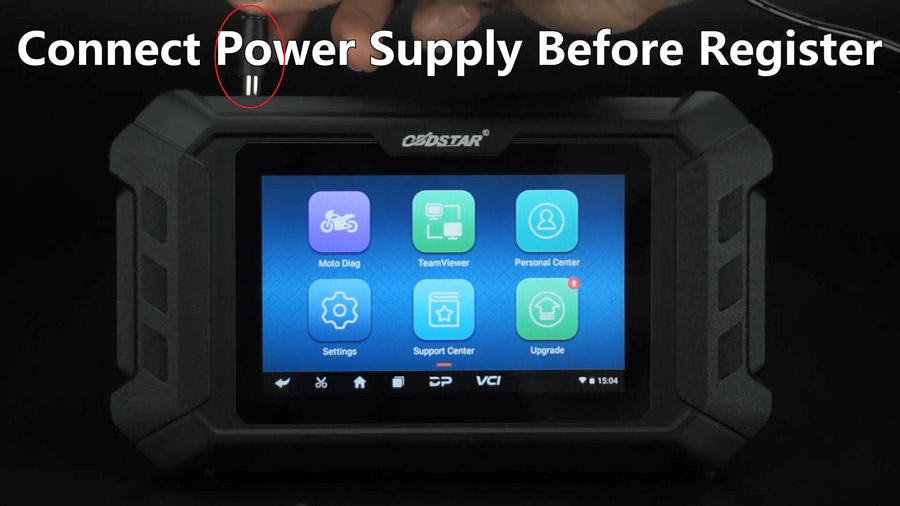
Connect Wifi: find the available Wifi, input the password and ensure you see it is connected.

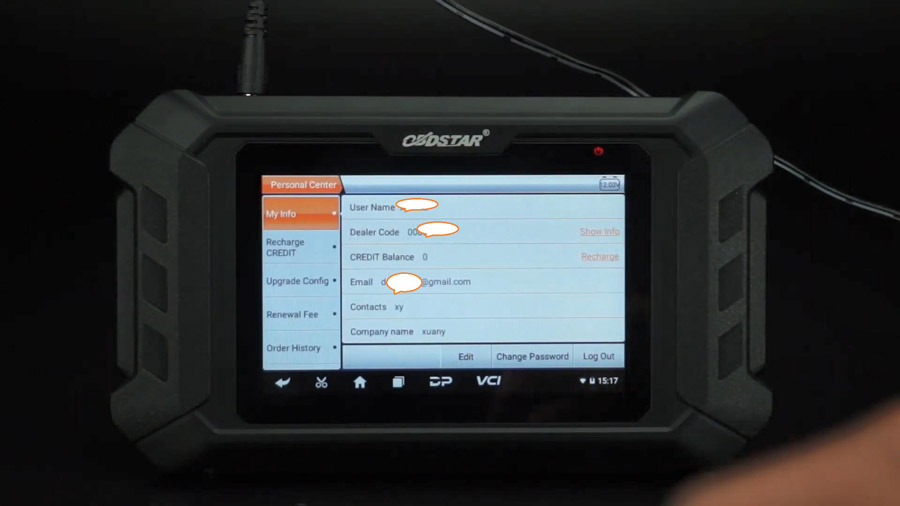
Tap "Personal Center†on the home menu – > Register (at the right corner of next page) -> Fill in user information including user name, password, valid email address, phone call, country, post code etc. Then register successfully.

Login now with your user name and password.
This is your personal Center information including My info, recharge credit, upgrade config, renewal fee, order history etc.
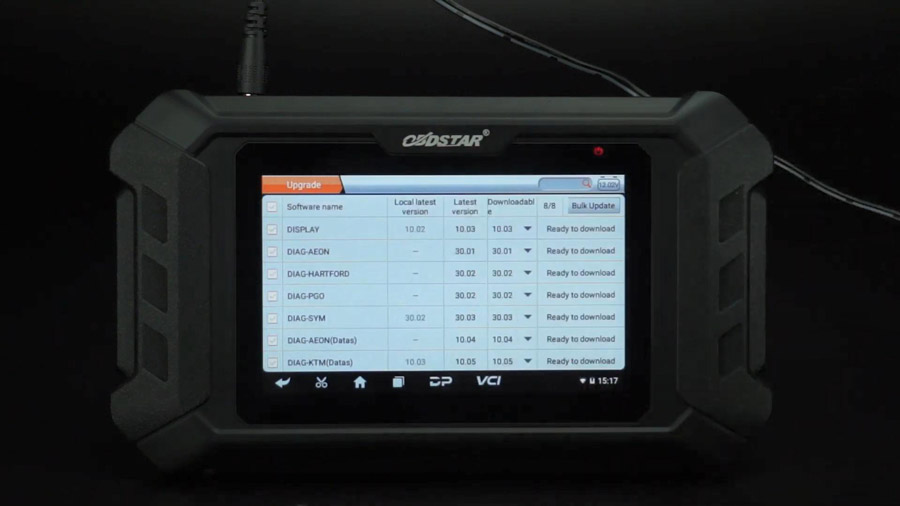
Then to upgradeOBDSTAR MS50.
Select all and tap "Bulk Updateâ€, it will show "Upgrade completeâ€.
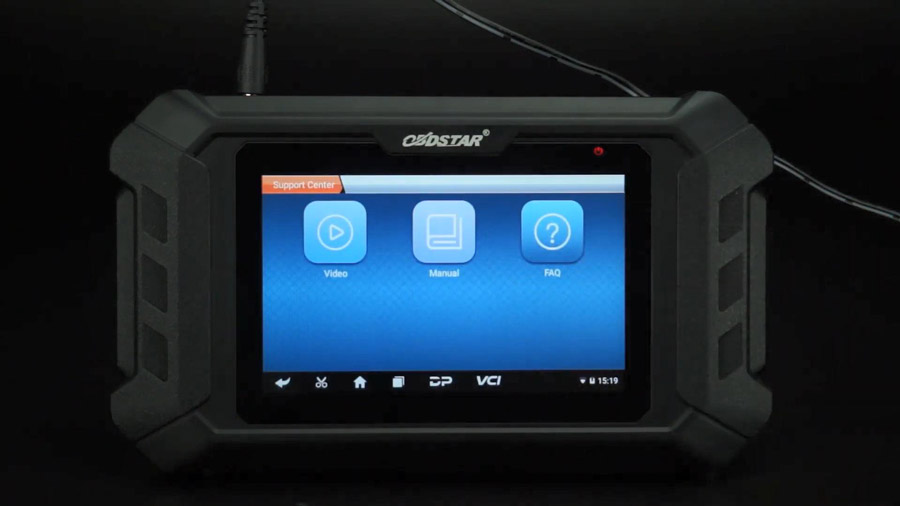
Back to "Support Centerâ€, there are "Videoâ€, "Manual†and "FAQâ€.
Let’s enter "Manualâ€, it shows the user how to use MS50 scanner in the words and diagram.

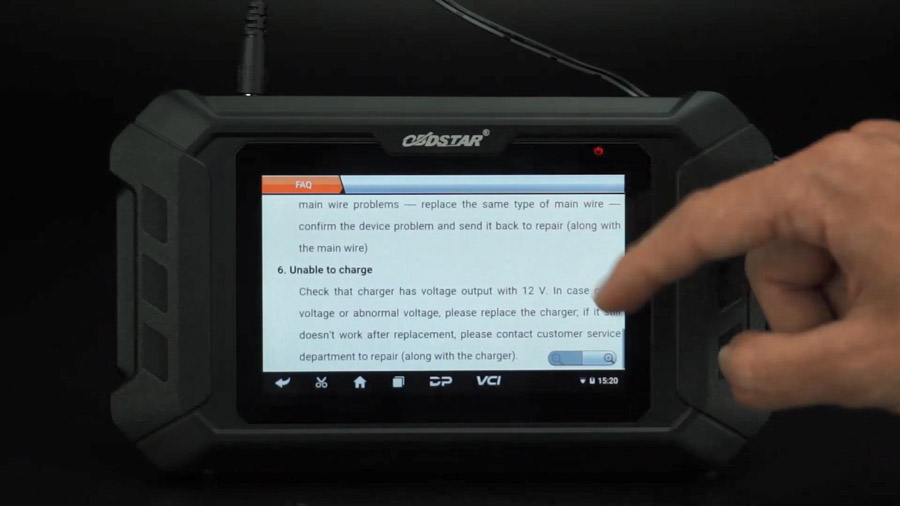
Then "FAQâ€, it lists some possible problems and solutions.
Finally, enter "Teamviewer†to see how to contact at OBDSTAR in time.
After it shows connected, it will show a ID.
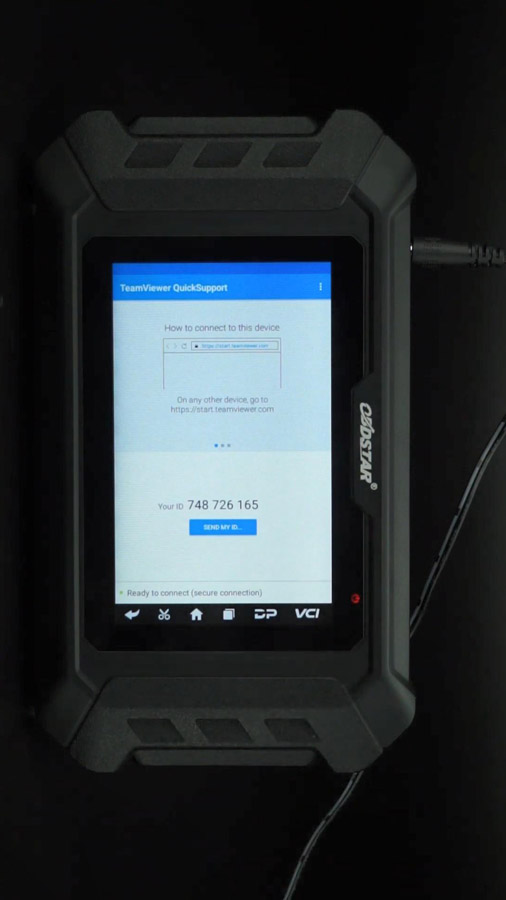
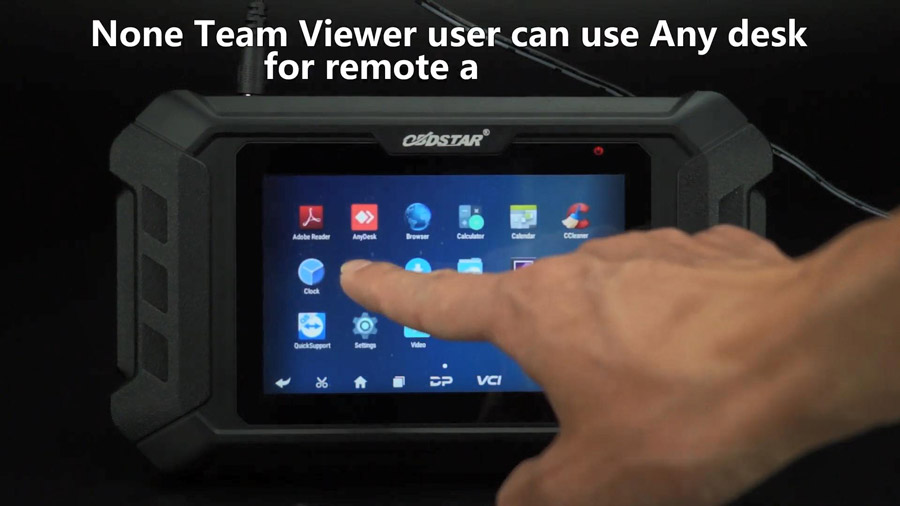
Back to the home menu and enter "AnyDesk†(None TeamViewer user can use AnyDesk for remote assistance.

Alright, hope this article help you more understand OBDSTAR MS50 Motorcycle diagnostic tool.
Enjoy!
Posted by: jean at
06:05 AM
| No Comments
| Add Comment
Post contains 332 words, total size 11 kb.
January 12, 2021
Here's the operation guide on Subaru smart key programming usingLonsdor K518ISE.
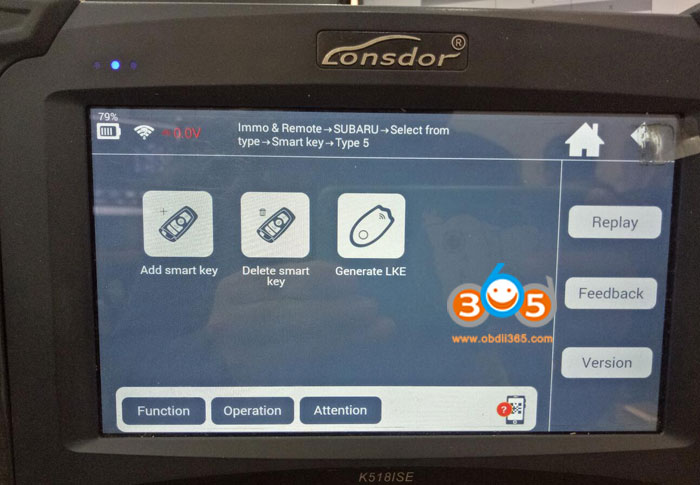
In K518, we select Immo & Remote->Subaru-> Select from type-> Smart key-> choose type
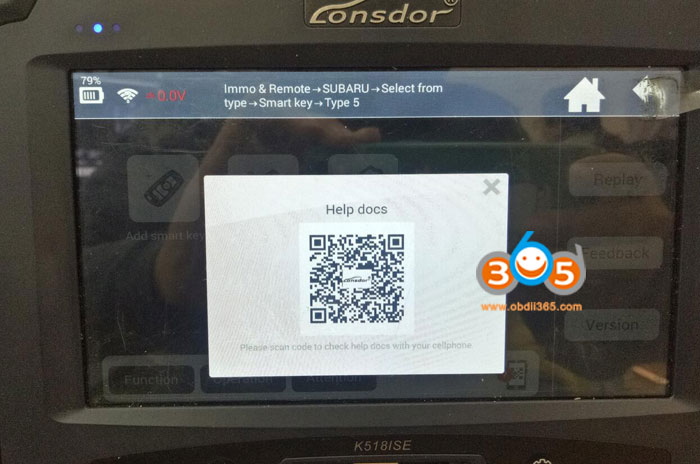
You can scan the QR code to get Help file
Subaru smart key programming tips:
Function
- Add smart key: program and add smart keys.
- Delete smart key: delete the programmed smart key.
- Generate LKE: use the immo data backed up before to generate aLKE (emulator key), which can be used to turn on dashboard and program/add smart key.
Operation
Operation process for all key lost(make sure LKE has been bound first, networking not required):
- Dismantle IMMO and read EEPROM data with other programmer(only support 93C86 data! Import the data to customfile folder inK518memory)-> 2. Generate LKE-> 3. Use the generated LKE close to car start button(dashboard lights up)-> 4. Add smart key.
Tips: 1. Free of PIN code;
2. Click blue texts to view complete operation process.
3. [Bind key emulator] is in [generate LKE] menu, system will prompt whether current LKE has been bound, if not, please bind it to K518 first; if yes, please continue to generate LKE.
Add smart key
- This function will program keys.
- Please put a working smart key close to car start button, and you will hear one toot.
- Put a new smart key(to be programmed) close to the start button.
- Programming... Finished.
Delete smart key
- This function will delete keys, please confirm continue to operate or not?
- Please put a working smart key close to car start button, and you will hear one beep.
- Deleting keys... Finished.
Generate LKE
- This function can generate a backup master key when all keys are lost, which can turn on dashboard to add and program other keys.
- Please put key emulator(LKE emulator) into K518 card slot.
- Identifying the key emulator...
- Please select file to operate.
- Identifying data...
- Current EEPROM data:Key count: 1, key type: F1
- Generating LKE...
- Generation completed, please put the generated LKE close to ignition, turn on dashboard, enter [add key] menu to program new key.
Attention:
- If failed to bindLKE emulatoror to generate emergency key, generally it is a problem of induction, please change LKE's placement and try again.
- The location of IMMO is generally near the co-pilot seat.
http://www.lonsdor.org/lonsdor-k518ise-subaru-smart-key-programming-manual/
Posted by: jean at
01:24 AM
| No Comments
| Add Comment
Post contains 374 words, total size 5 kb.
January 08, 2021
I have2006 G6 GTP (CAN protocol), 2001 Blazer (J1850 VPW) and 2004 Avalanche (J1850 VPW)to activate ABS bleeding, and I foundVident Ilink400Multi-System Scan Tool for GM onobdii365where someone said it worked on a 2003 S10 for crank sensor relearn. Also found someone who said it read cam sensor retard. And another who said it worked on the Blazer ABS Bleeding procedure. Also found some people who had some troubles, but there is always people who can’t get things to work when they should. what I find interesting is that the manufacturer’s web site says it works on both OBD1 and OBD2 – so maybe this will work on 1995 OBD1.5?
Then , I went ahead and ordered one, it was $149 free shipping.
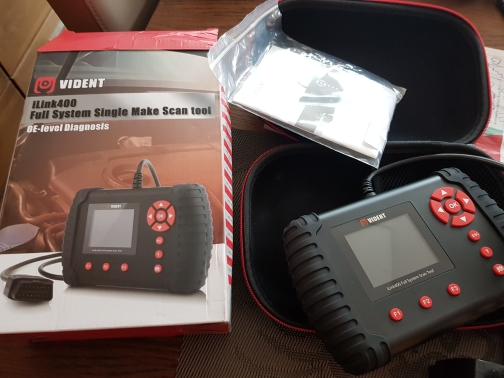
I’ll review the Vident Ilink 400 because it’sreally good value.
I’m REALLY impressed with it.Downloaded and installed GM software update. Hooked up to my 2006 G6 GTP (CAN protocol), my 2001 Blazer (J1850 VPW), and my 2004 Avalanche (J1850 VPW). The Avalanche it does not automatically recognize the vehicle and forces me to enter some info about the vehicle manually.Apparently does ABS brake bleeding and crank sensor relearn on all 3 GM vehicles(actually tried the brake bleeding procedure on the Avalanche). Did not look for cam sensor retard on the Avalanche and the G6, but does read the all-important Cam Sensor Retard on my Blazer. Saw it does injector balance test on Avalanche. Does misfire counters for all three. Pluswas reading BCM and HVAC codes on Avalanche.Red and identified a entertainment (radio) code on the g6. However could not find TCCM module on either Blazer or Avalanche (both 4-button).Too much to list – has TONS of capability.Way, way more than my HP Tuners VCM scanner software. Butremember you only get one manufacturer’s PIDs – pay $60 each for any more you want to install. The box claims it’s compatible with OBD1 and OBD2 but no OBD1 connector included so who knows. A little clunky to get through the menus, butit’s a handheld scanner.
I would say anyonewith 1998+ Blazer is VERY safe to buy this scan tool Vident Ilink 400and will be EXTREMELY happy with it for the price. It is obviously pretty cheaply made and Chinese, but should be OK.
Have no idea how it will work with 1995 (OBD1.5), or 1996-1997 Blazers (we know some Bluetooth scanning apps have trouble with GM PIDs on 1996-1997). I’ll try to review this scanner more thoroughly sometime this fall and post it. In the meantime, if anyone collects data using this scanner on the 1995-1997 Blazers, please let me know so I can include that info. I have no idea how it will work (GM PIDs and bidirectional controls) with very new vehicles (ie 2013+) but I believe the CAN protocol is consistent through 2012 and it seem to do the most module types for the CANBUS vehicles so they should be good to go.
The following paragraph is my personal experience and point of view on ChineseGM Tech2, Blue Driver for GM when comparing with Vident Ilink 400:
Take a typical Bluetooth OBD app for example, tons of these out there – only a few do enhanced GM PIDs (sensor/data monitoring) and even fewer have all the useful specific PIDs for a Blazer such as cam sensor retard. Specifically these are Car Gauge Pro (98+ blazer only – includes enhanced PIDs), Dash Command w/enhanced GM PID purchase (all years Blazer), Blue Driver (I have not personally reviewed but seems to work for iPhone users). Car Gauge Pro and Dash Command requires a separate Bluetooth OBD2 adapter to be purchased – recommend BAFX one. The rest have big promises, little susbstance. However, please be advised thatnone of the Bluetooth apps do Brake Bleeding or Crank Sensor Relearns, which is what the Ilink400 is really about.
At $300+ you can buy Windows software that will do the Crank Sensor Relearn, but the brake bleeding is not supported on HP Tuners anyways. Don’t know about the others. HP Tuners, Autoenginuity, EFI live.
At $150 you can buy Windows software Scan XL Pro that pretty much equals the functions of Dash Command – same company – different platform – don’t have to buy the Enhanced GM PIDs for each vehicle.
Some people love their $350 Chinese Tech 2 and claim is works just like the GM Tech 2. I have zero experience with either one.
SoI was quite excited to find the Ilink400 would do both brake bleeding and things like the crank sensor relearn and HVAC.The handheld scanner I bought and returned before buying mine would only do the brake bleeding + simplest generic OBD2 PIDs.
For casual Blazer diagnostics, for under $50 I recommend Dash Command or Car Gauge Pro (Car Gauge Pro does more on 1998+ Blazers, but not as intuitive to use and is poorly documented).If you feel the need for crank sensor relearn or brake bleeding or more bi-directional control, then for under $150 the Vident Ilink400 seems made to order.I like them ALL and find uses for each!!! The only one that does it all is the factory Tech 2.
Vident Ilink400 gm– just figured out the TCCM IS reachable using the Ilink400, but you find it under Powertrain (also Cruise Control is found under powertrain). Looks like you can monitor the status of various switches and their positions + much more. Found this when working on my Avalanche cruise control. Brake switch was not working and you could see the status of all the cruise control switches. It’s a great little handheld.
Enjoy!
https://www.obdii365.com/service/vident-ilink400-positive-review-on-chevy-blazer.html
Posted by: jean at
02:29 AM
| No Comments
| Add Comment
Post contains 938 words, total size 7 kb.
32 queries taking 0.1483 seconds, 210 records returned.
Powered by Minx 1.1.6c-pink.

