March 16, 2023
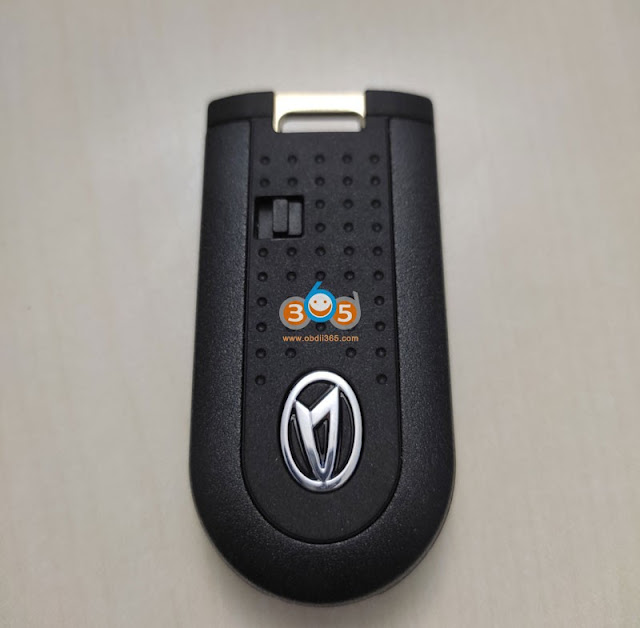
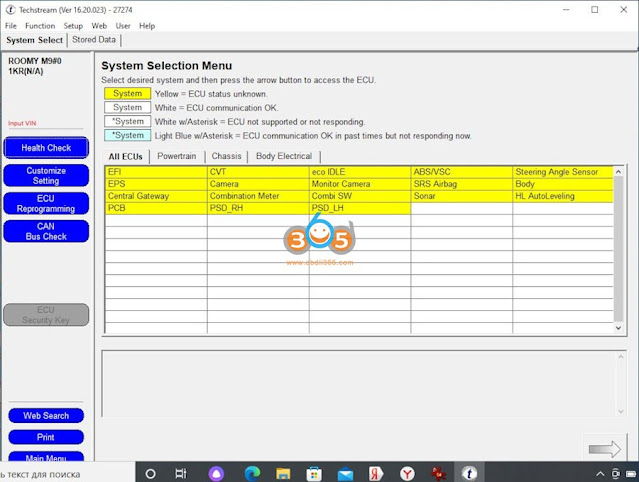
I got a Toyota Roomy van with one key, the second either remained in Japan.
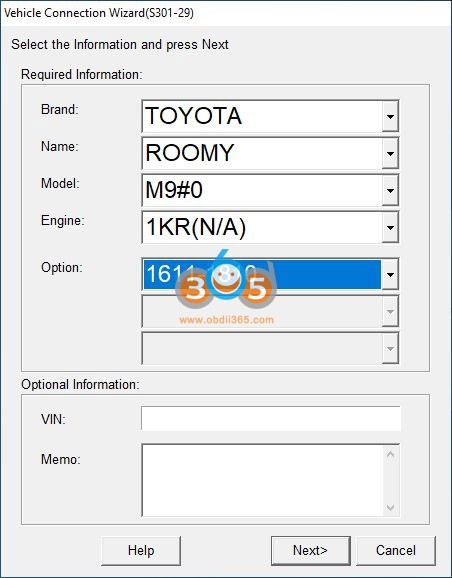
I’ve been planning to fix this for a long time.And I ordered a key and amini vci Toyota techstream cable.
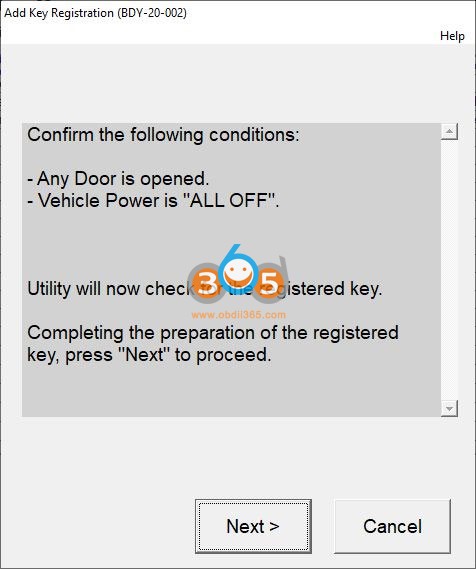
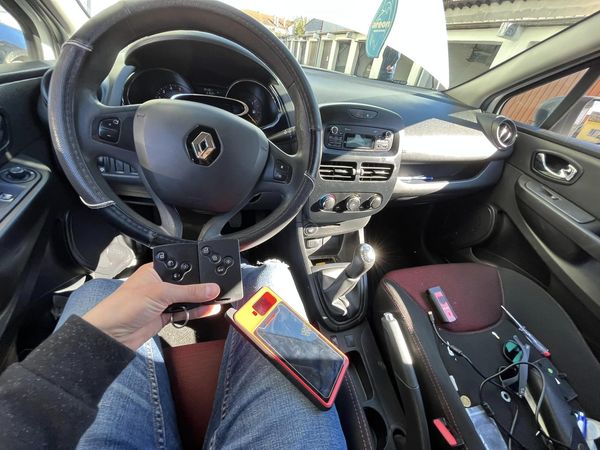
The key must be new or blank. To register the key you need to prepare a laptop with Techstream installed, amini VCI cable, an old key and a new key.
I registered with Techstream version 16.20.023.
Then the program will ask you to bring the old key to the start button – if the central lock clicks ok, then the new key.These operations take 30 seconds.– you need to have the keys in direct access.)
Everything, the new key is registered, it remains only to cut a new physical key on a blank.
Posted by: jean at
07:28 AM
| No Comments
| Add Comment
Post contains 182 words, total size 6 kb.
March 15, 2023
Problem:
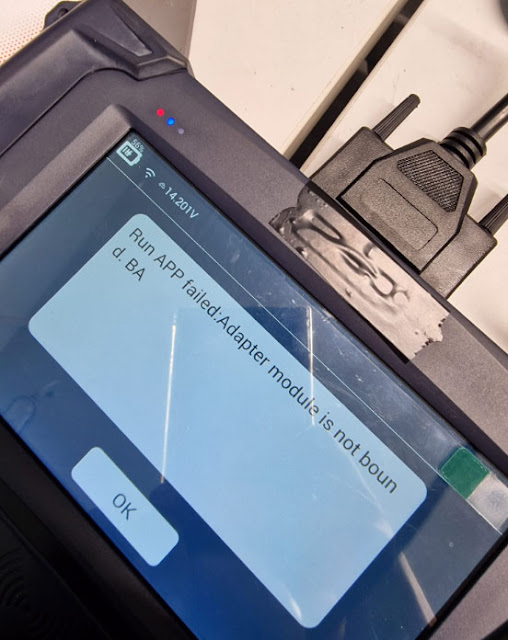
I need to read Volvo KVM data withLonsdor K518ISEK-prog2 programmer. But it days run App failed. Adapter module is not bound. Any solution?
Solution:
You have to combinekprog2 adapterwith K518ISE in order to read immo data.
Follow instruction here to bind kprog 2 with k518.
How to connect or bind KProg withLonsdor K518:
If it’s the first time to use the KProg adapter, you need to bind it with K518ISE.
Connect kprog
Go to the K518ISE home page
Choose "Settings -> Bind adapter”
And followthe direction to finish binding
You have to know:
One K518ISE host can bind up to 5 adapters
And the bound adapter can not be bound to other K518ISE hosts.
Once bound, no need to bind again.
Posted by: jean at
06:07 AM
| No Comments
| Add Comment
Post contains 132 words, total size 2 kb.
March 14, 2023
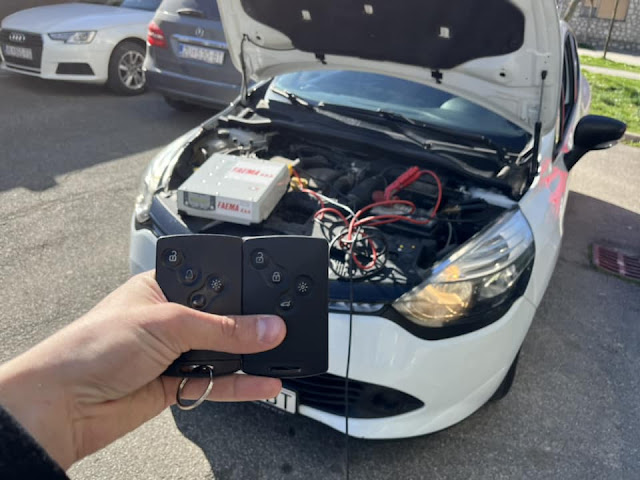
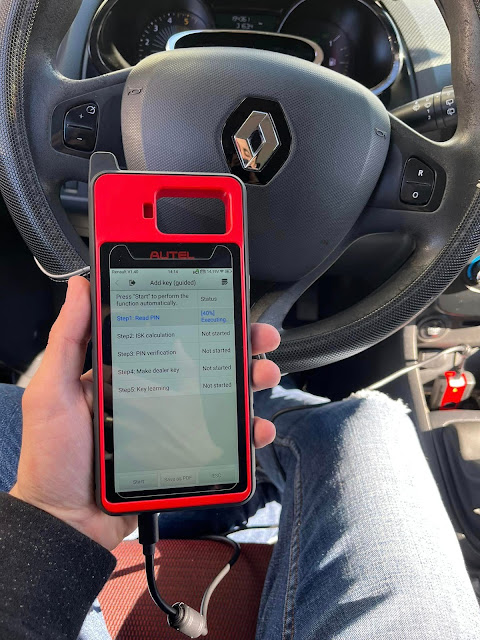
Renault Clio 4 2015 Add 4A card withAutel KM100-Super fast and easy.
This one is HFM, nothing is 100% safe ofcourse but generaly works fine on renaults.
Just put battery stabilizer, good internet connection and follow steps, for backup if you brick something you should have online launch diag to flash back module or renault canclip software and no worries.
Posted by: jean at
06:32 AM
| No Comments
| Add Comment
Post contains 68 words, total size 3 kb.
March 13, 2023
How to program Toyota Prius year 2011 all keys lost usingAutel MaxiIM IM608+APB112+xhorse Toyota XM38 smart key.
Preparation:
Feed the vehicle with power supply 12v
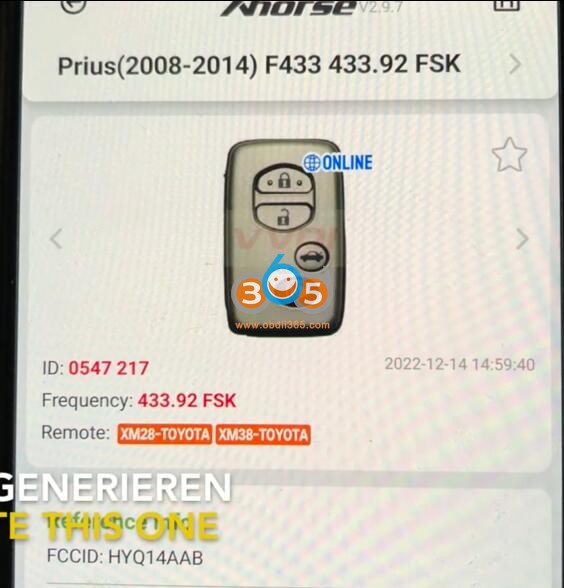
Generate xhorse xm38 remote under this option- Prius 2008-2014 F433 433.92 FSK
There are 2 ways to program all keys lost.
Guided function
Normal procedure.
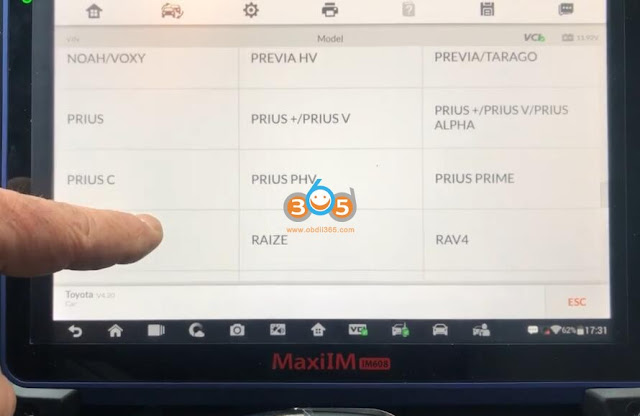
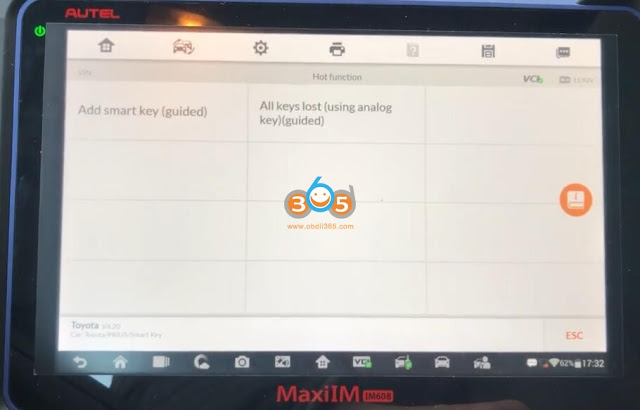
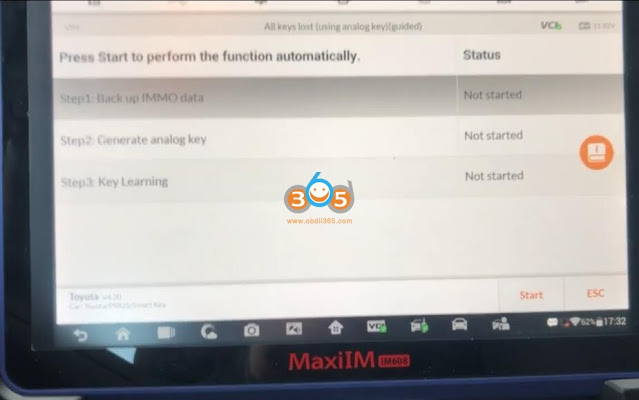
Guided function menu path: Manual selection->Prius->Smart Key->Hot functions-All keys lost (using analog key) guided
Step 1: Backup immo data
Step 2: Generate analog key
Step 3: Key Learning
There is a "guided function" forprogramming with Autel, which would certainly have been easier.
You can also do it as a regular procedure.
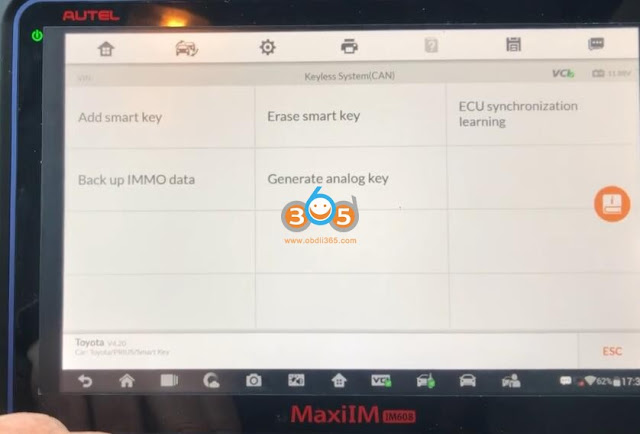
Select Manual selection->Prius->Smart Key->Control unit->Keyless System (CAN)
Step 1: Backup immo data
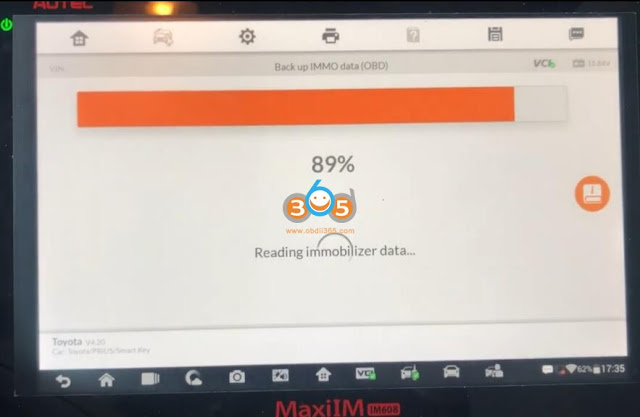
Backup Immo data
Enable internet connection.
Turn the ignition off and turn the hazard warning lamps on and off once
Read immo data in process
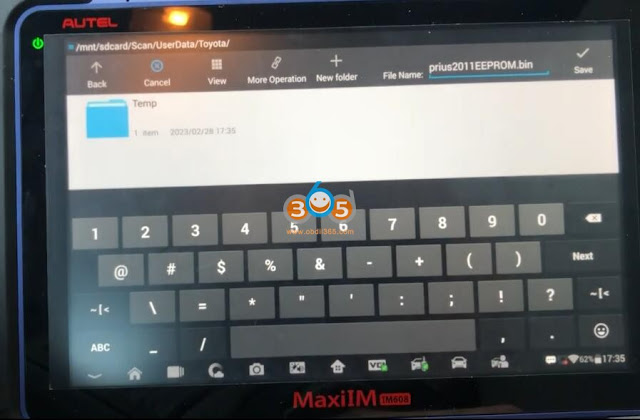
Save data
Step 2: Generate analog key
Connect APB112 emulator with im608
upload eeprom data backup in step 1
Generate simulator key successfully.
Then simulator key now can start car

Step 3: Add smart key with the APB112
Put the analog key close to the START button
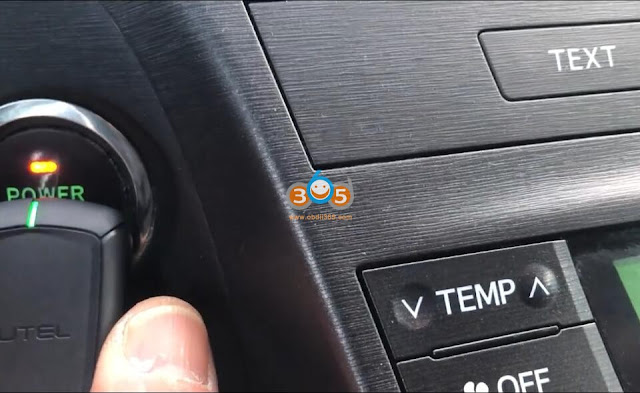
Put aXhorse XM38 smart keyneed to learn to the START button
Key learning success
Posted by: jean at
08:24 AM
| No Comments
| Add Comment
Post contains 210 words, total size 16 kb.
March 10, 2023
Here we share users’ experience with those wanting to add TPMS sensors to their Chevrolet Corvette C5 Z06.
Background:
He recently replaced the Bridgestone Potenza RE760 tires on C5 Z06 with new Continental ExtremeContact Sport tires in the following sizes on OEM Z06 wheels (Frt: 255/40/17 and Rr: 295/35/1![]() so when he did that he decided to add TPMS sensors to the wheels and then enable the TPMS system in the DIC.
so when he did that he decided to add TPMS sensors to the wheels and then enable the TPMS system in the DIC.
Here’s what you’ll need:
– Four TPMS sensors (he ordered these through Rock Auto. They are Schrader Model# 20117. Schrader makes the OEM sensors and these are the exact same as OE but only cost $20.79/ea, so the total cost was around $88 for all four)
–GM TECH2 scan tooldevice (i got a clone fromobdii365.com)
– A strong magnet, preferably round
So first you’ll need to add the TPMS sensors (Schrader Model 20117 or OE/ACDELCO# 25773946) to your wheels. Be sure to NOT overtighten the sensor nut when installing them. The torque spec is 62 inch/pounds (NOT foot/pounds) so be very careful. Once the tires/wheels are installed on the car, connect the TECH2 device to the OBDII port on the underside of the dash and then put the key in the ignition and turn it to "On”. You do not need to actually start the car.
Here’s a link that shows what to do:
And here’s a YouTube Video showing the TECH2 steps as well:
The steps are the following:
1. F0: Diagnostics
2. Select Model Year (Mine was 2002)
3. Select Vehicle Type = Passenger Car
4. F1: Body
5. Select Product Line = Y
6. Select Body Style = (1) Two-Door Coupe/Sedan
7. Select Transmission = Manual
8. Body = F5: Remote Function Actuation
9. F2: Special Functions
10. F0: Set Options
11. F0: Tire Pressure Monitor
12. Toggle the function "On” and then hit the "Save Options” and power off theTECH2 scanner.
Once that’s done, the next step is to put the DIC in the ‘Learn Tire” mode.
Here’s a YouTube link for that:
2. Press the "OPTIONS” button and cycle through the display until you get a blank screen on the DIC.
3. Press and hold the "RESET button until "FOB TRAINING” displays in the DIC.
4. Press the "OPTIONS” button once to display "TIRE TRAINING” in the DIC.
5. Press the "RESET” button to start the tire training. It should display "LEARN L FRONT TIRE” in the DIC.
6. This is the most important step.You will need to use a strong circular magnet and place it near the tire valve stem and then wait for the horn chirp.Next go in a clockwise manner to the Right Front sensor waiting again for the horn chirp and then the Right Rear and then finally the Left Rear.
7. Your TPMS sensors should now be programmed and available for viewing using the "GAGES” button.
Just an FYI, you MUST use a strong magnet for the tire learning phase. The normal tire learning devices at tire stores and dealershipsWILL NOT WORKwhen learning the sensors.
Hope that helps. This was really inexpensive to do but very useful. It’s great to know now you have the TPMS system active in Z06 so you can check the tires anytime while driving.
Posted by: jean at
07:16 AM
| No Comments
| Add Comment
Post contains 588 words, total size 5 kb.
March 09, 2023
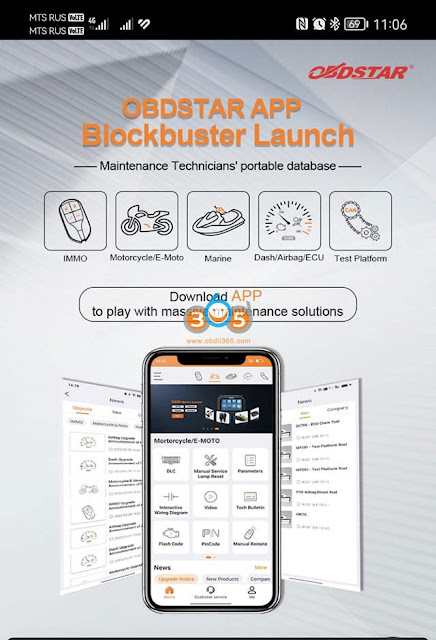
What isOBDSTAR App?
OBDSTAR App contains maintenance technicians’ portable database for
- Car maintenance and repair
- Motorcycle maintenance and repair
- Marine maintenance and repair
- Customer service
- frequently asked errors/problems solutions
Where/How to Download OBDSTAR App?
Way 1:
Scan the QR Code here to download App.
Way 2:visit OBDSTAR official and download
https://support.obdstar.com/download/
Once download app, register and login with your phone number and user name.
It’s only available for the Android system at present. iOS will be available soon.
The Engish version should be ready by end of this week. Stay tuned.
This App is amazing! Very detailed, one thing we can suggest is more immo specific info, like on FCA 12+8 Cable, CAN FD, 16+12 Nissan cable connection locations, eeprom help (immobox/chip location), which moto/boat cables are for immo.
Shaping up to be the ultimate auto/moto/boat tool with excellent info.
TheOBDSTAR Appcan be divided into 5 parts
- Locksmith/Immobilizer section
- Motorcycle section
- Marine Section
- Dashboard/Airbag/ECU Section
- Test platform section
In Immobilizer section you cancheck pin code manually, search the manual remote control programming procedure of each brand, operation video guides, accessory connections and instructions, recent immobilizer updates etc.
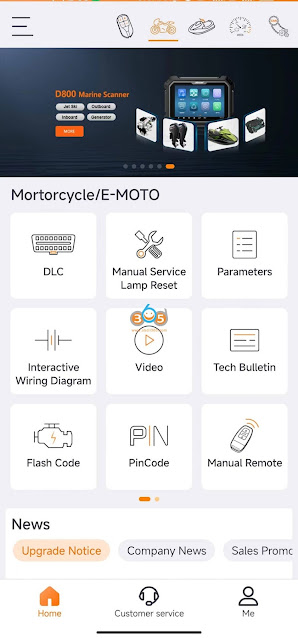
In Motorcycle/E-Motor section, you can check manual service reset procedure, check Interactive circuit diagram, read datastream, check operation video, check ECU Pinout, check technical bulletin etc
In Marine section, you can check manual service reset procedure, check Interactive circuit diagram, check operation video, check manual remote control procedure, check technical bulletin etc
In Dashboard/Airbag/ECU section, you can check airbag reset pinouts, ECU pinouts, gearbox pinouts, BCM pinouts, dashboard pinouts, operation video etc.
In Test platform section, you can check dashboard pinouts, ABS pinouts, radio module pinouts, Air conditioner panel pinouts, operation videos, technical bulletin etc.
Posted by: jean at
06:36 AM
| No Comments
| Add Comment
Post contains 286 words, total size 5 kb.
March 07, 2023
Add an OEM key to a 2020 Toyota RAV4 withAutel IM608successfully. Same procedure as RAV4 2022 (checkprevious post). Go control unit – keyless, then I can select backup immo data-back up through OBD, then add a key WITHOUT 3 lines data and pay for the code. If choose add a key directly, then the programmer will spit out those 3 lines data and ask for a code.
When backing up data, the dashboard will display engine has issues, steering wheel have issues,blah, blah,blah as the backup process going, quite nerve racking but once is finished, everything is fine.
You can if it is lost all keys, there is a choice of using apb112. But my case is to add a key.
After backup immo data, then select add key, then it will ask you if you backed up data or not, then select the file, then same old Toyota beep beep beep process.
Great job Autel.
Posted by: jean at
07:11 AM
| No Comments
| Add Comment
Post contains 165 words, total size 4 kb.
March 06, 2023
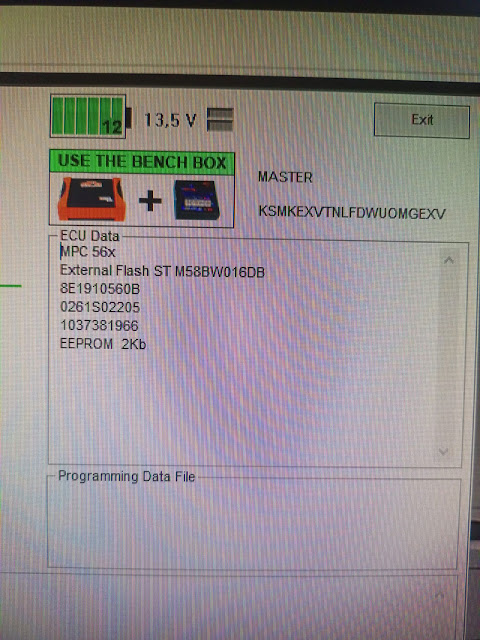
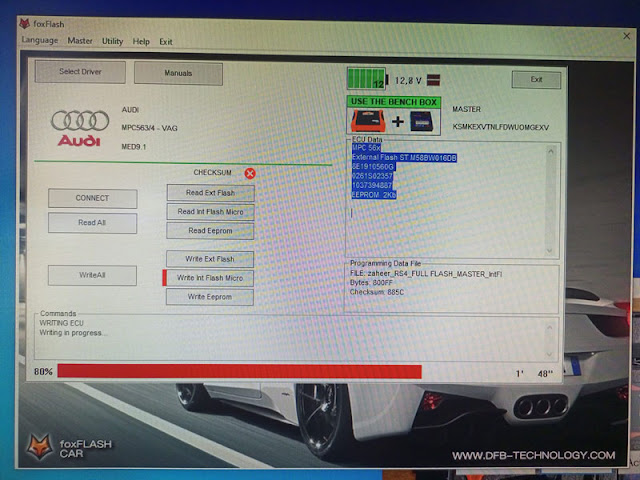
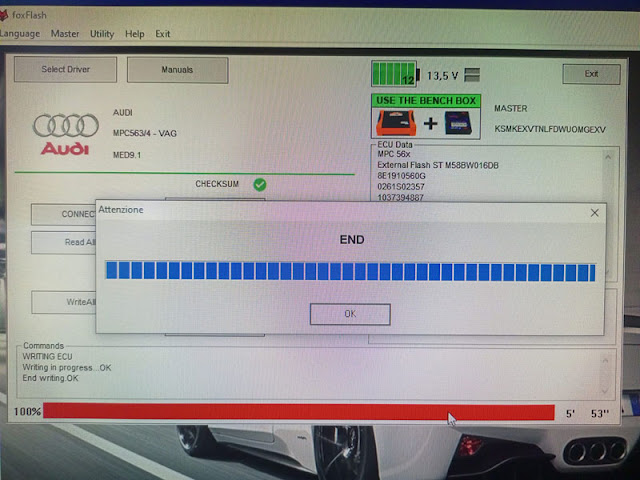
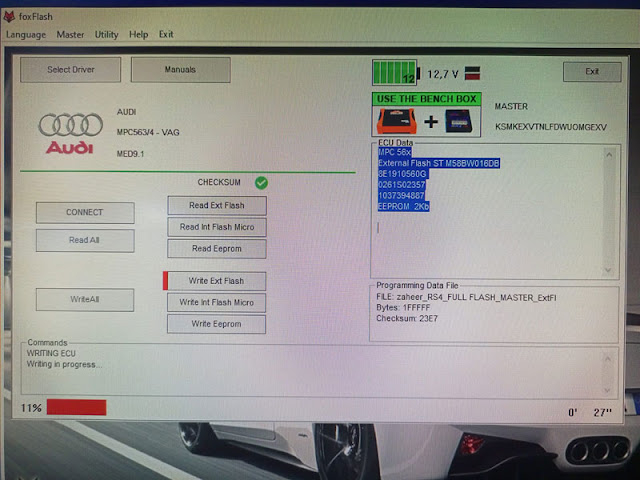
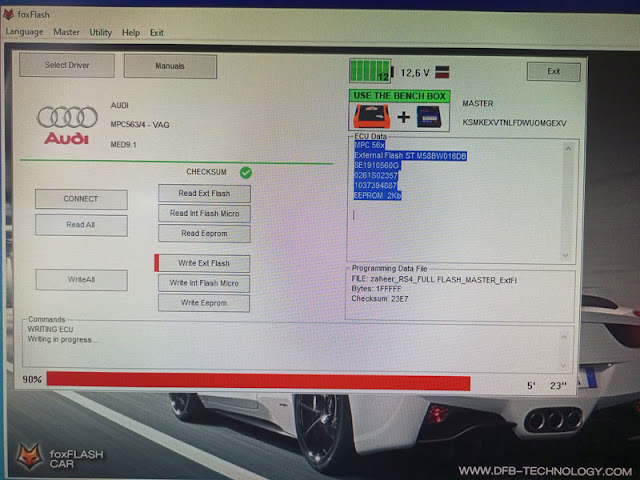
Successfully cloned the Audi ME9.1 ECU withfoxflash programmeron bench.
Read ext flash, int flash and eeprom and write all three.
Don’t wite all in one or better to do it separately.
Pinout BOSCH MED9.1 [MPC561/2] – Audi, Vw, Seat, Skoda [Gasoline]
To read and write use the following driver:
→ BENCH MODE
→ [brand]
→ MPC561/2 – Vag
→ MED9.1
Pinout BOSCH MED9.1.x [MPC563/4] – Audi, VW, Seat, Skoda, Porsche [Gasoline]
To read and write use the following driver:
→ BENCH MODE
→ [brand]
→ MPC563/4 – [brand]
→ MED9.1.x
Example:
Successfully cloned the ME9.1 MPC563/4 byfoxflash.
Ext flash, Int flash and eeprom written with checksum OFF.
The car started perfectly.
Posted by: jean at
08:27 AM
| No Comments
| Add Comment
Post contains 114 words, total size 7 kb.
March 03, 2023
What is the difference between Launch X431 Pro5 and the PAD VII?
Check table comparison below:
| Item | Launch X431 Pro5 | Launch X431 PAD VII |
|
|||
| Screen | 10.1-Inch 1920×1200 FHD IPS 1920 x 1200 |
13.3 inch capacitive screen,1920*1080 | ||||
| Operating System | Android 7.0 | Android9.0 | ||||
| Processor | 1.8GHz + 1.8GHz 8A-CORE |
2.0GHz Octa cores | ||||
| Memory / RAM | 65G / 4GB RAM | 256GB/8GB | ||||
| Battery | 7,000 mAh | 19000mAh | ||||
| Camera | 8MP Rear / 5MP Front | Front 8mp, Rear 13mp | ||||
| Connection | Bluetooth , Wifi(2.4GHz /5GHz) | Bluetooth,Wifi (5G WiFi) | ||||
| VCI | Smartbox 3.0 | Smart Link C
3-in-1 SmartLink C Device: Work as VCI to obtain vehicle data; Provide dual diagnostic modes; Act as a J2534 programming device.
|
||||
| IP65 waterproof & dustproof | Yes | |||||
| IP limitation | Global Version without IP Blocking | Global Version without IP Blocking | ||||
| Language | English,Simplified Chinese, Traditional Chinese, German, Japanese, Russian, French, Spanish, Portuguese, Polish, Turkish, Dutch, Greek, Hungarian, Arabic, Danish, Korean, Persian, Serbian, Finnish, Swedish, Czech, Italian | English, German, Italian, French, Spanish, Portuguese, Chinese, Korean, Turkish, Swedish, Japanese, Polish, Czech, Russian, Dutch, Thai, Finnish, Danish, Romanian, Arabic, Persian,Hebrew,Croatian | ||||
| Protocols | CAN/CANFD/DoIP 2534/D-PDU/RP1210 | CAN/CANFD/DoIP 2534/D-PDU/RP1210 | ||||
| Supported car brands | 99% brands | 99% brands (up to 200 brands) | ||||
| Full-system Diagnostic | Yes | Yes | ||||
| Active Test | Yes | Yes | ||||
| Auto VIN | Yes | Yes | ||||
| Scan VIN/licnese | Yes | Yes | ||||
| Remote Desk | Yes | Yes | ||||
| Repair Assist | GUIDED PROCEDURES WITH DTC ANALYSIS & FAULT CODE SOLUTIONS | GUIDED PROCEDURES WITH DTC ANALYSIS & FAULT CODE SOLUTIONS | ||||
| Actuation Test | Yes | Yes | ||||
| Topology Module Mapping | COLOR CODED ALL SYSTEM STATUS SCREEN ON SUPPORTED VEHICLES |
COLOR CODED ALL SYSTEM STATUS SCREEN ON SUPPORTED VEHICLES |
||||
| Secure Gateway Access | AUTHORIZED FCA ACCESS WITH AUTOAUTH ACCOUNT |
AUTHORIZED FCA ACCESS WITH AUTOAUTH ACCOUNT(How to access FCA Autoauth) |
||||
| Vehicle Diagnostics | PASSENGER / LIGHT DUTY SOME MEDIUM DUTY/Optional Heavy duty |
PASSENGER / LIGHT DUTY SOME MEDIUM DUTY/Optional Heavy duty |
||||
| Basic & Special Functions | American, ASIAN & EUROPEAN 1996 AND NEWER |
American, ASIAN & EUROPEAN 1996 AND NEWER |
||||
| Service Reset Functions | 21 SERVICE FEATURES | 33special functions | ||||
| Component Activations | BI-DIRECTIONAL CONTROL | BI-DIRECTIONAL CONTROL | ||||
| Smartlink remote diagnosis | Yes | |||||
| Online Programming | Benz | Yes | Yes | |||
| BMW | Yes | Yes | ||||
| VAG | X | Yes | ||||
| Porsche | X | Yes | ||||
| Land rover | X | Yes | ||||
| Jaguar | X | Yes | ||||
| Renault | X | Yes | ||||
| Nissan | X | Yes | ||||
| Subaru | X | Yes | ||||
| Infiniti | X | Yes | ||||
| Hyundai | X | Yes | ||||
| Kia | X | Yes | ||||
| Online
Parameterization |
VW | X | Yes | |||
| Audi | X | Yes | ||||
| Online Coding | Mercedes (SCN) | Yes | Yes | |||
| BMW | Yes | Yes | ||||
| VAG | Yes | Yes | ||||
| Porsche | Yes | Yes | ||||
| Renault | No | Yes | ||||
| Offline Programming | Ford | Yes | Yes | |||
| Mazda | Yes | Yes | ||||
| Vauxhall | Yes | Yes | ||||
| Opel | Yes | Yes | ||||
| Flash Hidden Function | Benz | Yes | Yes | |||
| BMW | Yes | Yes | ||||
| VAG | Yes | Yes | ||||
| Porsche | Yes | Yes | ||||
| Jeep | Yes | Yes | ||||
| Dodge | Yes | Yes | ||||
| Chrysler | Yes | Yes | ||||
| Toyota | Yes | Yes | ||||
| Honda | Yes | Yes | ||||
| Repair Data | Benz | X | Yes | |||
| BMW | X | Yes | ||||
| VW Audi | X | Yes | ||||
| Porsche (11-) | X | Yes | ||||
| Online FFS Activation VW/Audi | No | Yes | ||||
| Add-on Tools | ||||||
| ADAS | Yes, with ADAS kit | Yes, with ADAS kit | ||||
| TPMS Programming | Yes, with TSGUN add-on | Yes, withTSGUN add-on | ||||
| Expandable heavy-duty truck module (HD Module) | Yes, if purchase truck software kit | Yes, if purchasetruck softwarekit | ||||
| VideoScope | With optional VSP-600 | With optionalVSP-600 | ||||
| IMMO Programmer | With optional X-prog3 | With optionalX-prog3 | ||||
| Battery Tester | With optional BT506 battery tester | With battery testerbst360 | ||||
| Wi-Fi Printer | Yes | Yes | ||||
| Endoscope | Yes,optional S2-2 SensorBox | |||||
| Oscilloscope | Yes, optional O2-1 ScopeBox, Oscilloscope | |||||
| Other Function | ||||||
| OBD PIN Detection | Yes Detect the vehicle protocols and OBDII pin voltage status to help technicians judge the OBD2 interface. | Yes Detect the vehicle protocols and OBDII pin voltage status to help technicians judge the OBD2 interface. | ||||
| Repair database | Thru "X-431 FIX” function, need purchase license from Mall
|
|||||
| Tesla Diagnostic | Yes (Purchase in the Mall) | Yes (Purchase in the Mall) | ||||
| Australian Ford and Holden | Yes | Yes | ||||
| Brazilian cars | BRAZIL FIAT, BRAZIL GM, etc. | BRAZIL FIAT, BRAZIL GM, etc. | ||||
| Indian cars | TATA ,MARUTI, MAHINDRA | TATA ,MARUTI, MAHINDRA | ||||
| Malaysian cars | PROTON, PERODUA | PROTON, PERODUA | ||||
| Software Updates | 2 Years Free Update Online,1 Year subscription is $450/year. | 2 Years FREE,$569/year later | ||||
Note: The add-on tools are sold separately.
In Sum:
- PAD VII has better hardware, larger RAM ROM.
- X431 Pro5newly add BMW and Benz online programming in 2023, but only do BMW and Benz (How to activate Pro5 online programming), PAD VII will do online programming for more brands, Jaguar, Nissan, Renault, Land rover, Subaru, Hyundai, Infiniti, Kia, Porsche.
- PAD VII will do VW, Audi online Parameterization and Renault online coding, Pro5 cannot.
- They have similar add-on modules, PAD VII supports additional Endoscope and Oscilloscope add-on, Pro5 does not.
- X-431 Fix database has added to the X-431 PAD VII global version device, Pro5 does not.
- Pro5 yearly subscription is cheaper thanPAD 7.
Related reading:
Launch X431 Series Scanners Comparison
Posted by: jean at
07:13 AM
| No Comments
| Add Comment
Post contains 769 words, total size 16 kb.
March 02, 2023
OBDSTAR DC706TCU programmer released new software V30.04 adds following transmission gearbox TCU read and write.
Highlights
• Add CADILLAC, CHEVROLET, GMC T87 TCM read/ write INT flash;
• Add AUDI, SKODA, VW DQ380 TCM read/ write MAPS/INT eeprom/INT flash;
• Add 8HP TCMread/ write MAPS/ INT eeprom/INT flash for below models:
■ ALFA ROMEO
■ ALPINA
■ ASTON MARTIN
■ AUDI
■ BENTLEY
■ BMW
■ CHRYSLER
■ DODGE
■ GREAT WALL
■ IVECO
■ JAGUAR
■ JEEP
■LAMBORGHINI
■ LAND ROVER
■ MASERATI
■ MAN
■ PORSCHE
■ ROLLS ROYCE
■ IVECO
■ VW
• Add BMW, MINI, RENAULT 7DCT300 TCM read/write MAPS/ INT eeprom/ INT flash;
• Add AUDI, SEAT, SKODA, VW DQ500 BOSCH TCM read/ write MAPS/ INT eeprom/ INT flash;
• Add BENZ, NISSAN VGS NAG3(9G TRONIC)TCM read/ write MAPS/ INT eeprom/ INT flash.
Posted by: jean at
06:20 AM
| No Comments
| Add Comment
Post contains 146 words, total size 2 kb.
32 queries taking 0.2165 seconds, 185 records returned.
Powered by Minx 1.1.6c-pink.














![Pinout BOSCH MED9.1 [ MPC561/2 ]](https://blogger.googleusercontent.com/img/b/R29vZ2xl/AVvXsEiHkwo-mTX-soFlKbLu4_-VETFU_9_jlDUvDJU79jknQiiYZmwxFskhdRBXeoTnoiOnMcBqGafjR7ylIyPwfc5FkPXTfb2tZpjfjdGm_lR7drzjBB0kbfwKFDemFm52yynOG9UBFLRtwupWCvraTKsbclkYEb6nIGo-tCHqEd4MsA3SAw8_aHxMk8ri/w640-h250/foxflash%20med9.1%20bench%20pinout%201.jpg)
![Pinout BOSCH MED9.1.x [ MPC563/4 ]](https://blogger.googleusercontent.com/img/b/R29vZ2xl/AVvXsEhPzirSKL_S03v6--19GD7eHM3bfNHtg_hL5dVnAp5RPYmr8lzLkfDND3DA3GLmZUHWjJ7LekXg9YKchBBsfHixc01THnv3Ip2QlyaDsVT5y_K_Jeo9RR76ec9IHhWXEXFcoVf2fWR57HAyLdq9vS7z5Kaz6COPOUsS9WmHKRu6vvrxYgSklHDRfeTe/w640-h250/foxflash%20med9.1%20bench%20pinout%202.jpg)
