


September 08, 2023
oyota Techstream V18.00.008 software was tested working withLaunch X431 SmartLink CJ2534 passthru device.
First of all, download and install SmartLink C J2534 driver here
http://blog.obdii365.com/2023/04/12/download-launch-x431-smartlink-c-j2534-passthru-driver/
then download and install Techstream 18.00.008
http://blog.obdii365.com/2023/02/01/free-download-toyota-techstream-v18-00-008/
Run J2534Plus passthru check device is connected

Run techstream software, go to VIM Selection, select VCI as J2534Plus


Software is ready to use


Posted by: jean at
06:50 AM
| No Comments
| Add Comment
Post contains 65 words, total size 7 kb.
September 07, 2023
Is it possible to transfer installed modules for acdp 1 to a newyanhua acdp 2unit?
Yes, users can transfer old modules to new ACDP 2.
How to Transfer Modules:
Plan A- License transfers
Transfer all license from ACDP-1 to ACDP-2 and delete ACDP-1
(ACDP-1 cannot be used any more)
$69
Plan B Shared license
Share all ACDP-1 license with ACDP-2
After license sharing, both ACDP-1 and ACDP-2 can use the shared license at the same time.
Cost will be35%of the total amount of shared module official price.
Send ACDP-1 SN to obdii365.com to check license price.

ACDP2Module 18,19,25and30have different interface board, you need to purchase corresponding new modules separately for ACDP 2.
If don’t want to buy new modules, just make a little modification on the adapter of old modules.
cut off the protruding plastic and part on old interface board like image below

FYI:
Yanhua tech has modifiedACDP2BMW program, BMW bench interface boards are compatible with ACDP2 now.
They are modifying the module 15 App, so it will be soon compatible with ACDP2. Don’t need to purchase a new module 15.
Posted by: jean at
05:54 AM
| No Comments
| Add Comment
Post contains 192 words, total size 4 kb.
September 06, 2023
How-to: program Porsche Cayenne 2011-2017 5M48H key withLaunch X431 IMMO Plus/IMMO Elitewith X-prog3.
Connect IMMO tablet with x-prog3 programmer
Step 1: Read IMMO Data
Select Porsche software->IMMOBILIZER function->Cayenne->2011-2017->Read IMMO Data->5M48H


Check wiring diagram
Follow wiring diagram to connect 5M48H immo module with x-prog3 (need to remove component)


Backup EEPROM Data


Step 2: Generate Dealer Key
Select Generate dealer keys
Upload eeprom data read in step 1


Place the new key into x-prog3 programmer


Select an unused key position to generate key
Generate dealer key completed.

Step 3: Learn key
Select Learn keys
All keys should be learned.
Turn on emergency indicators
Upload eeprom data again
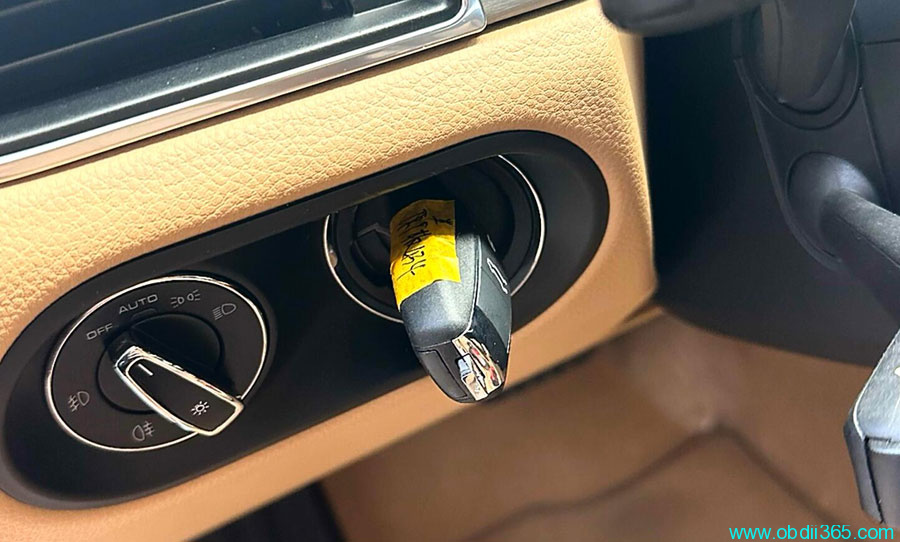
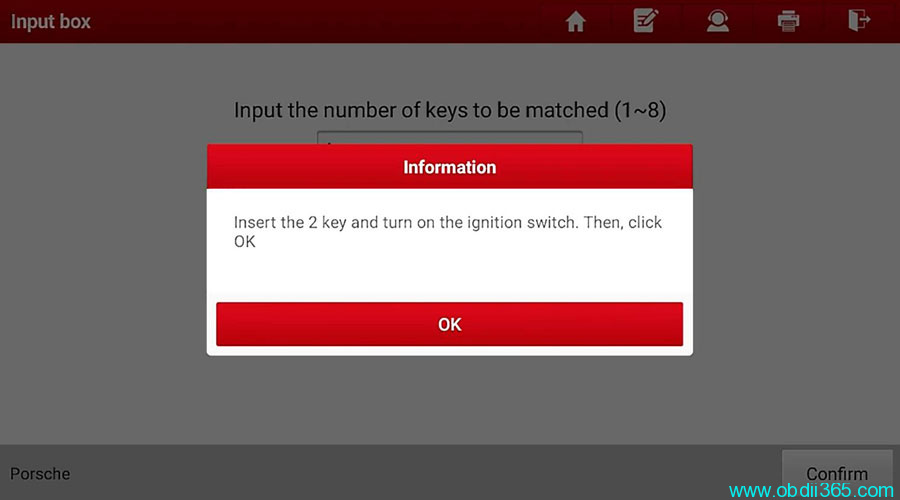
Input number of keys need to learn: 2

Insert original key and turn on ignition switch

Insert new key and turn on ignition switch.

You will see 2- keys learned on dashboard.

Posted by: jean at
08:52 AM
| No Comments
| Add Comment
Post contains 147 words, total size 19 kb.
September 05, 2023
As titled, how to activate Motorcycle software in Launch x431 diagnostic tools? Here is the clue.
Compatible devices:
Launch X431 V,X431 V+,Pros V1.0,PROS V5.0,Pro3s+,Pro5, PAD V,PAD VIIetc
Supported Motorcycle brands:
BMW
Harley Davidson
Honda
Kawasaki
Suzuki
Yamaha
How to Activate Motorcycle Software?
Purchase each Motorcycle diagnostic software in "Mall”
BMW Motor $44.6
Harley Davidson Motor $44.6
Honda Motor $44.6
Kawasaki Motor $44.6
Suzuki Motor $44.6
Yamaha Motor $44.6

To diagnose Motorcycles with Launch X431 you also need extra motor adapters. Euro V and VI motor adapters will be available soon.
Check motorcycle function and coverage here:
https://qcar.x431.com/qcar/#/pc/index?q=e30%3D

For example:
diagnose a Harley Davidson XL1200 Sportster using the X-431 PAD V LINK.


Posted by: jean at
06:59 AM
| No Comments
| Add Comment
Post contains 118 words, total size 5 kb.
September 04, 2023
Launch X431tutorial: How to Enter/Enable Service Mode for Tesla Model 3/Model Y/Model S/Model X.
The benefit of Tesla Secret Service Mode:
Though Service Mode is tailored for technicians or Tesla owners with a deep understanding of their vehicle, it offers a new level of engagement, providing detailed insights that can help troubleshoot, reset, calibrate, and even configure new parts.
Device required:
Launch X431 diagnostic toolPAD VII, PAD V,Pro5,Pros3+etc
Tesla softwareV10.15 and above
X431 App version V7.03.037 and above

*Note:
Tesla software and diagnostic cables need to be purchased separately.
Procedure:
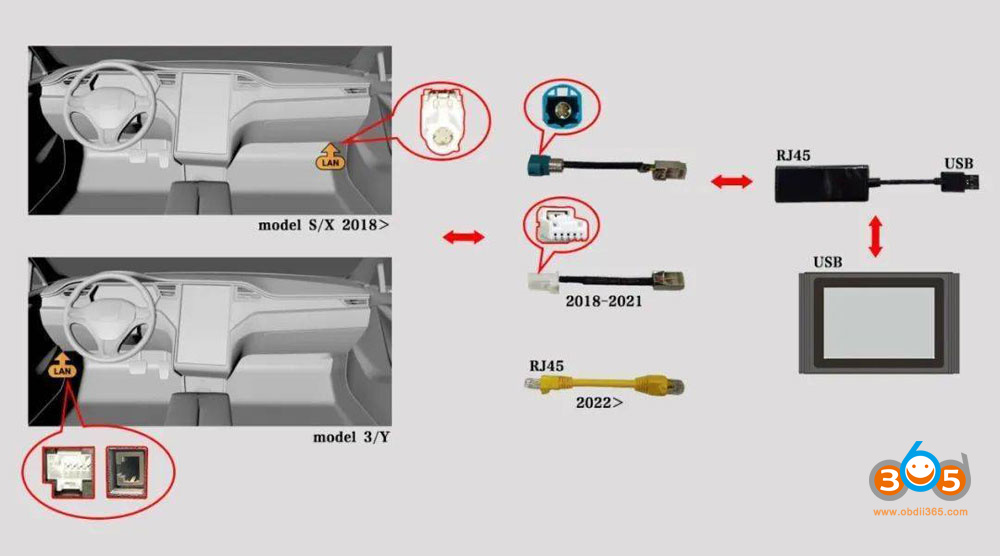
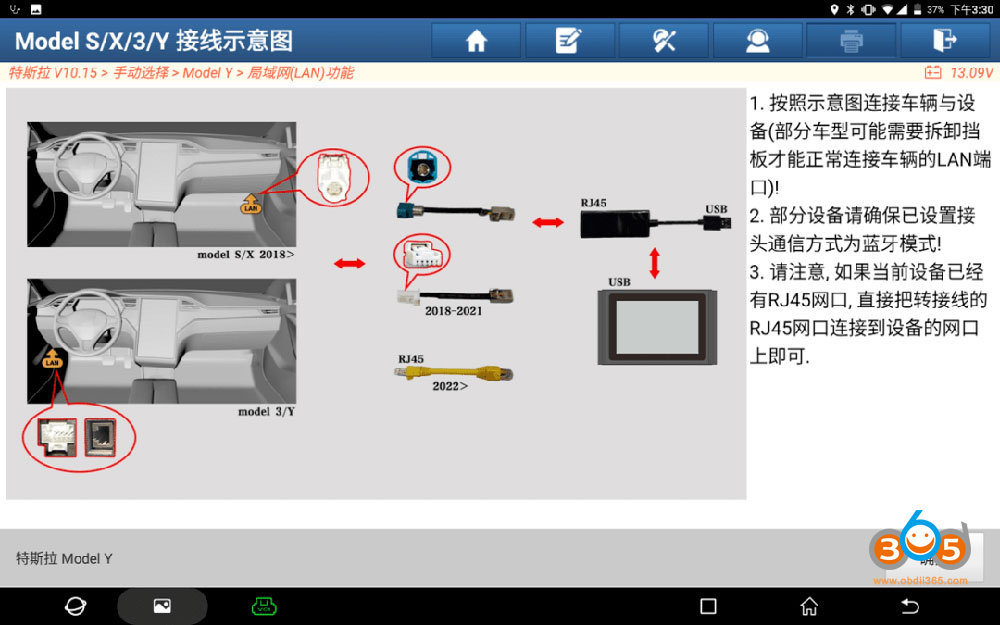
1.Find the vehicle’s LAN port and connect it with the dedicated LAN adapter cable. Generally, the LAN port of Model 3/Y models is on the lower left of the steering wheel; the LAN port of Model S/X models after 2019 is on the lower right front of the co-pilot, as shown below:

▲ Model 3/Y LAN port location

▲ LAN port 5PIN of Model 3/Y before 2022 (need 5 PIN Converter)
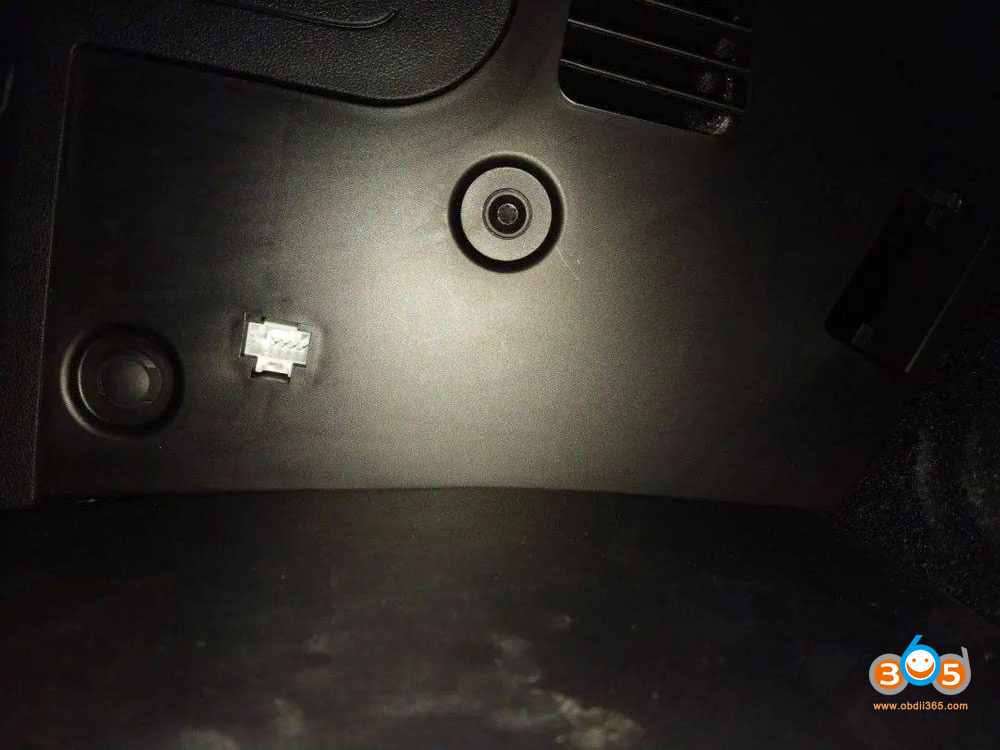
Note: Some models may need to remove the baffle to ensure the normal insertion of the adapter cable, as shown in the figure below:


▲LAN port RJ45 of Model 3/Y after year 2022 (Need RJ45 converter)

▲ LAN port 4 PIN of Model S/X after March 2018 (Need 4 PIN Converter)
2. Connect one end of LAN cables to vehicle, the other end needs to be connected to the RJ45 port to the RJ45 port to the USB converter,and the USB end of the converter is connected to the device, as shown in the figure below:

(Note: Some Launch X431 scanners have RJ45 ports, and the adapter cable can be directly connected to the device).
For other models, check pinouts in Part 4 here
http://blog.obdii365.com/2023/08/31/launch-x431-tesla-adapters-pinouts/
3. Make sure your X431 scanner communication mode is set to Bluetooth mode.
Step 1: Click "Personal Center”-> VCI

Step 2: Click "VCI” more than 8 times, and you will see a hidden menu "Diagnostic Connector Connection Management” will appear.
Step 3: Click "Use Bluetooth communication mode” to set to Bluetooth mode.
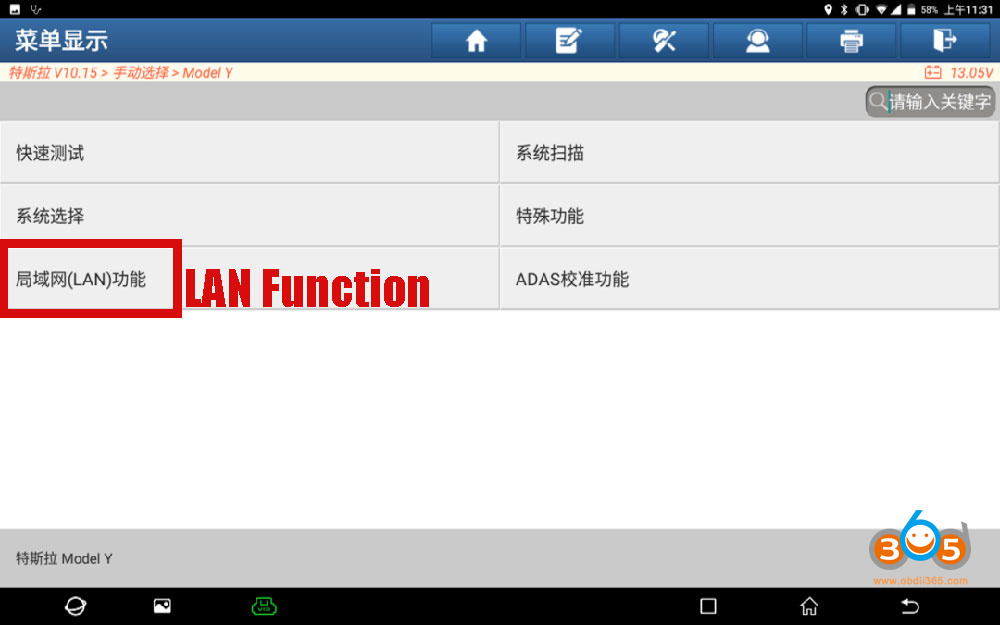
4. Connect X431 scanner with vehicle (insert diagnostic connector of the device into OBD port), turn on ignition switch, select Tesla software-> Manual Selection, select the corresponding model, For example Model Y is selected here, then select LAN function

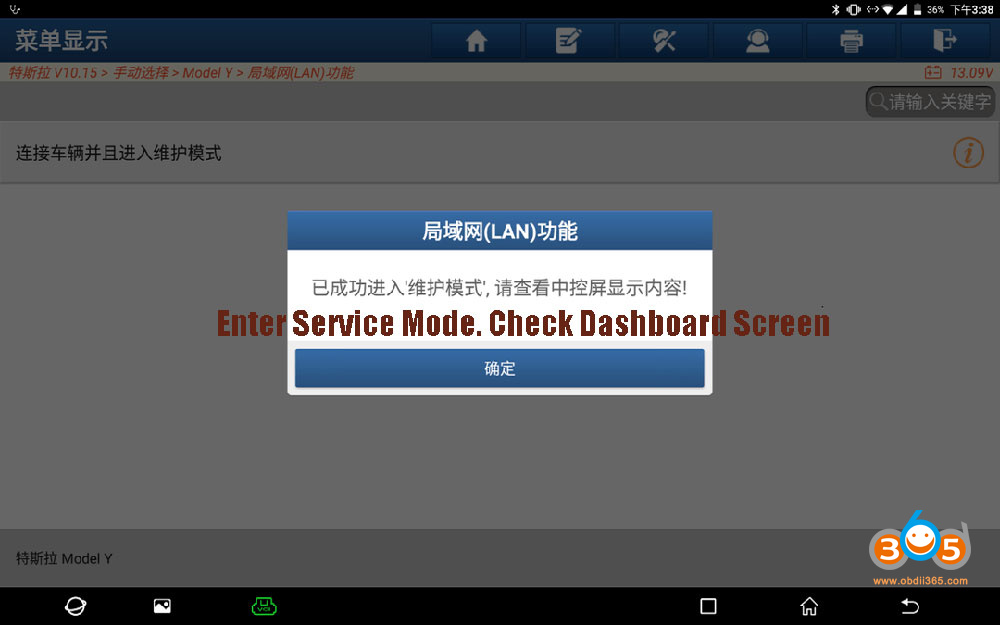
Make sure network is connected, device is set to Bluetooh mode and cable is well connected, press OK to proceed.

Enter Service Mode, check content on your vehicle dashboard screen


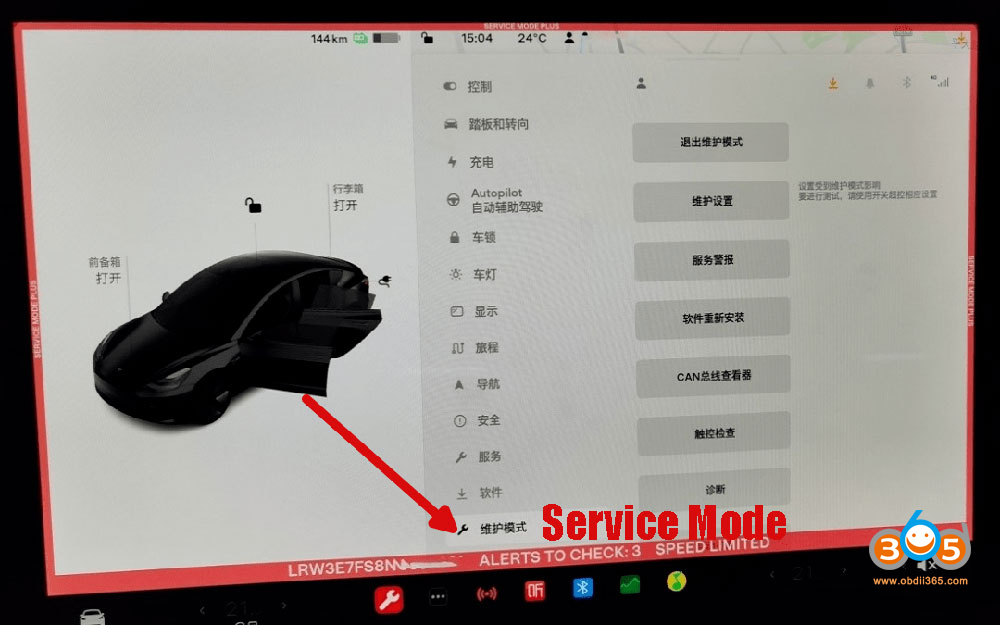
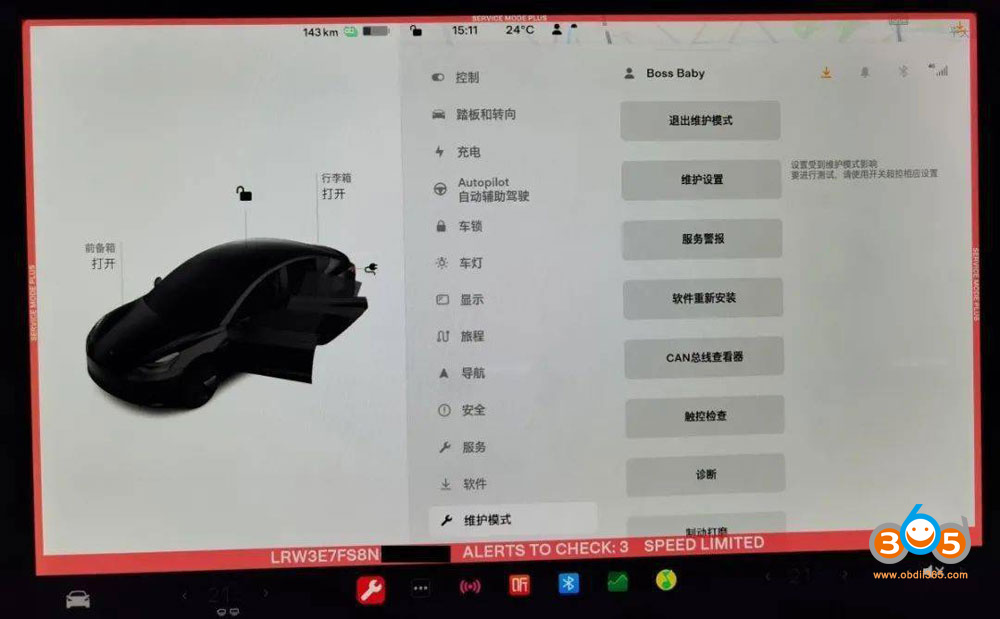
5. After successfully enabling the "Service Mode”, you can see the "Service Mode” on the vehicle’s central control screen, indicating that the vehicle has successfully entered the "Service Mode”, as shown in the figure below:


6.
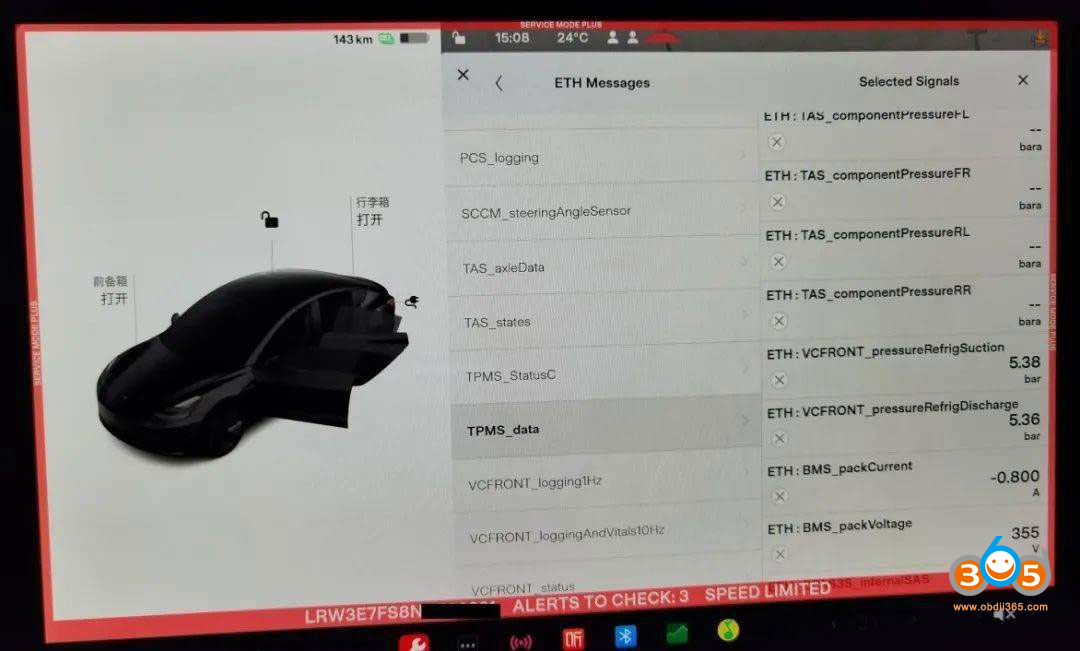
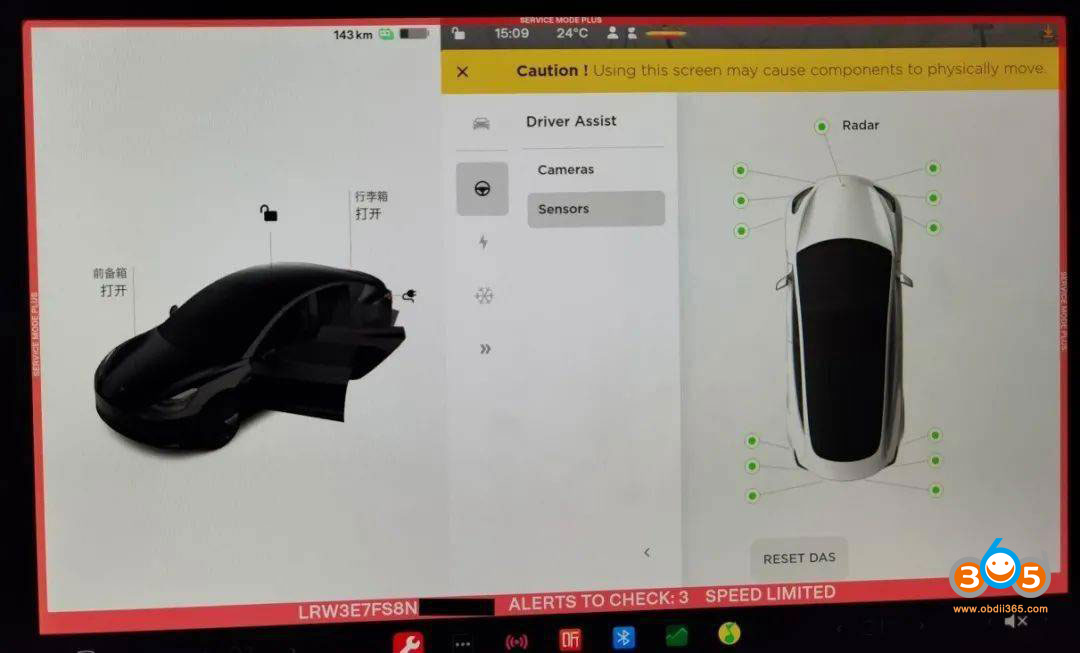
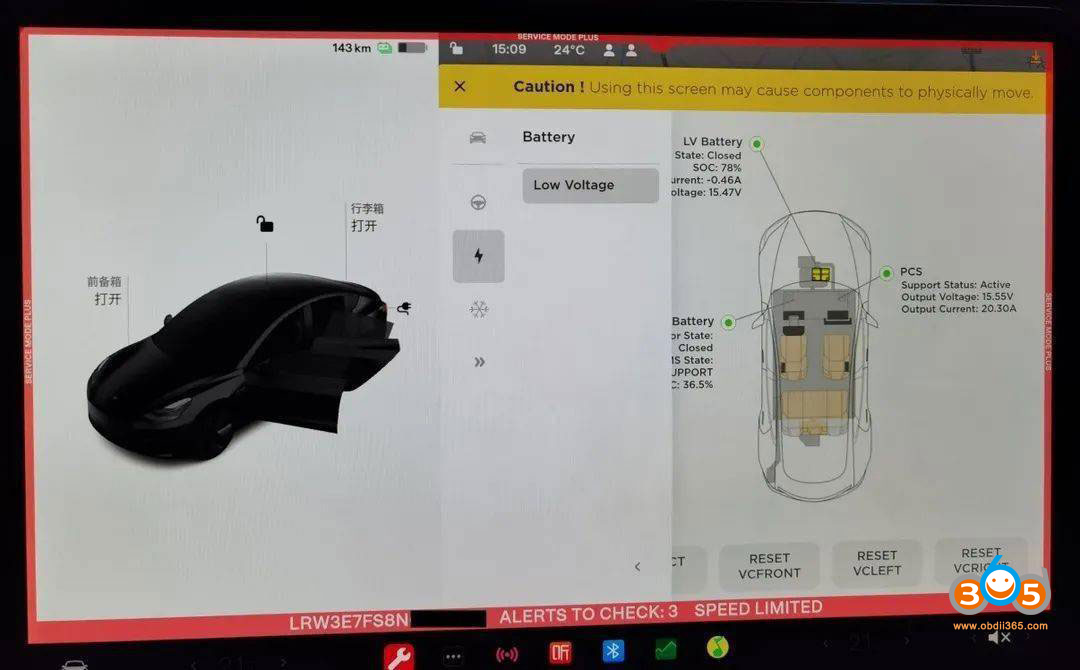
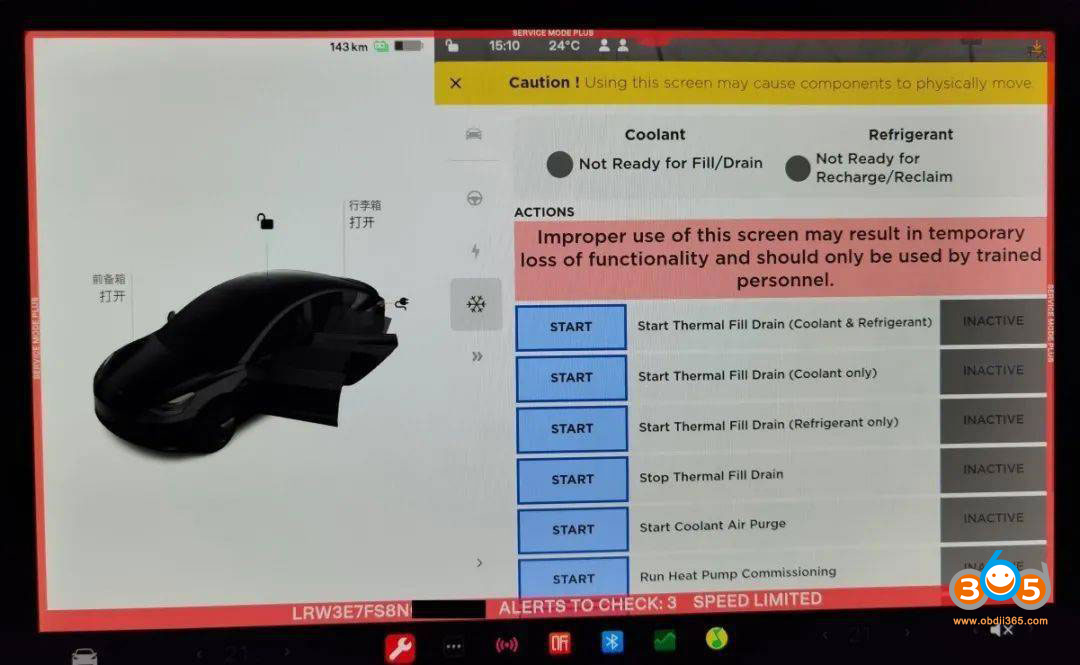
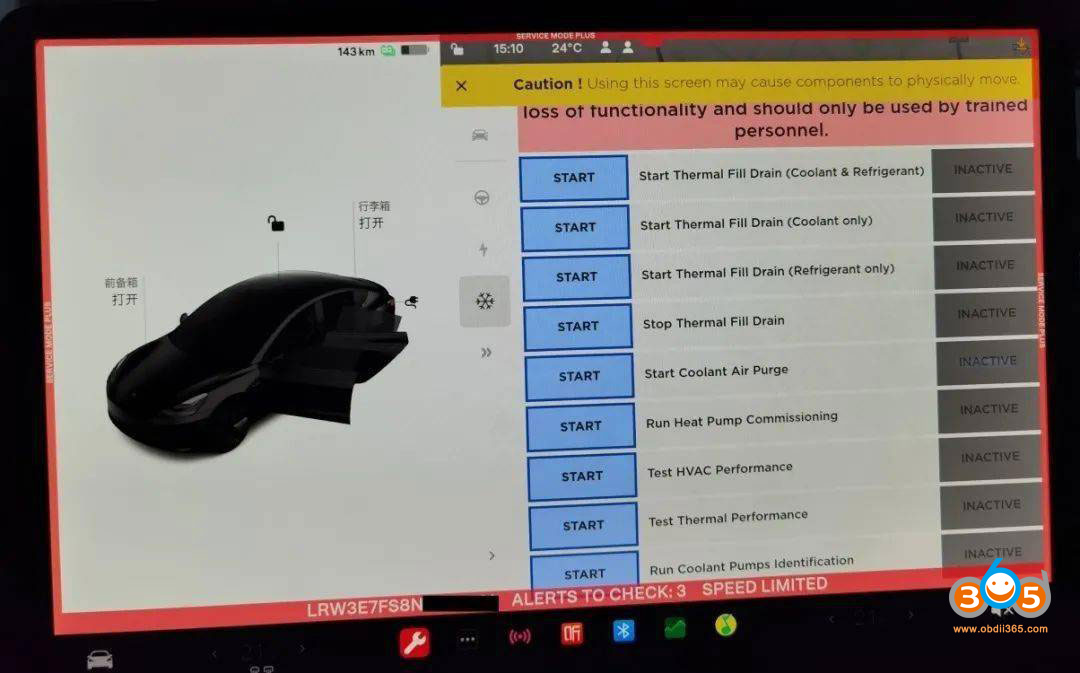
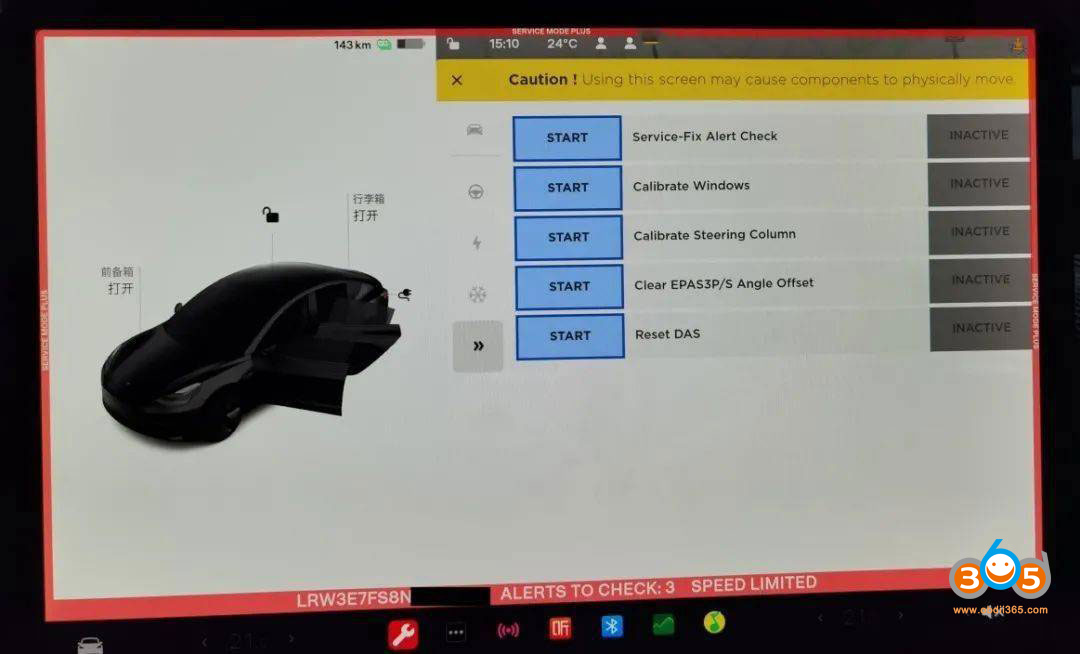
Click the [Service Mode] menu on the vehicle’s dash screen to view vehicle alarm information and some bus data streams, and perform some commonly used special functions, as shown in the figure below:

For example: coolant replacement, steering angle calibration, etc. (For specific special function menus, please check [Service Mode] -> [Diagnostics] on the vehicle screen).

Service Alerts

CAN Bus viewer

Vehicle Information

Driver Assist

Battery menu


Heat control menu

etc
http://blog.obdii365.com/2023/09/03/how-to-enable-tesla-service-mode-with-launch-x431/
Posted by: jean at
06:49 AM
| No Comments
| Add Comment
Post contains 525 words, total size 24 kb.
September 01, 2023
Ford Ka 2013 all keys lost, 2 new keys programmed successfully byLaunch x431 and x-prog3.
Tips to program key to this model:
Ford program doesn’t support this feature, but when you choose Fiat 500, All immo coding can be done, including reading out the PIN code.
Image attached:


Posted by: jean at
06:24 AM
| No Comments
| Add Comment
Post contains 58 words, total size 5 kb.
32 queries taking 0.1552 seconds, 201 records returned.
Powered by Minx 1.1.6c-pink.

