June 30, 2026
How to copy and clone BMW U Chassis BCP key data using theAutel IM608together with theGODIAG BCP Adapter. Follow the complete step-by-step process for reading BCP key data and performing key programming on supported BMW U Chassis vehicles.
The process is straightforward but requires meticulous attention to the tool’s prompts and the physical connections.
Model example: 2024 BMW I7 BCP system
Copy a BCP key using Autel BMW ikey.

Preparing the Vehicle and Tool
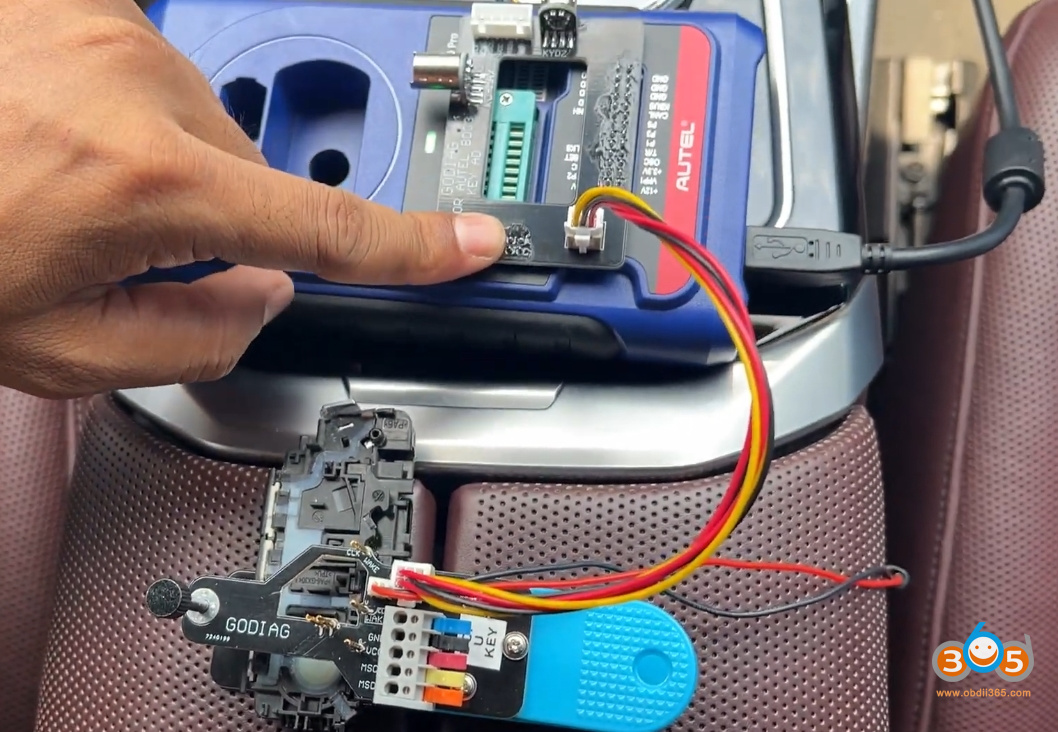
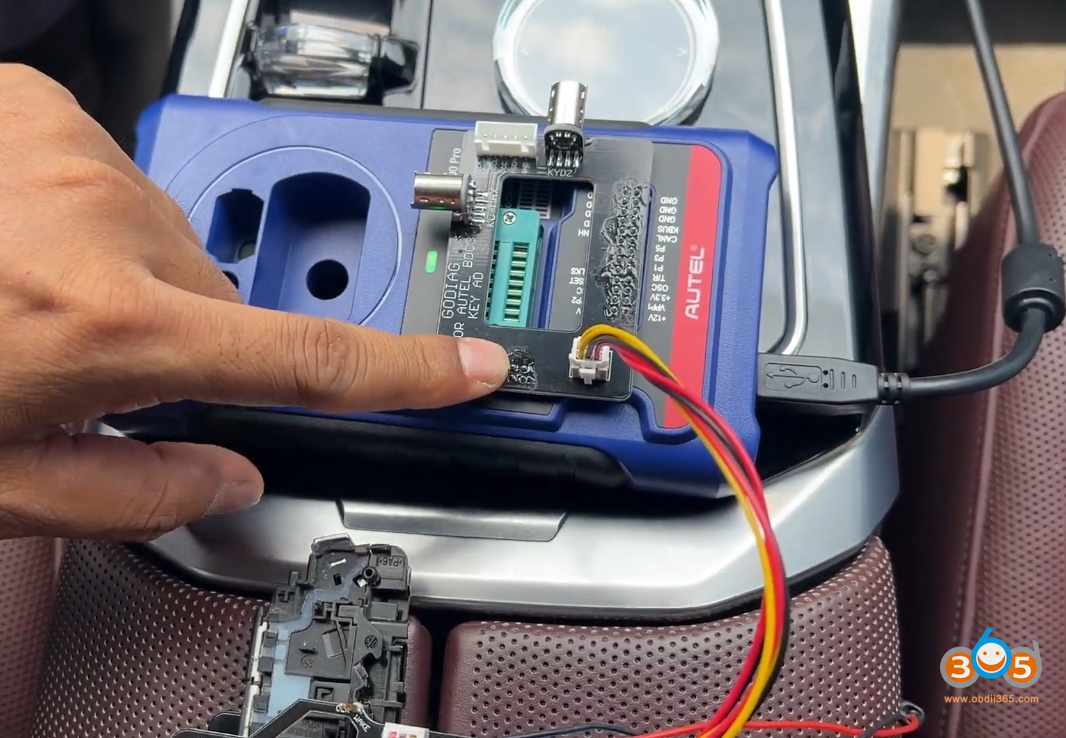
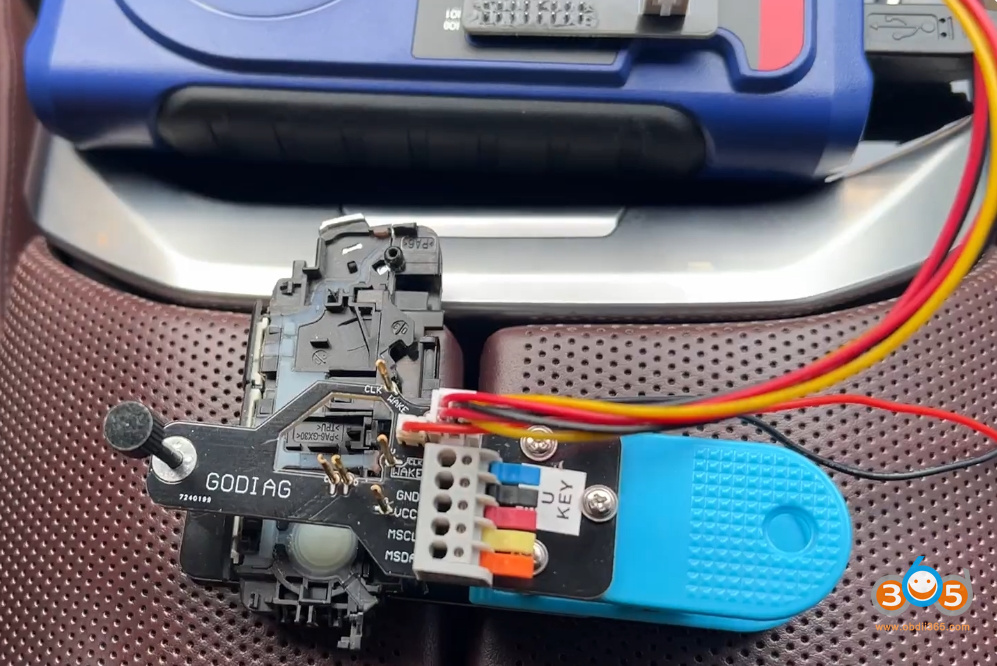
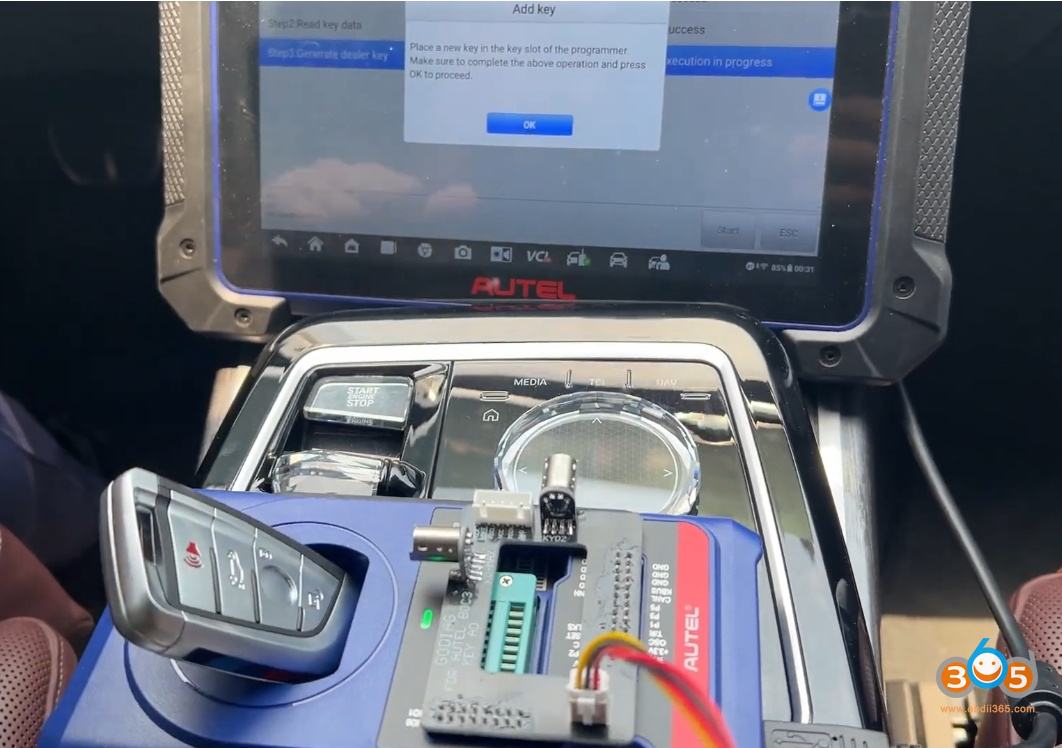
Before diving into the software, connect the BCP adapter with XP400 pro. With the Godiag BCP clip adapter, you don’t need to disassemble the inner key shell. Just dril a hole to the inner key shell and connect the clip with inner key shell according to the points.


Step-by-Step Cloning Process
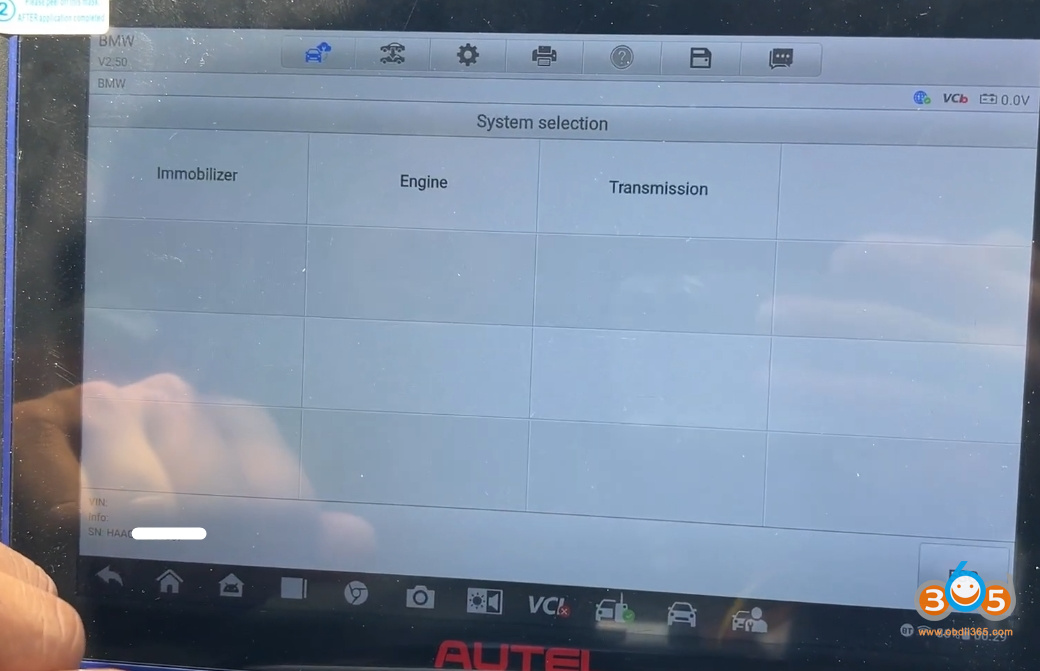
Accessing the BDC Function:On the Autel IM608, Selects the "BMW”, then chooses "System Selection” to allow the tool to automatically identify the vehicle’s system. Then navigates to "Immobilizer” – "BCP Immobilizer” – Key Operation – Add key. Select Encrypted or Unencrypted key type.


Identifying the Vehicle:The tool prompts you to enter the vehicle’s VIN (Vehicle Identification Number). Confirms the VIN and selects the appropriate frequency—in this case, 433 MHz, a common frequency for BMW remote keys.

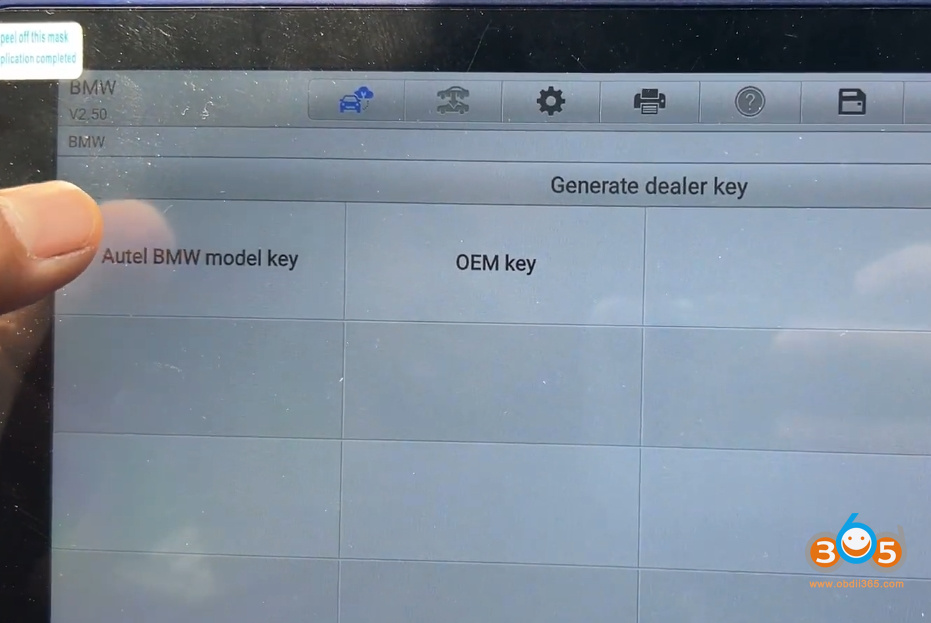
Choosing the Key Type:A crucial decision point appears: must choose between an "OEM key” (likely referring to a master/original key) or a "Autel Key.” In this instance, we chooses the "Autel Key” because he only has a single Autel key available to clone. It is important to note that a Autel key is often a valet or limited-access key. Cloning this type replicates its specific permissions and restrictions.

Generating the Dealer Key:The tool displays a warning: "This function can only generate the Autel key.” After confirming, places the new, blank key into the designated programming slot on the IM608 (or the connected key programmer). Then presses "OK,” and the tool begins generating the key data.
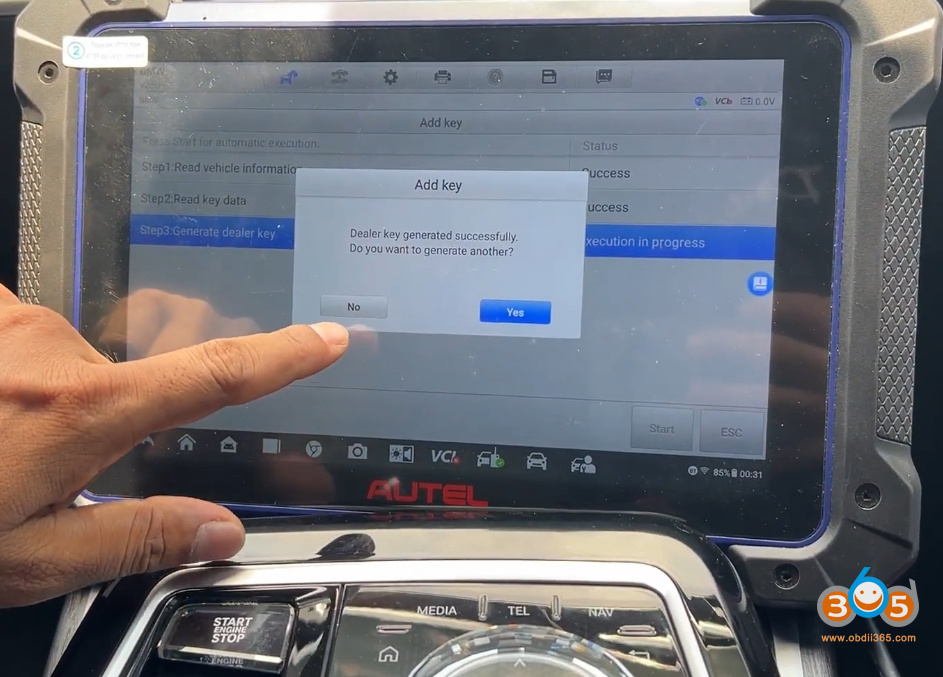
Successful Generation:Within moments, the IM608 displays "Success.” The tool asks if more keys are needed; declines and proceeds.


Verifying the Clone
With the programming complete, the true test is functionality. Takes the newly cloned key and performs a series of checks:
Door Lock/Unlock:open and close the door to test the remote’s locking and unlocking functions. The vehicle responds correctly.
Ignition/Start:Finally, he places the key in the vehicle and starts the engine. The car starts without hesitation, confirming that the clone process was a complete success.
Key Takeaways and Best Practices
Autel vs. Master Keys:Understand the difference between key types. Cloning a Autel key will produce a copy with the same limited access. If you need a master key with full access, you must clone from a master key.
Follow Prompts Exactly:The Autel IM608 provides clear, step-by-step instructions. Rushing or skipping steps—especially regarding physical connections and key placement—can lead to failures.
Verify Before Finishing:Always test all functions (remote locking/unlocking and engine start) before handing the key to the customer.
Conclusion
Cloning keys for newer BMW models is no longer a simple cut-and-program job; it requires advanced diagnostic tools, specific adapters, and a clear understanding of the vehicle’s security architecture. The Autel IM608, combined with the BDC3 adapter, provides a reliable and efficient solution for locksmiths facing these modern challenges.
www.obdii365.com
Posted by: jean at
08:32 AM
| No Comments
| Add Comment
Post contains 548 words, total size 18 kb.
June 29, 2026
The 2026 Toyota Camry presents unique challenges when dealing with an "all keys lost” situation. Here we walk through the complete process of gaining access, bypassing security systems, and programming new keys for this modern vehicle.
2026 Toyota Camry all Keys lost using LONDSOR K518, and Toyota 30 pin bypass cable.
Tools Required
Before beginning, ensure you have the following equipment:
-
10mm socket(or 10mm wrench)
-
Phillips head screwdriver
-
Trim removal wedge
-
Toyota bypass cable(30-pin connectortype)
-
Key Programming tool(Lonsdor K518 ProorAutel IM508recommended)
-
Smart key emulator(Lonsdor or equivalent)
-
Wi-Fi hotspot(for internet connectivity)
-
Flathead screwdriver(for manual door lock manipulation)
Step 1: Accessing the Smart Box Connection
The critical connection point for this procedure is located behind the glove box. Here’s how to access it:
-
Remove the lower trim panel– Grab and pull toward you; it should pop off easily
-
Identify and remove all fasteners:
-
Three Phillips head screws
-
One 10mm bolt
-
Additional screws on both sides of the dash
-
-
Lower the glove box assembly– Once all fasteners are removed, carefully lower the entire assembly
-
Locate the smart box– The connection you need is thetop connectoron the smart box
Pro Tip:When removing the dash components, take note of screw locations for easier reassembly.
Step 2: Disabling the Factory Alarm System
Newer Toyota models (2023+) have an updated alarm system that requires a specific procedure to disable:
The Problem
Older methods of simply turning the door lock actuator with a screwdriver no longer work on 2023+ models. The alarm may still remain active even after manually unlocking.
The Solution – Step by Step:
-
Access the door lock cylinder:
-
Remove the driver’s door lock cylinder
-
Carefully fish it out through the handle (it may be tight)
-
-
Manual unlock procedure:
-
Insert a flathead screwdriver into the actuator
-
Turn to the unlock position
-
Open the driver’s door (alarm will sound)
-
-
The "Newer Method” to disable the alarm:
-
With the door open, turn the lock fromlocktounlock
-
Close the door
-
Turn fromlocktounlockagain
-
The alarm should now be fully disabled
-
Important:This method is essential on 2023+ Toyotas. Failure to properly disable the alarm will result in communication errors with the ECU.
Step 3: Bypass Cable Installation
The 30-pin bypass cable connects the smart box to the OBD port:
-
Disconnect the top connectorfrom the smart box
-
Connect the bypass cableto the smart box’s female port
-
Route the cablefrom the smart box to the OBD port
-
Connect the cable’s OBD endto your diagnostic tool
Note:The male end of the bypass cable connects to the female part of the smart box, and the female part connects to the male part of the connector that came out of the box.


Step 4: IMMO Data Backup
Once the bypass cable is installed and the alarm is disabled:
-
Connect your key programmer(Lonsdor K518 Pro or Autel IM50

-
Select appropriate vehicle menu:
-
If available:Camry HV > 2021 and up
-
If not found (as in this case):Corolla > 2023-2026 – Smart Key System
-
-
Enable hazard lights(some systems require this)
-
Select "Backup IMMO Data”
-
Enter vehicle VINwhen prompted
-
Save the IMMO data filefor use in key generation


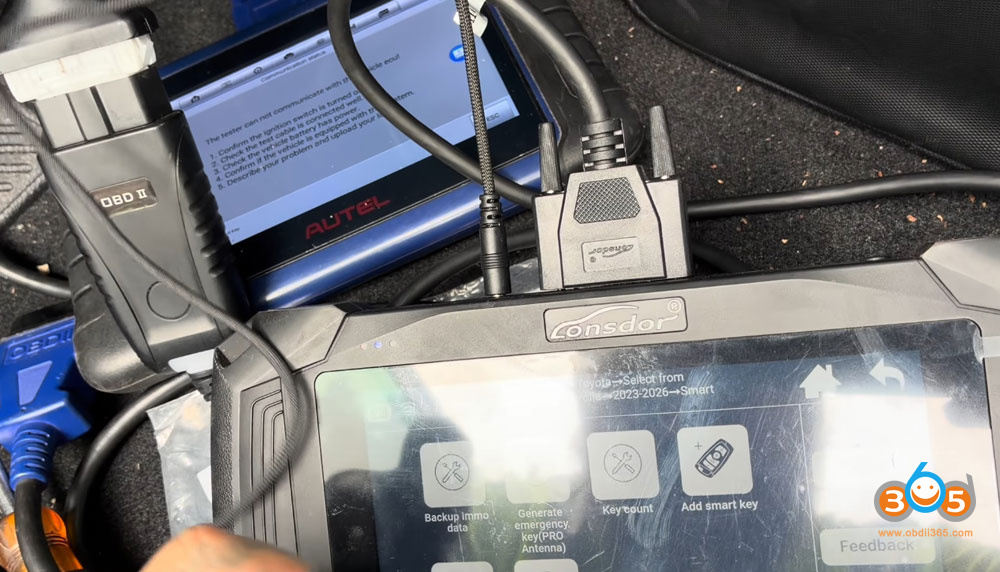
Troubleshooting Communication Errors
If you encounter communication errors:
-
Verify the alarm is completely disabled
-
Ensure the bypass cable is properly connected
-
Try accessing through a different vehicle model menu (e.g., Corolla instead of Camry)
-
Confirm internet connectivity (some functions require online access)
-
Check that the vehicle battery is sufficiently charged
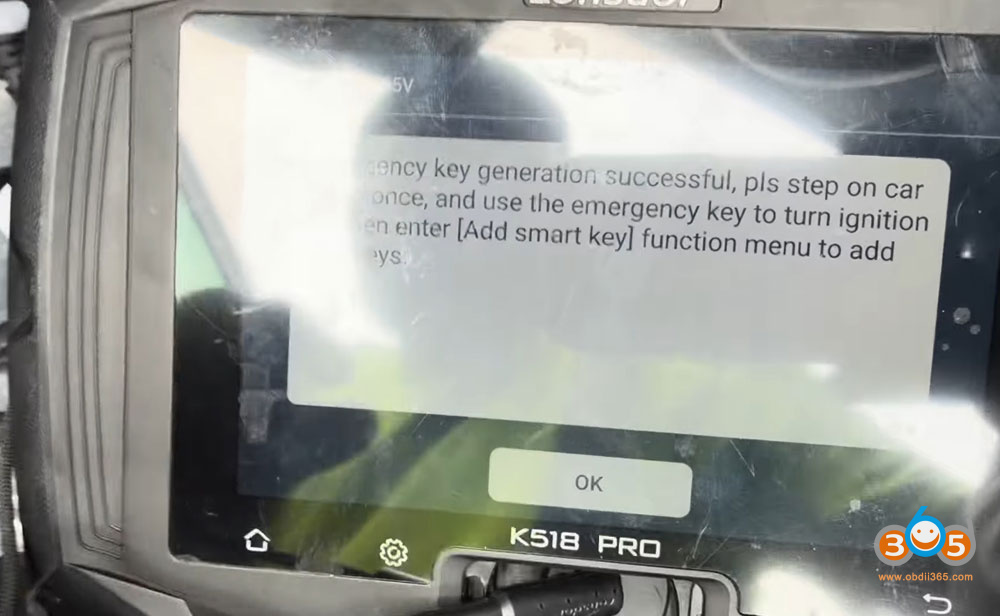
Step 5: Generating the Emergency Smart Key
With IMMO data backed up:
-
Connect the smart key emulator/antennato the programming tool
-
Place the emulator antennain the vehicle’s key detection area
-
Select "Generate Emergency Key”from the tool menu
-
Load the saved IMMO data file
-
Wait for calculationand key generation
-
Test the emergency keyby holding it to the start button
Validation:When successfully generated, pressing the start button with the emergency key should turn on the vehicle’s ignition.

Step 6: Programming the Smart Key
Choosing the Right Key
Two options were tested in this procedure:
Option 1 – Autel Universal Smart Key:
-
Tested with Autel KM100 and Toyota universal keys
-
Frequently encountered compatibility issues
-
AutelToyota ikey only works on Toyota 8A/4Dmodels. It does not work on this 4A key model.
Option 2 – Xhorse Universal Smart Key:
-
More reliable for Toyota applications
-
Successfully generated for the 2026 Camry
-
The preferred choice for this vehicle

Programming Steps:
-
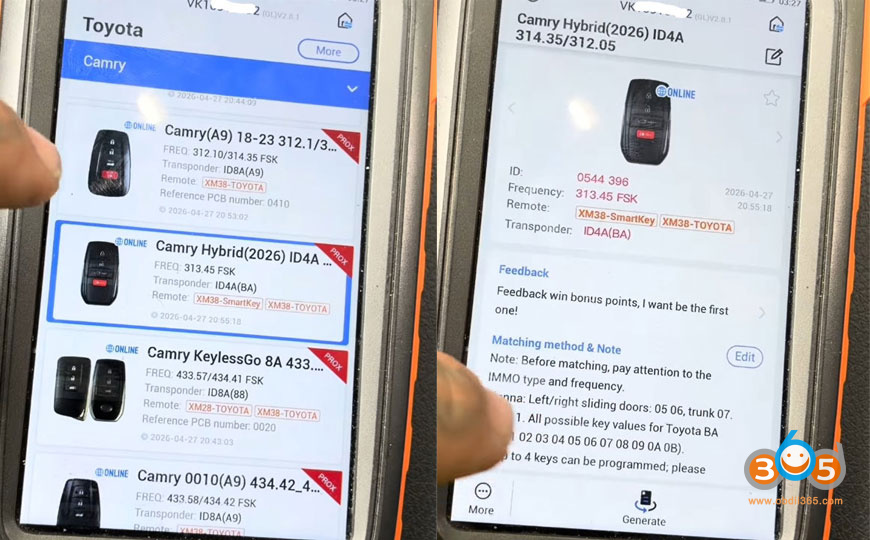
Open your key programming software(Xhorse in this case)
-
Select:
-
Toyota > Camry > Camry Hybrid 2026
-
Generate key
-
-
Wait for 100% completionand select "Complete”
-
Add the smart key:
-
Select "Add Smart Key”
-
Ensure internet connection
-
Verify fully charged battery in vehicle
-
Turn ignition on
-
-
Load the IMMO data:
-
Select "Load D-Flash” or similar option
-
Navigate to your saved Camry 2026 file
-
Allow system to calculate and bypass rolling PIN code
-
-
Key registration process:
-
Hold theregistered keyto the start button (hear one beep)
-
Then hold thenew keyto the start button (hear two beeps)
-
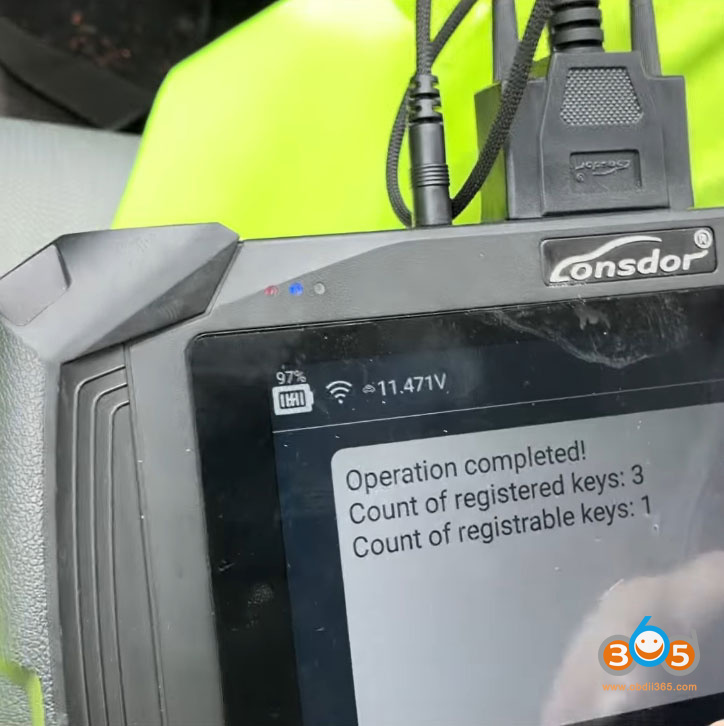
Confirm successful registration (system will show key count)
-
-
Test the new key:
-
Turn ignition off
-
Test lock/unlock functions
-
Test proximity start without holding key to button
-
Press start button twice (without brake) to verify ignition operation
-

Step 7: Emergency Key Cutting
The final step for a complete job:
-
Retrieve the door lock cylinder
-
Locate the key codestamped on the cylinder
-
Punch in the codeto a key cutting machine
-
Cut the mechanical emergency keyfor the customer
Common Challenges and Solutions
Alarm Won’t Disable
-
Ensure you’re using the lock/unlock sequence with the dooropen
-
The sequence must be performed with the door open, then closed
Communication Errors After Alarm Disabled
-
Try different model year menus (2021+ vs 2024+)
-
The Corolla menu may work for Camry systems
-
Check all connections at smart box and OBD port
Key Generation Failures
-
Verify internet connection is stable
-
Ensure correct frequency (this vehicle uses 314-315 MHz)
-
Consider switching from Autel to Xhorse keys
Vehicle Shows Malfunction Errors
-
Common after crash damage (as in this case)
-
Not related to key programming
-
Advise customer of pre-existing issues
Model-Specific Notes
2026 Toyota Camry Hybrid:
-
Frequency: ~314-315 MHz
-
Uses 30-pin connector for bypass
-
Requires specific alarm disable procedure
-
Menu selection may require using Corolla option
Compatibility Notes:
-
2021+ model selection may not work
-
2024+ menus provide correct communication
-
Xhorse keys are more reliable than Autel for this application
Summary of Critical Steps
| Step | Action | Importance |
|---|---|---|
| 1 | Access smart box connector | Essential for bypass |
| 2 | Disable alarm (newer method) | Critical for communication |
| 3 | Install 30-pin bypass cable | Allows OBD access |
| 4 | Backup IMMO data | Required for key generation |
| 5 | Generate emergency key | Verifies communication |
| 6 | Program permanent key | Main objective |
| 7 | Cut emergency key | Complete service |
Final Verification
After completing all steps, verify:
-
Vehicle starts with proximity key
-
Lock/unlock functions work
-
Emergency key operates door
-
No additional warning lights present (beyond pre-existing issues)
Posted by: jean at
08:53 AM
| No Comments
| Add Comment
Post contains 1128 words, total size 20 kb.
June 26, 2026
Problem:
Added a spare key today to 2022 Toyota Kluge / Highlander HV usingAutel IM508salong withAutel universal keyfor Toyota 8A.
Backed up eeprom file via OBD, followed guided add key, and programmed in successfully.
However trunk open button not functioning.
Did eco to immobiliser sync and all other buttons /keyless entry etc working great but need to get trunk button working.
Had same issue recently with a 2023 Rav4 hybrid. Any input?

Solved.
RECTIFIED TODAY BY CONNECTING XP400 BACK UP TO 508s and first reading info off universal key I generated yesterday for 2022 Toyota Kluger / Highlander then updating – changing assigned function for trunk open button from trunk to tailgate
TURNS OUT ELECTRIC TAILGATES IN SUVSV NEED A CONTINUAL 3 TO 4 SECOND SIGNAL WHERAS THE DEFAULT IS TRUNK WHICH ONLY GIVES A SHORT Half second pulse.
Tested and now all smart functions etc working like a genuine one.
Posted by: jean at
08:51 AM
| No Comments
| Add Comment
Post contains 161 words, total size 2 kb.
June 25, 2026
In the rapidly evolving world of automotive diagnostics, choosing the right scan tool can be overwhelming. Two prominent contenders in the mid-level market are the MUCAR 892BT and the Thinkcar Thinkscan 689BT. While they share many similarities—including being manufactured by the same parent company—there's one significant difference that sets them apart: artificial intelligence.

The Key Difference: AI Integration
The MUCAR 892BT distinguishes itself by incorporating AI functionality, specifically the "MU AI" intelligent assistance feature. This isn't just a gimmick; it provides practical, time-saving benefits during real-world diagnostic work.
The Thinkcar 689BT, while an excellent tool in its own right, lacks this AI capability. Given that both tools are similarly priced—with the MUCAR 892BT currently available at a lower cost—the choice becomes clear for most users.
Real-World Performance
What They Share
Both tools offer:
-
Similar physical design with identical button layouts and screen patterns
-
Compatibility with the same vehicles and diagnostic functions
-
Bidirectional controls for testing components
-
Support for add-on accessories like key programmers and oscilloscopes (with future expansion)
-
Free lifetime updates (as long as the company supports the product)
The MUCAR Advantage
The 892BT's AI feature provides several practical benefits:
1. Intelligent Code Interpretation
When you pull a diagnostic trouble code (DTC), the MU AI offers detailed explanations, often including:
-
How the component works
-
Step-by-step troubleshooting walkthroughs
-
Failure level assessments
-
Component location images
-
Wiring diagrams
2. All-in-One Information Hub
Instead of bouncing between your laptop, phone, and the vehicle, the MUCAR allows you to:
-
Access Google searches directly
-
View AI-generated diagnostic guidance
-
See wiring diagrams and component locations
-
Watch YouTube repair videos on the tool itself
3. Time Savings
By consolidating multiple information sources into one device, the MUCAR eliminates the need to constantly move between the vehicle and your computer. This efficiency translates directly to time—and money—saved.
Performance on Different Vehicles
The MUCAR 892BT demonstrates versatility across various makes and models:
Honda Odyssey (2016)
-
Completed a full scan in approximately 90 seconds
-
Identified 4 DTCs across 10 modules
-
Noted low battery voltage issues in the ABS module
GMC Duramax Diesel (2011)
-
Scanned 18 computers and found 40 DTCs
-
Identified fuel level sensor issues
-
Provided diesel-specific functions including DPF regeneration
-
Offered detailed wiring diagrams and sensor location images
RAM 2500 Cummins Diesel (2015)
-
Scanned 19 systems quickly
-
Provided comprehensive diesel functions including:
-
Stationary DPF regeneration (requires up to 80 minutes)
-
Gearbox relearn
-
Turbo actuator calibration
-
Transport mode settings
-
Mazda CX-30 (2021)
-
Scanned 22 modules in under 5 seconds
-
Minor quirk: required manual navigation to Mazda menu before auto-reading VIN
Buick Encore (2022)
-
Included helpful guidance for push-start vehicles (long press start button for 5-10 seconds)
-
Identified antenna signal circuit issues
What You'll Love
Free Lifetime Updates
Unlike many competitors that charge expensive annual subscriptions, the MUCAR offers free software updates for life. This alone can pay for the tool over time.
Magnetic Dongle
The OBD-II connector uses a strong magnet that securely stays in place—a welcome improvement over competitors whose dongles frequently fall out.
Fast Boot Times
The MUCAR powers up quickly, saving precious seconds during each use.
Portable Design
The compact, lightweight tablet can fit in a back pocket, making it convenient for shop or mobile use.
Report Generation
Full diagnostic reports can include AI troubleshooting information, useful for documentation or customer communication.
Limitations to Consider
No tool is perfect, and the MUCAR 892BT has its shortcomings:
Missing Topology View
Unlike some higher-end tools, the MUCAR doesn't display network topology—a visual representation showing which modules communicate with each other. This feature can be invaluable for diagnosing complex communication network issues.
No Built-in Flashlight
A small but practical omission. A light would help when locating the OBD port under dark dashboards.
No Camera for VIN Scanning
Manual VIN entry is still required on some vehicles, though the tool often auto-reads it once you navigate to the correct manufacturer menu.
Limited Module Programming
While the MUCAR supports some programmable module installation, it lacks comprehensive reprogramming capabilities for replacing modules with new ones that need VIN coding. This is common among mid-level tools but worth noting.
AI Not Always Perfect
The AI isn't infallible. In some cases, a simple Google search provided better information than the MU AI. It's still worth checking both sources when troubleshooting.
Final Verdict: Which Should You Buy?
The MUCAR 892BT wins for most users.
Here's why:
-
It has AI featuresthat genuinely assist with diagnostics, providing wiring diagrams, component locations, and troubleshooting guides on the fly.
-
It's currently cheaperthan the Thinkcar 689BT, despite offering additional functionality.
-
Lifetime free updatesmean you won't face expensive annual subscriptions just to keep your tool current.
-
Same core functionalityas the Thinkcar in terms of vehicle coverage, bidirectional controls, and diagnostic capabilities.
-
Future-proofing—even if AI is in its early stages, updates will only improve its capabilities over time.
Who Should Buy It?
-
DIY enthusiastswho want professional-level diagnostics
-
Shop mechanicsseeking a capable secondary or primary mid-range tool
-
Mobile technicianswho value portability and all-in-one functionality
-
Diesel ownerswho need DPF regeneration and other specific functions
-
Anyone tired of subscription feesfor diagnostic software
Who Should Look Elsewhere?
-
Professional shopsrequiring advanced module programming capabilities
-
Technicianswho need topology views for complex network diagnostics
-
Userswho prioritize camera-based VIN scanning
The Bottom Line
TheMUCAR 892BTrepresents excellent value in the mid-level scan tool market. While it has room for improvement—and the AI is still evolving—it offers a compelling package of features, free updates, and practical functionality that makes it a worthy replacement for older tools, including its close cousin the Thinkcar 689BT.
As one mechanic puts it:"The more I can sit there in the driver's seat in the air conditioning of the car and diagnose that car, the better."
If you're looking for a capable, future-ready scan tool without the burden of ongoing subscription costs, the MUCAR 892BT deserves serious consideration.
Posted by: jean at
07:11 AM
| No Comments
| Add Comment
Post contains 966 words, total size 11 kb.
June 24, 2026
In the crowded world of OBD2 scanners, theMUCAR 892BTstands out by offering a compelling package:built-in AI assistance,lifetime free software updates, and a responsive, user-friendly interface. But does it deliver on its promises? After extensive real-world testing on vehicles ranging from a 2000 diesel truck to a modern daily driver, here is the full verdict.
First Impressions & Unboxing
The MUCAR 892BT arrives as a complete kit designed for professional and serious DIY use. Inside the well-organized carrying case, you will find:
-
The 8-inch tablet scanner
-
A wireless Bluetooth VCI (Vehicle Communication Interface) with a strong magnetic back
-
Cables and adapters including: Ethernet for DoIP, USB-A to Ethernet adapter, and a USB-A to C charging cable
-
Multiple plug types for different regions
-
A screen protector and a wall charging brick
The tablet itself feels premium, with a bright, crisp screen and a handy built-in kickstand that easily props up on a steering wheel. Thewireless Bluetooth VCIis a standout feature, allowing you to move freely around the vehicle without being tethered by a cable.


Key Features That Set It Apart
1. Lifetime Free Updates – A Game Changer
One of the biggest selling points is thelifetime free updates. Unlike many high-end competitors that charge hundreds of dollars annually, the MUCAR 892BT lets you download the latest vehicle software at no extra cost.
Important Clarification:If the manufacturer ever stops providing updates, the tool does not become a brick. It will continue to work on all vehicles it already supports. You simply won't be able to diagnose newer models that come out after the update cutoff. This is standard for all scan tools.
2. Built-in AI Assistant
The AI assistant is more than a gimmick. It can answer both car-related and general questions. For example:
-
Ask about a specific trouble code (e.g., P0420) and it provides probable causes and fixes.
-
Ask general questions like "How hot is the sun?" and it pulls up factual information.
This feature is integrated into the diagnostic workflow, making it easy to get quick insights without reaching for a phone or laptop.
3. Dollar Fix Community
The tool includes access to theDollar Fix community—a public forum where users can post questions about their vehicles and get advice from other DIYers and mechanics. This crowdsourced knowledge base can be invaluable for troubleshooting tricky problems.
4. Full Bi-Directional Control & OE-Level Diagnostics
The MUCAR 892BT supportsfull system scanningandbi-directional control, meaning it can both read data and send commands to vehicle actuators. During testing, the reviewer successfully:
-
Activated the blower motor and wipers on a modern GM truck
-
Ran a relative compression test on a 2003 Ford 6.0 diesel
-
Performed cylinder contribution tests on a 7.3 diesel
It coversover 140 car brandsand supports advanced functions likeECU coding,34+ maintenance services(oil reset, ABS bleeding, DPF regen, etc.), and protocols likeDoIPandCAN FD.
Real-World Testing: Diesel Trucks vs. Modern Vehicles
On Older Diesels (2000 F250 7.3L & 2003 F350 6.0L)
-
Auto VIN detection often failson these older trucks (likely due to aftermarket tuners).
-
Manual vehicle selectionworks well.
-
The tool provided comprehensive live data streams (fuel trims, cylinder contributions, etc.).
-
It successfully performed arelative compression teston the 6.0L, identifying a weak cylinder without needing special adapters.
-
Limitations:It did not support advanced injector buzz tests or some specific Powerstroke functions. The reviewer notes that for these older diesels, specialized software likeForScanis still superior.
On a Modern Daily Driver (Newer GM Truck)
-
Auto VIN detection worked flawlessly.
-
The tool identified a massive number of modules (video processing, body control, powertrain, etc.).
-
Bi-directional testswere extensive and worked perfectly—controlling HVAC, wipers, washer pumps, and more.
-
The tool shines brightest on modern vehicles with complex electronic architectures.
The reviewer repeatedly praises thefast and responsiveinterface. The Android-based tablet navigates menus smoothly, and the screen recording feature (built into the tool) makes it easy to capture diagnostics for later review.
Standout Features:
-
Screen Recorder & Screenshots:Useful for documenting issues or sharing with customers.
-
Third-Party Apps:You can install apps like YouTube, Google Chrome, and even games (Candy Crush) directly on the tablet, turning it into a versatile shop companion.
-
Customer Management:Shop owners can store customer info and generate professional health reports with their business logo.
Pros & Cons at a Glance
Pros:
Lifetime free updates
Built-in AI and community forum
Fast, responsive interface
Wireless Bluetooth VCI with magnetic mount
Extensive bi-directional control on modern cars
Supports third-party apps like YouTube
Generous 34+ service functions
Cons:
Some advanced tests (e.g., injector buzz on older diesels) not supported
Auto VIN detection may fail on heavily modified older vehicles
Requires internet connection for some AI and community features
Final Verdict: Is It Worth It?
TheMUCAR 892 BTishands-down the reviewer's favorite scan tool—even over more expensive units. It offers an unbeatable combination of features, speed, and long-term value thanks to the lifetime updates.
Who Is This For?
-
Serious DIYers and enthusiastswho want professional-grade diagnostics without recurring fees.
-
Independent shops and mobile mechanicslooking for a cost-effective, capable tool for modern vehicles.
-
Owners of newer vehicleswho will benefit most from the bi-directional controls and deep module access.
Bottom Line:For under $500, the MUCAR 892BT delivers exceptional value. It's fast, feature-rich, and future-proofed by free updates. If you're in the market for a scan tool that does almost everything without breaking the bank or locking you into expensive subscriptions, this is a top contender.
Posted by: jean at
07:52 AM
| No Comments
| Add Comment
Post contains 893 words, total size 10 kb.
June 23, 2026
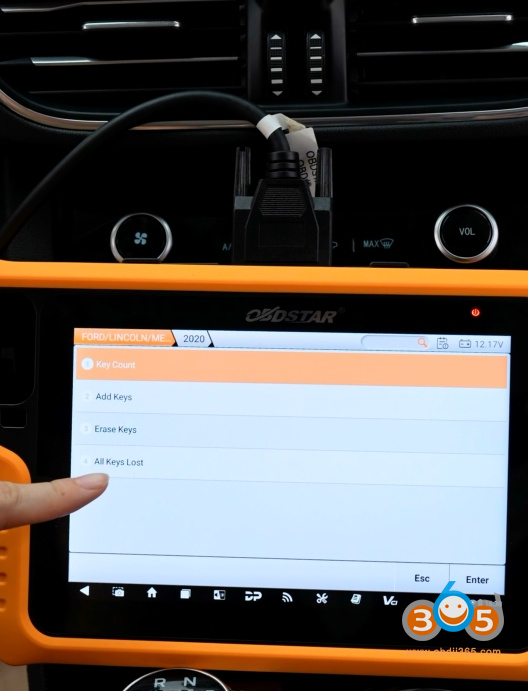
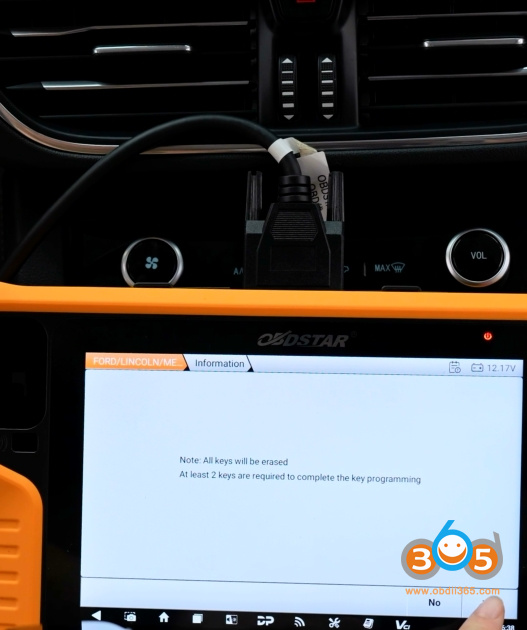
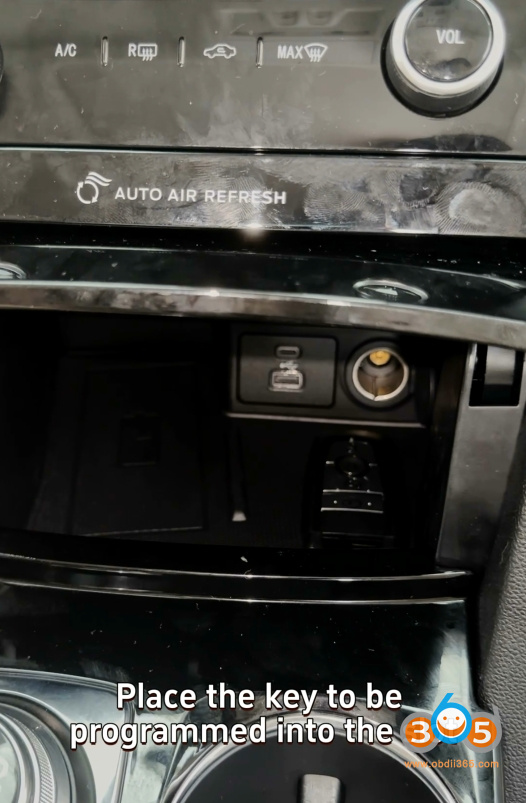
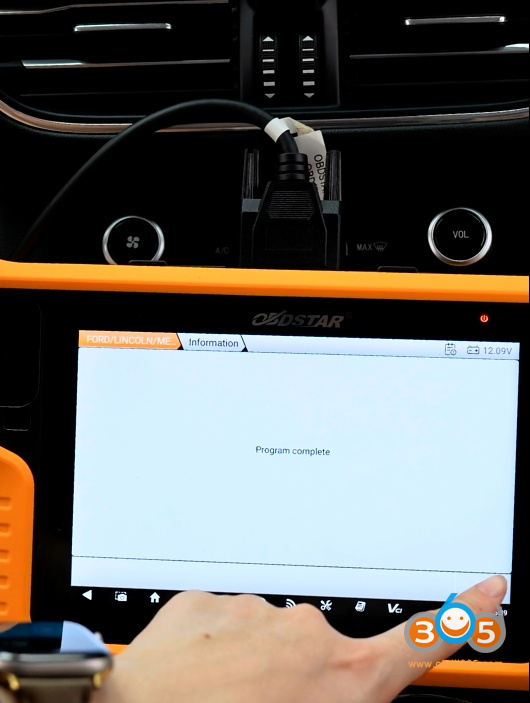
Tutorial: How-to program Ford Escape 2020 all smart keys lost withOBDSTAR X300 Classic G3by OBD.
No bypass cable or 3rd party pin code required.
Requires at least 2 keys to be programmed.
Select Ford- Select by module-Asia- Escape- Proximity- 2020


Read key number.
3 keys existed.


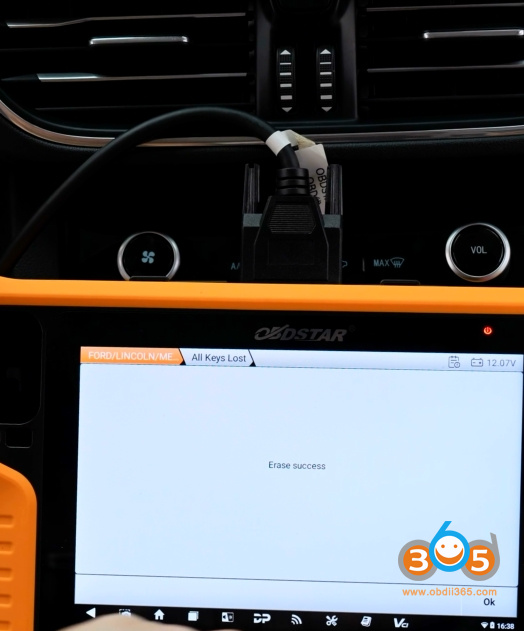
Select All Keys Lost
All keys will be erased.


G3 will ask to switch ignition off, which we don’t actually do.
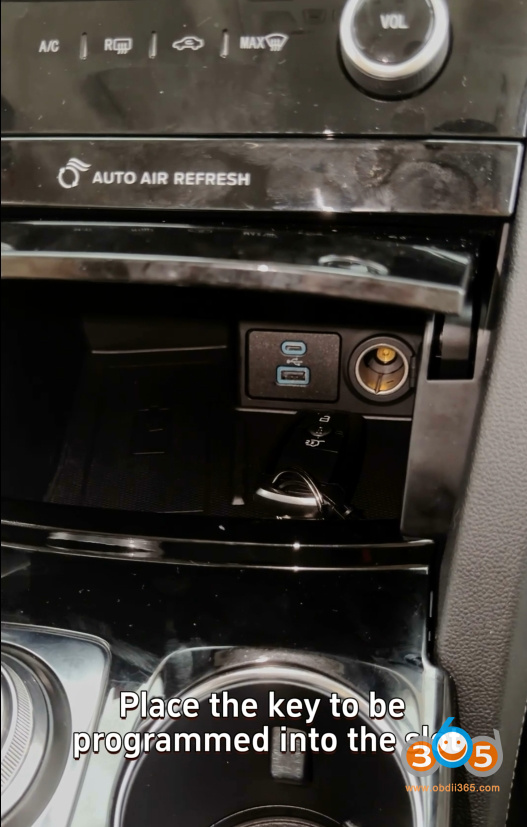
Place the 1st key to be programmed into the slot.
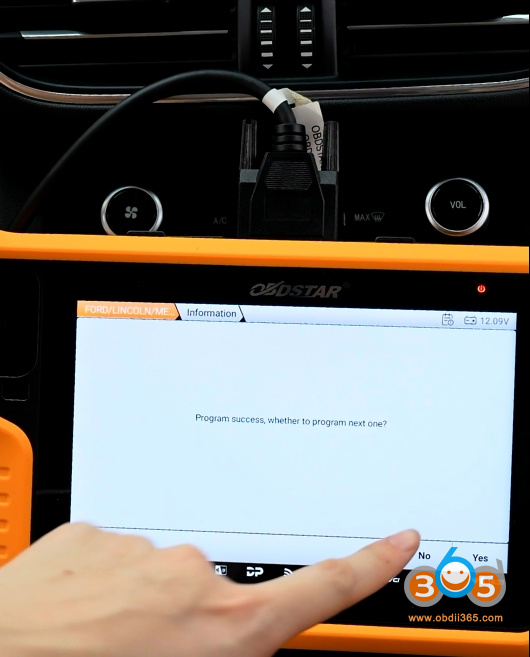
Program 1st key successfully.


Place 2nd key to be programmed into key slot.
Program 2nd key successfully.


Posted by: jean at
07:48 AM
| No Comments
| Add Comment
Post contains 104 words, total size 12 kb.
June 22, 2026
Problem:
Got the2M2 Tank 2 Pro key cutting machinewith a built-in battery. Everything worked normally until yesterday, when the machine suddenly shut down while not connected to a power source. The machine failed to charge the battery.
Troubleshooting Steps:
Step 1:
Remove the four screws on the bottom cover and measure the voltage across theyellow wireandblack wire.If the reading isgreater than 22V, proceed to Step 2.


Step 2:
Measure the voltage across thered wireandblack wire.If the reading isbelow 20V, proceed to Step 3.


Step 3:
Using a power adapter, directly charge the device for approximately 1 hour according to the images below. Afterward, re-measure the voltage across thered and black wires(as in Step 2) to check if the reading is higher than before.


Once you have completed the tests, please send the results to 2M2 Tank engineers. They will analyze the findings and advise whether a battery replacement is needed.
Posted by: jean at
07:03 AM
| No Comments
| Add Comment
Post contains 161 words, total size 3 kb.
June 18, 2026
Keydiy KD-X4 new user feedback:
"Today I successfully programmed an MQB49 key with a 5D chip for a 2022 Audi e-tron. I used theKEYDIY KD-X4for the job.
The first task was to safely disassemble the key. It wasn’t difficult at all—in fact, I would say it was quite easy. Then, using an adapter, I read the key information, created a dealer key, changed the key ID to match the ID of the original lost key, and then programmed it to the vehicle. The vehicledid not have SFD.
The key I used was an original used key. The programming process went smoothly and without any issues.
I have a feeling that KEYDIY is one step ahead in this area.
The key I used had three chips, compared to the original key, which had only two chips. I assume that the key I used was from a vehicle with more advanced comfort features.
Despite this difference, everything works perfectly and there are no error messages or fault codes.”


Posted by: jean at
07:48 AM
| No Comments
| Add Comment
Post contains 175 words, total size 4 kb.
June 17, 2026
Problem:
Tried to read SsangYong Delphi DCM3.7AP ECU withEngineDance X5 ecu programmer via OBD mode. But it ask for the password based on the dynamic code. Where to get the password?

Solution:
Get the password from EngineDance X5 engineer by providing 1) ECU and EngineDance X5 device 2). Software operation interface.
Posted by: jean at
09:15 AM
| No Comments
| Add Comment
Post contains 57 words, total size 1 kb.
June 16, 2026
Successfully added a spare blade key to a Dacia Docker 2014 withOBDStar X300 Classic G3programmer via OBD.


Posted by: jean at
08:00 AM
| No Comments
| Add Comment
Post contains 75 words, total size 6 kb.
32 queries taking 0.5035 seconds, 213 records returned.
Powered by Minx 1.1.6c-pink.