July 28, 2026
Good news! Yanhua Mini ACDP2/ACDP1 free update ODE transmission gearbox TCU IMMO OFF function in July 2026.
Modules involved are
Compatible gearbox types:
- Gen1 DQ380 ODE
- Gen1 DQ381 ODE
- Gen1 DQ500 ODE
- Gen2 DQ380 ODE
- Gen2 DQ381 ODE
This upgrade is free. For users with modules 19 or 45, you can use this feature after upgrading the app.
The IMMO OFF function is currently only available forODEgearbox version.
ACDP alone can complete the IMMO OFF function—no other third-party software or devices are required.
New Update Function:
Read IMMO Data
Clear IMMO Data (IMMO OFF)


Posted by: jean at
07:55 AM
| No Comments
| Add Comment
Post contains 118 words, total size 3 kb.
July 27, 2026
CG100Xprogrammer released new software V2.1.3.0 on July 27th, 206.
The following models are added for Body repair:
-
Land Rover JPLA-19H440-DE RFA SPC560B60L3
-
Land Rover K8D2-10C784-XX 48V Lithium battery 9S12ZVCA19V(ON25N)
The following models are added for airbag:
-
BYD AUTO STHZA-3658100 95128
-
BYD AUTO HA2EJ-3658100B 95128
-
BYD AUTO 3658100-RM01 95128+SPC560P40L1
The following models are added for read-write:
-
DongFeng Nano01 2024-93C86(read write)
-
DongFeng U400014160 95320(read write)
-
Land Rover BCM BCM MPC5748G(read write)
-
Land Rover BCM BCM MPC5746C(read write)
-
Maserati Lai Wante 2018-95320(read write)
-
NETA S37-3658010AB 95320(read write)
-
YeMa SiPaiKa PIC18F46K80(read write)
-
Trumpchi E9 R7F701651(Multimedia Head Unit)(encrypted)(read write)
-
Great Wall Haval Xiaolong 2023- R7F701651(Multimedia Head Unit)(encrypted)
The following models are added for dashboard:
-
BAIC X7 24C32 Instrument Cluster + 95640 Body
-
Benz Vites 25640
-
DongFeng Furuika 2022- STM32F103VE
-
DongFeng EV180 2023- 24LC256(Pure Electric)
-
DongFeng Duolika 2024- R5F10DPJ
-
DongFeng ChaoLong medium bus STM32F103RB
-
DongFeng HuashenT5 MB91F53BC
-
DongFeng Tianjin KR 2024- 24C32
-
DongFeng Fengxing SX6 9S12HA32
-
DongFeng Fengxing T9 24C64(Central Control Unit)
-
FOTON Times King Kong 726 STM8S105K4
-
FOTON View G7 EV 2025- 24C08
-
FOTON Toano Damai 24C16
-
HELI Forklift PIC18F4580 V2
-
Hongxing BOX1 2024- 24C16
-
Huaxia 504 Tractor 24C02
-
Geely Farizon E200S 24C04
-
CNHTC SITRAK C7H 540 R7F701441
-
JMC WweiLong HV5 2018- 24C04
-
JMC Jinhui EV48 24C256(Multimedia host)
-
JieFang MV131 2017- 24LC04
-
TODAY SUNSHINE M2 24C64
-
KINGLONG Bus 2025- 24C16
-
Liugong 835Loader 9S12XHY128
-
Chery Karry Dolphin E7 2024- 24C16
-
Chery Karry Xiaoxiang X3 24C16
-
Hitachi ZX220 Excavator 93C66(RL66)
-
Rullancar RL8 2025- 9S12XHY256
-
Sanyang motorcycle R5F10DME
-
SAIC Jiehu H6 320 93C66
-
WuLing Glorious new card 2025- 24C16
-
WuLing MINI EV Macaron 2025- 24C64
-
Naveco Ousheng 2025- 25160
-
YunDu X 24C64
-
CNHTC HOWO 2011- 24C256(CBUc)
Posted by: jean at
08:45 AM
| No Comments
| Add Comment
Post contains 277 words, total size 3 kb.
July 24, 2026
The OBDSTAR BMW B48/B58 encrypted ECU unlock functionality is scheduled for releaseat the end of August, 2026.We’re providing an exclusive early preview of the BMW B58 (Bosch MG1CS024) ECU unlocking process.
Compatible devices:
OBDSTAR ECU Master/X300 Classic G3 with ECU License/OBDSTAR DC706
OBDSTAR RH850 C4-06 Adapter(basic kit)

Procedure:
Go to ECU Read/Write- Engine- Quick search 024 and selectMG1CS024 lockedECU type. For locked ECUs, onlybootmode is available.

Read connection instructions and check wiring diagram.


Connect ecu adapter with ECU master.

Connect the 3-in-1 jumper cable to the white power wire.

Follow pinout to connect 2x IG, GND, CAN-H and CAN-L wires.


Check PCB wiring diagram.

Follow diagram to remove a resistor.

Then solder C4-06-C01 black and red wires to the ECU board.

Since the OBDSTAR wires are a bit thick, it is recommended to use tape to secure the c4-06-01 board in place, to prevent the black and red wires from being accidentally pulled loose.

Connect C4-06 host adapter with ECU Master unit. Connect W010A to the C4-06-01 adapter.


Use the OBDSTAR’s included power supply to power the ECU MASTER.

Once everything is connected, click "Connect” in the software to begin the ECU unlockingprocess.
After the unlock is complete, you can then proceed to read the EEPROM and FLASH data; OBDSTAR also supports reading the ISN code.
Posted by: jean at
07:54 AM
| No Comments
| Add Comment
Post contains 225 words, total size 15 kb.
July 23, 2026
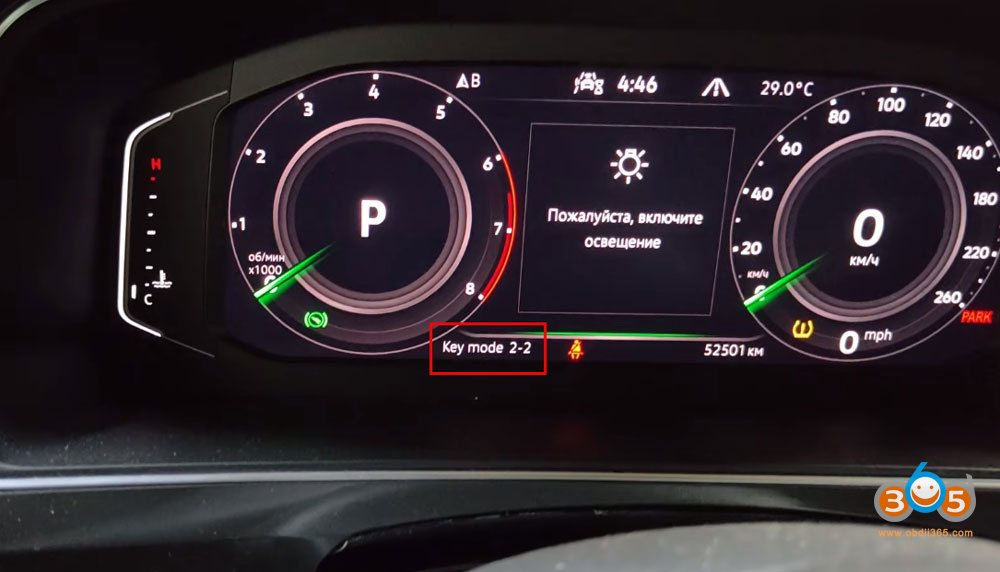
In this article, we’ll walk through the process of adding a spare key to a 2022 Volkswagen Tiguan equipped with the MQB49 5C system. The vehicle arrived with a factory-standard key, and the owner had ordered an original key from the dealer using the VIN code. However, instead of performing the key programming online (which would have been the official dealership method), the owner opted for a manual, offline approach to save costs. This guide covers the entire procedure, from reading the key data to programming it into the vehicle.
Key Details
- Vehicle: 2022 Volkswagen Tiguan
- System: MQB49 5C
- Key Type: Original dealer-supplied key (ordered via VIN)
- Method: Manual programming (offline) usingAutel IM508/IM608+XP400 Pro
The key is fully functional and can be programmed online at any later time if the owner chooses, reverting it to an "official” dealer-level key.
Step 1: Initial Key Inspection and Preparation
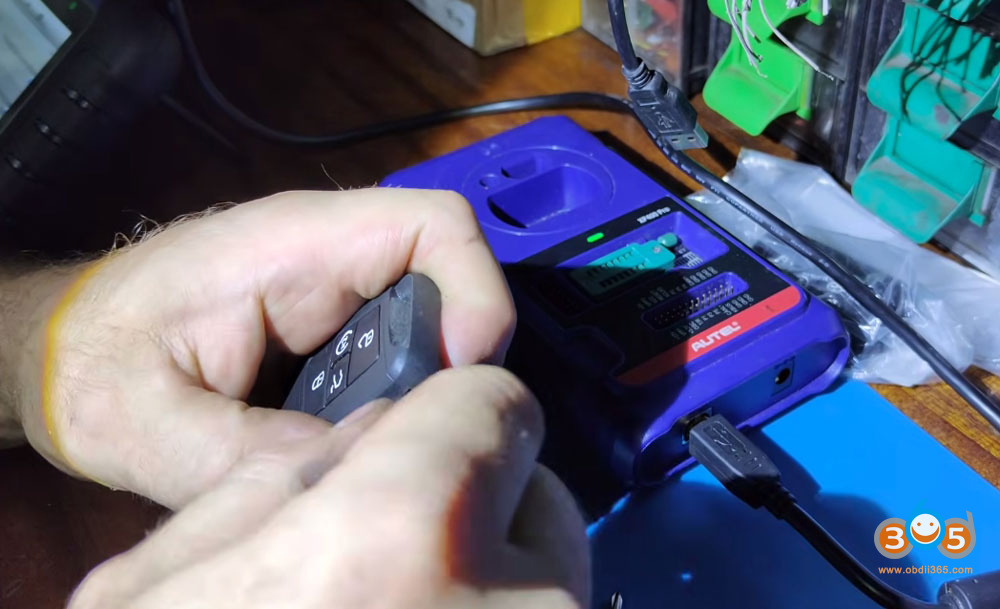
Before beginning the programming process, the key was placed into a programmer device (likely XP400 Pro or similar tool) to perform an automatic transponder detection.
The tool identified the chip as ID 5C and confirmed it was locked, which is the expected factory state for a new, unused key.
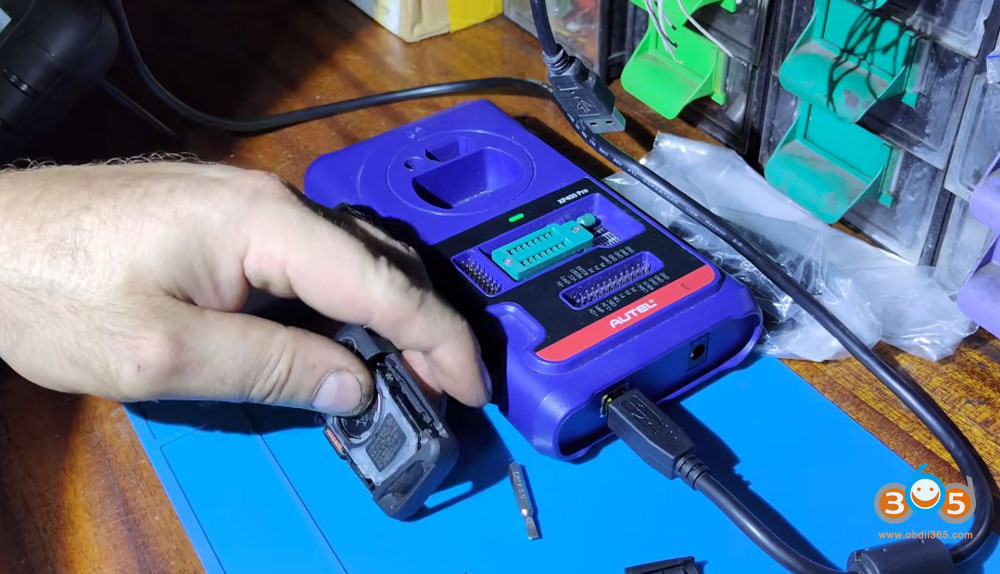
The key was then disassembled carefully to access the internal circuit board and transponder.


Step 2: Disassembling the Key
How to open the key shell:
Remove the blade (physical key).
Gently pry off the rear cover using careful movements to avoid damaging the plastic clips.
Remove a small Torx screw (after finding the correct bit).
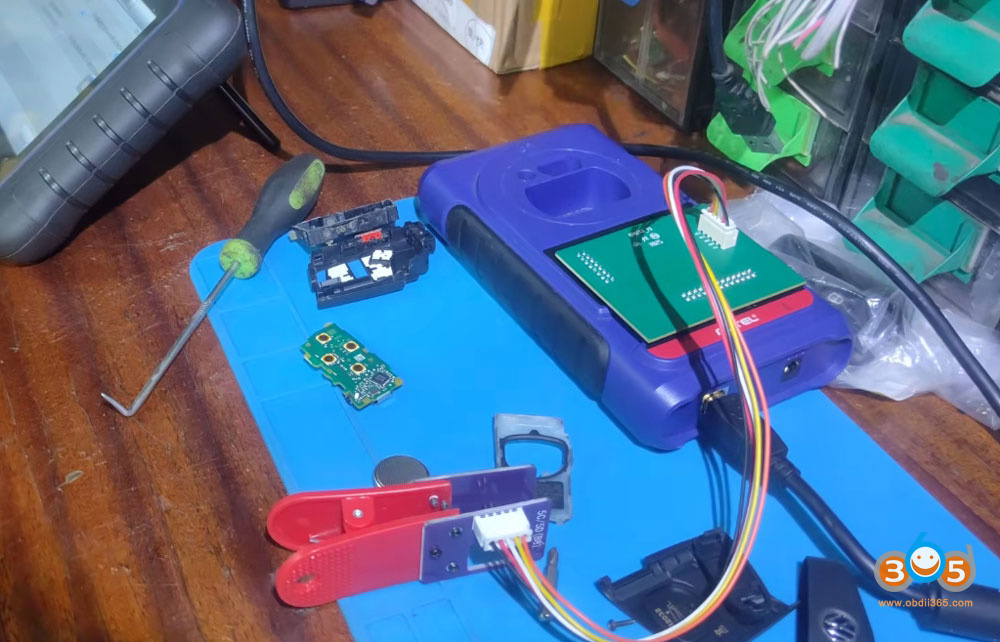
Lift the internal module – the circuit board is glued in place with sealant, so it must be carefully pried loose.
Extract the core/PCB from the housing. The board is held by clips and can be released with gentle pressure.


Step 3: Reading Immobilizer Data (Immo Data)
To program the new key, the immobilizer data must first be read from the existing key. This was done using a DAMP (Data Acquisition Module Protocol) adapter connected via anAP131 interface cable.
The Autel IM508/IM608 provided wiring diagrams for connecting the key, but we opted for a non-invasive method (usinggodiag 5C adapterno soldering required).
The reading process began, though it was noted that the data transfer was relatively quick – suggesting a successful and efficient read.
The software saved the extracted data as a backup file for later use.
Important: The Autel subscription for the online database had expired, but this did not affect the offline reading capability.


Step 4: Programming the key to the Vehicle
With the immobilizer data extracted, we moved to the vehicle. Before starting, the following safety steps were taken:
Engine hood opened (required for certain diagnostic procedures).
Handbrake applied for safety.
Steps performed inside the vehicle:
- Connect the diagnostic interface to the vehicle’s OBD port.
- Verify no SFD (Security gateway) was present – this made the procedure simpler.
- Select the Expert mode in the diagnostic software.
- Load the previously saved immobilizer file.
- Perform key learning:
- Place the existing working key in the ignition (or near the reader coil).
- Follow the on-screen prompts to add the new key.
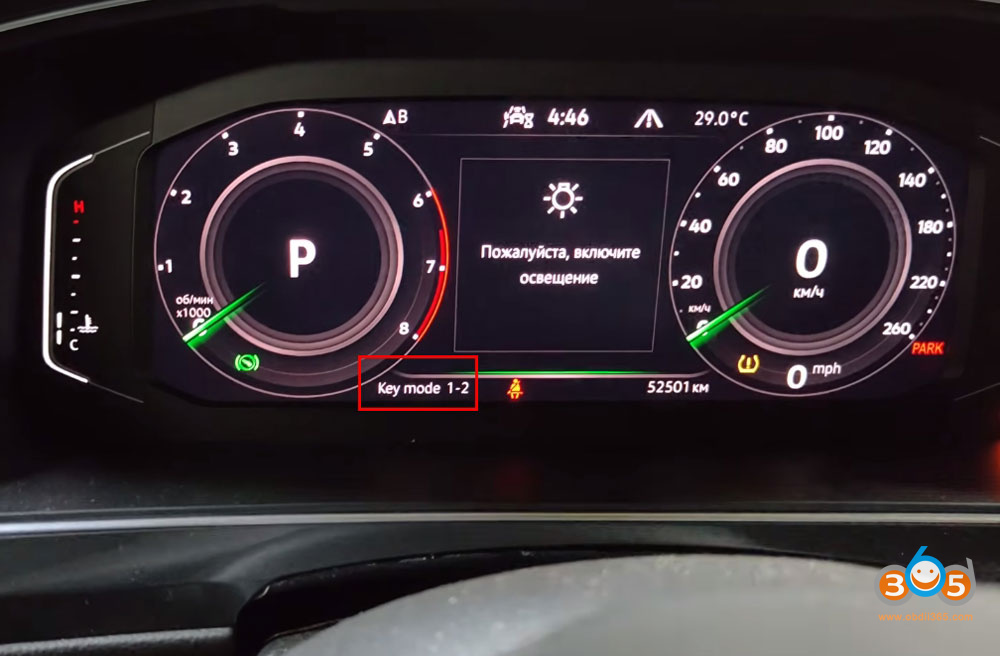
- The system confirmed that 1 key was already present, and after placing the second key, 2 out of 2 keys were successfully recognized.
- Complete the key learning – the software confirmed successful key learning.


Step 5: Final Verification and Testing
After programming, we performed a thorough check:
- Ignition-on test: Both keys were tested with the ignition switched on – both functioned correctly.
- Engine start test: Each key was used to start the vehicle – both worked without issues.
Additional feature: The new key retains the ability to be reprogrammed online in the future, making it equivalent to a fully official dealer key if needed.
Posted by: jean at
07:54 AM
| No Comments
| Add Comment
Post contains 624 words, total size 14 kb.
July 20, 2026
Since 2020, Nissan has implemented a security gateway system that restricts vehicle control, preventing technicians from performing essential diagnostic functions without proper authorization. This includes clearing diagnostic trouble codes, performing actuator tests, and accessing critical special functions.
XTOOL has integrated AutoAuth services into its diagnostic tools, providing a legitimate and streamlined solution to bypass this security gateway. This article provides a comprehensive, step-by-step guide to unlocking the Nissan security gateway using XTOOL diagnostic equipment.
Understanding the Nissan Security Gateway
What It Does
- The security gateway acts as a protective barrier between diagnostic tools and the vehicle’s electronic control modules. Its primary purposes include:
- Blocking unauthorized access to vehicle control systems
- Preventing code clearing without proper authentication
- Restricting actuator tests and special functions
- Protecting against cyber threats and unauthorized programming
The Problem for Technicians
- Without unlocking the gateway, technicians face significant limitations:
- Cannot clear diagnostic trouble codes (DTCs)
- Unable to perform actuator tests
- Restricted access to special functions
- Limited ability to complete repairs that require module communication
Compatible devices:
XTOOL diagnostic devices support unlocking the Nissan Security Gateway (SGW) via AutoAuth. Compatible models include theD7,D8,D9series, PRODIGY series, Compass series, IP900 andIP919series, and theX100 MAXseries andX100 PAD3.This allows you to perform full diagnostics and bidirectional controls on locked 2023 and newer models.
How to Unlock Nissan Security Gateway with Xtool?
XTOOL has addressed this challenge by integrating AutoAuth authentication services directly into their diagnostic tools. This integration creates a seamless workflow that allows technicians to unlock the security gateway through a few simple steps.
Connectivity Requirements
- Wi-Fi connection is mandatory during the unlock process
- The system performs online verification through AutoAuth servers
- Offline operation is not possible for gateway unlocking
Step 1: Vehicle Connection
Begin by connecting your XTOOL diagnostic tool to the vehicle. The system will:
Initialize the VCI (Vehicle Communication Interface)
Establish communication with the vehicle’s systems
Prepare for diagnostic operations
Step 2: Vehicle Identification
Navigate through the diagnostic menu:
Select Nissan from the main menu
ChooseAutomatic Detection.
SelectRead VIN Code.
The system will automatically read and display the vehicle’s VIN information.

Step 3: Regional Confirmation
Once the VIN is read:
Select USA from the region options.
Confirm the vehicle details displayed on screen.
Verify that all information matches the vehicle being diagnosed.

Step 4: Security Gateway Unlock Prompt
At this point:
A Security Gateway Unlock Prompt will appear on screen.
Ensure Wi-Fi connectivity – this is essential for the authentication process
Tap Yes to proceed with the unlock procedure.

Step 5: AutoAuth Authentication
You will be directed to the AutoAuth login screen:
Enter your username and password.
TapLog In.
The system will unlock the security gateway online through AutoAuth servers.
Wait for the confirmation message.


Step 6: Proceed to Diagnostics
Once the unlock is successful:
Tap OK to proceed.
Navigate toSystem Selection.
SelectEngine(or other desired control module).

Step 7: Full Diagnostic Access
With the gateway unlocked, you now have complete access to:
- DTCs (Diagnostic Trouble Codes) – read and clear
- Live Data – real-time sensor readings
- Actuator Tests – component activation for testing
- Special Functions – advanced procedures and adaptations

Step 8: Advanced Special Functions
From the Special Functions menu, technicians can perform critical procedures including:
- Idle Air Volume Learn – reset idle control adaptations after cleaning or repairs
- Throttle Position Learn – recalibrate throttle body position sensors
- Various other manufacturer-specific adaptation procedures
Common Questions and Answers
Q: Why Do I Have to Pay Extra?
This is the most common question from technicians:
A: The fee is charged by AutoAuth for authentication services. Not by XTOOL. And it’s actually the most legitimate and safe way to repair the vehicle.
The authentication fee covers:
- Secure online verification of credentials
- Compliance with manufacturer security requirements
- Legitimate access to vehicle control systems
- Protection against liability from unauthorized access
Q: Is This Function Global?
A: Basically, AutoAuth mainly targets the North American area. Other regions generally are not restricted yet.
- North America: Security gateway unlock is required for 2020+ Nissans
- Other Regions: Restrictions may not currently apply, but technicians should monitor for future changes
- Technicians outside North America should verify local requirements
Q: I Have Three Devices. Do I Need Three Accounts?
A: AutoAuth charges per shop. So, one shop account normally can bind multiple devices at the same time.
Benefits of this approach:
- Cost-effective: Single subscription covers multiple tools
- Convenient: Unified account management
- Flexible: Multiple technicians can use different tools under one shop account
- Simple: No need to manage separate credentials for each device
Posted by: jean at
07:02 AM
| No Comments
| Add Comment
Post contains 748 words, total size 8 kb.
July 16, 2026
Good news!Keydiy KD-X4key programmer will release a new update- copy/clone 2018+ Jaguar Land rover smart key.
Advantages:
- Without disassembling the KVM Module.
- No need to replace RFA module or program RFA
- Without going through online programming.
- No code tracking problem.
Coverage:
2018+ Jauguar Land rover NXP NCF29Ax smart key models.
What key to use?
It is compatible with original key orKD ZB smart keys.
How to use the function and copy 2018+ JLR Smart Key with KD-X4?
Disassemble the original JLR key.

Go to Land rover Smart Key Synchronization function.
Select Land rover- select by type- disassemble to copy key- copy smart key.
KD App will show you the key wiring diagram.
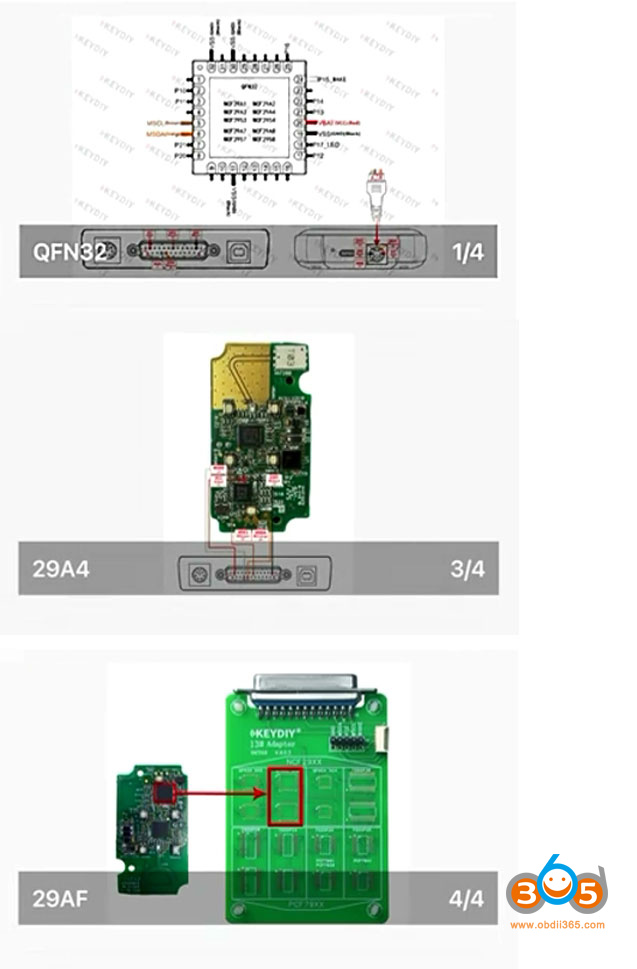
Solder wires to the key board directly or desolder the NXP chip and solder toKD’s #13 NCF29Ax adapter.

Read original key chip data and save.
Then change and connect a new key.
Write the original key chip data to the new key to copy a new key.
Keep an eye on KD App update.

Posted by: jean at
07:38 AM
| No Comments
| Add Comment
Post contains 176 words, total size 4 kb.
July 15, 2026
A customer reported that he failed to scan a 2024 BMW 2 series withVXDIAG VCX SE BMWand ISTAP-D 4.59 software.
Error fautly ICOM vehicle connection.

To use ISTA 4.59.xx software with VXDIAG VCX SE, you need to update ICOM driver to V1.5.4.260612 version and later.
VXDIAG BMW driver
2026.06.12 V1.5.4.260612
Update to support ISTA/D 4.59.xx.

Update BMW driver in vx manager.
Then restart ista-d 4.59 software.
Posted by: jean at
07:12 AM
| No Comments
| Add Comment
Post contains 75 words, total size 2 kb.
July 14, 2026
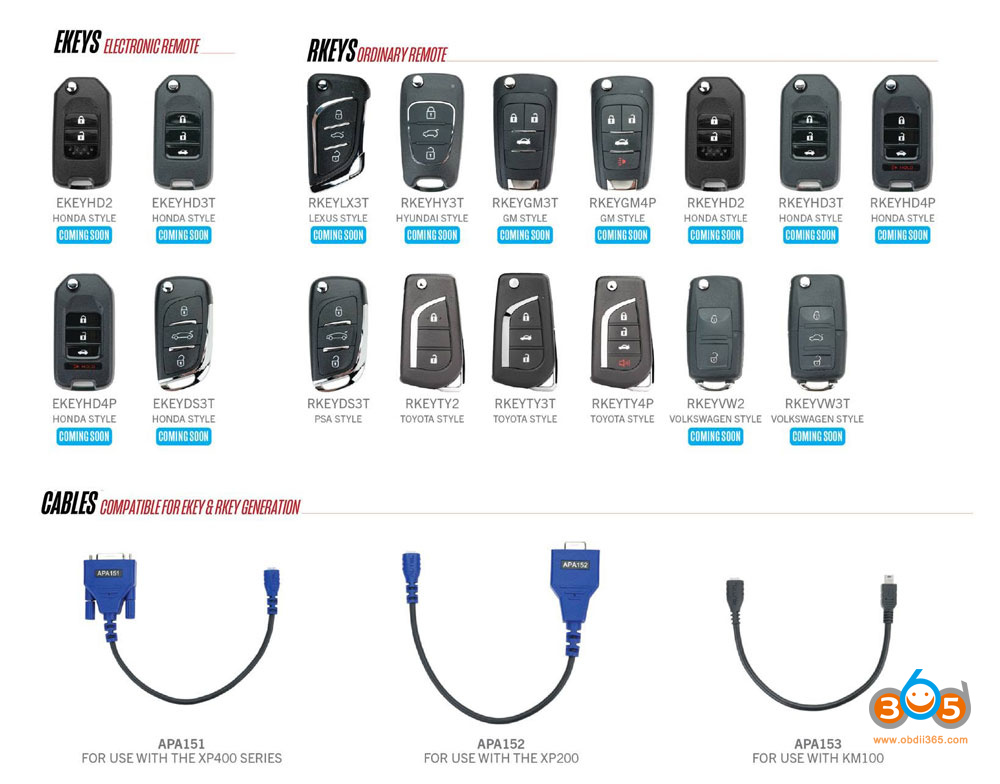
Following theAutel iKEYseries smart keys, AUTEL is set to release the EKEY and RKEY series.
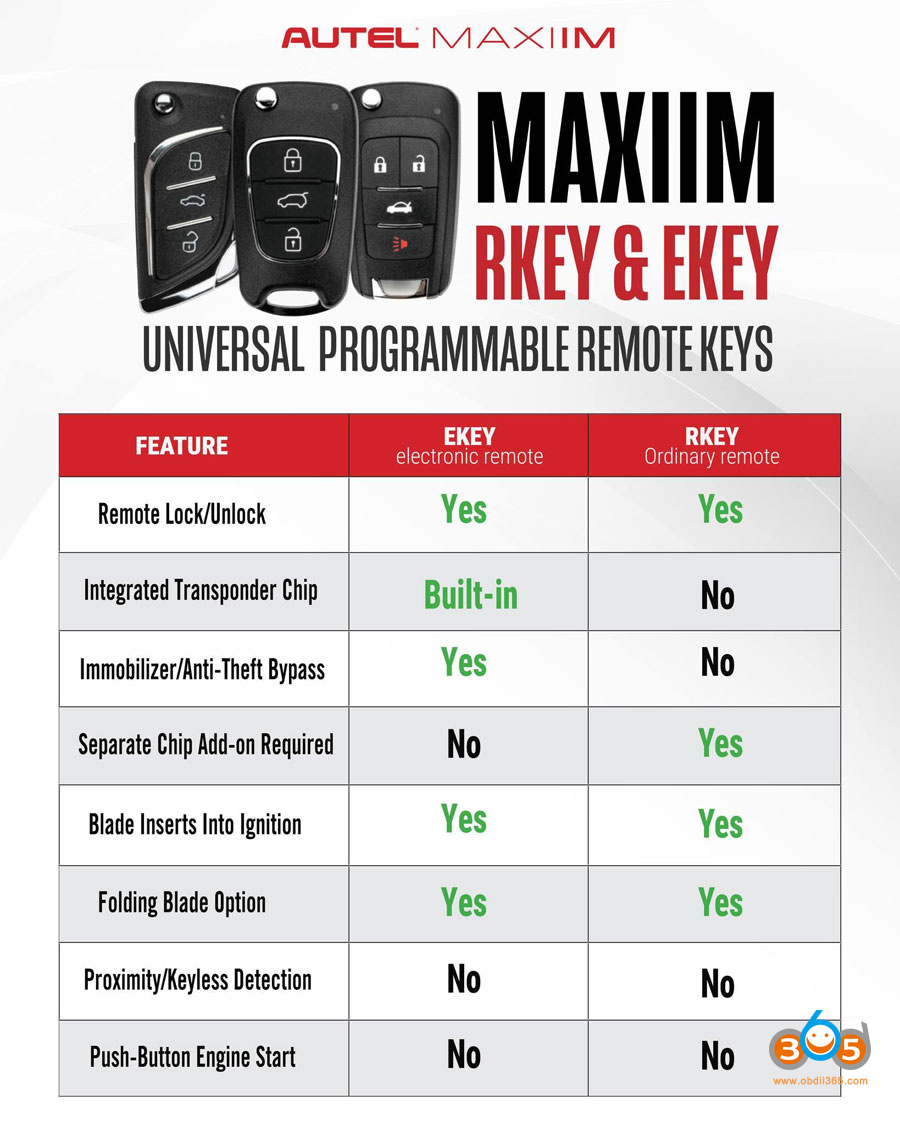
Autel introduces theMaxiIM RKEYandEKEYseries — two universal programmable keys operating across 315MHz and 433MHz frequencies, engineered to replace a cabinet full of blanks with a single programmable solution.
And the best part: both keys are fully supported across the entire Autel MaxiIM product line. The device you already own is all you need.
RKEY delivers remote lock and unlock coverage across multiple vehicle brands. EKEY goes further — a built-in immobilizer transponder that handles advanced security systems with no external chip required.
Less inventory. Broader coverage. One smarter decision.

Autel Ekey vs Rkey
| FEATURE | EKEY
electronic remote |
RKEY
Ordinary remote |
|---|---|---|
| Remote Lock/Unlock | Yes | Yes |
| Integrated Transponder Chip | Built-in | No |
| Immobilizer/Anti-Theft Bypass | Yes | No |
| Separate Chip Add-on Required | No | Yes |
| Blade Inserts Into Ignition | Yes | Yes |
| Folding Blade Option | Yes | Yes |
| Proximity/Keyless Detection | No | No |
| Push-Button Engine Start | No | No |

Autel EKEY & EKEY
The RKEY delivers reliable remote lock and unlock across a wide range of vehicle systems.
The EKEY goes further — a built-in immobilizer transponder that works with high-security luxury vehicle protocols. No add-ons. No workarounds.
The all-new MaxiIM EKEY keys are designed specifically for this type of applications. It is equipped with aBuilt-in Immobilizer Transponder, with support for advanced simulation across a range of ID Protocols, including the encrypted systems used in high-security luxury vehicles, and compatible with 315MHz and 433MHz frequencies.
No need for an outside slice.
No need to divert the client away.
Most importantly, EKEY is fully powered via Autel MaxiIM range. That is, the device you use today gives you the ability to provide this level of service directly, without having to change your business system.
The EKEY goes further — a built-in immobilizer transponder that works with high-security luxury vehicle protocols. No add-ons. No workarounds.
FEATURES
Comprehensive vehicle coverage, provide vehicle-specific key configuration for streamlined operation.
Compatible with systems using 315MHz/415MHz.
Supports ultra-long range frequency transmission for reliable, consistent performance.
Built-in immobilizer transponder, support multiple types of immobilizer transponders such as ID11, ID12, ID13, ID47, ID46(PCF7936), ID46(PCF7937), ID46(PCF7946), ID46(PCF7947) (Only support on EKEY series)
Sold Individually, Batteries Not Included.
Emergency Blade Not Included.

Coming soon. Keep an eye on obdii365.com.
Posted by: jean at
08:53 AM
| No Comments
| Add Comment
Post contains 381 words, total size 6 kb.
July 13, 2026
CG FC200Programmer released new software version V1.3.9.0 on July 12th, 2026.
1 Added Platform Mode Erase function for Mercedes-Benz VGS4 TCU (Soldering-free)
Supported Software Versions:
0009020823
0009025731
0009020424
0009021127
0009025831
0009029817
0009021142
0009027331
0009025123
0009022027
0009027426
0009026724
0009022627
0009027626
0009020722
0009022642
0009027926
0009027023
0009024013
0009028347
0009029012
0009024423
0009020118
0009024331
2 Added ECU Types
Dongfeng: LEC4AP
Qoros: M7, ME17.8.8 (TC172
 , ME17.8.8 (TC1767), ME7.8.8
Borgward: MED17 (TC172
, MED17 (TC1767), MED17 (TC1782), MED17.8.10 (TC172
, MED17.8.10 (TC1782), MED17.8.2 (TC1767), MED17.8.21 (TC1767), MED17.8.32 (TC1793), MED17.810.1, MED17.823 Added VIN Modification Support
Volkswagen / Audi: ME7.1.1_800 ST10C167
JMC: EDC17C63
4 Added DTC OFF Support
BYD: TB10
Changan / Jinbei / Foton / Hafei Minyi: TR40, TR4C, STC-213, LEC4A
5 Optimized DTC OFF System Coverage
Dongfeng / JAC / Jinbei / Kama / Wuling: LEC4AP, LEC4AF
BAIC / Dongfeng / Jinbei / Chery / Zotye: ME7.8.8, ME7.9.7.1
BYD / Changan / Qoros / Chery / Geely / GAC: ME17.8.8, MED17.8.X
Changan / Chery / Geely / Haval / GAC / BYD / Luxgen / Lynk & Co / Roewe: M7.8.0, M7.9.71
6 System Optimization
Optimized the MED17.2 type to resolve the issue where the ISN could not be read.

Posted by: jean at
07:11 AM
| No Comments
| Add Comment
Post contains 202 words, total size 3 kb.
July 10, 2026
Remove the driver's side trim panel.


Unclip the retaining clips. Remove the cover panel.


Locate the BCM module.
Unplug the blue connector.


Insert one blue end of the C1032 cable into the vehicle's original blue socket, and plug the other blue end into the original port on the BCM.


The C1032 harness also has two black OBD connectors — plug the male connector into the vehicle's OBD diagnostic port, and connect the female connector to the device's OBD cable.


Once connected, you can start programming the key.
Posted by: jean at
07:55 AM
| No Comments
| Add Comment
Post contains 114 words, total size 3 kb.
30 queries taking 0.2942 seconds, 213 records returned.
Powered by Minx 1.1.6c-pink.