July 09, 2026
Read and write Volvo/Renault/UD/Mack truck ECU EMS 2.2 chip MPC5554 byEngineDance X5ecu flasher successfully.
Model example: UD GH11 truck
Read eeprom and flash on bench mode.
Write eeprom and flash on bench mode.
Checksum correction by X5.
DPF and SCR Off ok.


Posted by: jean at
07:27 AM
| No Comments
| Add Comment
Post contains 52 words, total size 4 kb.
July 08, 2026
Magic Motorsport Flexboot glitch unlock new user report:
No cars sitting around in workshops for days on end. Worked flawlessly, hopefully many more to come MG1CS049 - 2024 BMW G82 M4.
Boot glitch unlock.
Then read and write on bench mode.


Posted by: jean at
07:47 AM
| No Comments
| Add Comment
Post contains 48 words, total size 5 kb.
July 07, 2026
Where to download PC software for the newLaunch Prog5(G5) programmer?
The Prog5 can be used standalone or with X431 tablets. When use G5 as a standalone device, it works on PC and doesn't need a PC converter.

Prog5 PC Software Function:
Read, write and clone ECU & TCU via bench and boot mode.
Free download Launch Prog5 PC software
https://en.cnlaunch.com/products-detail/i-251.html#pro_download
Operating system:Win8, Win10
Language:English, German, Russian, Japanese, French, Portuguese, Korean, Italian, Spanish, Arabic
NOTE: The appropriate language-specific installation package must be selected prior to download, as the software does not allow language switching after installation.
Download and install G5 PC software.
The software installation is easy. Install ECU_Clone PC.setup until finished.
Then connect G5 with PC. Check for available software and firmware updates.


The device comes with 1 year free software subscription. Need to renew after software expires.
Launch X-prog5 PC software vs X-prog3 PC software:
Prog5 PC software supports more ECU and TCU cloning types, i.e VAG Simos 18 series cloning, Benz DSM FBS4, VGS4 NAG2/ VGS3 BAG3 FBS4 cloning , more BMW ISN reading types, add ecu checksum correction functions.
Posted by: jean at
07:46 AM
| No Comments
| Add Comment
Post contains 189 words, total size 6 kb.
July 06, 2026
Failed to add key 2025 Dodge Ram Sport 1500 withAutel IM608. The secure gateway with a different connector. The12+8 FCA gateway adapterand the Start connector cannot connect to the gateway connector.

Here is the clue.
New style gateway. No aftermarket device will program the key by OBD. The2025 Dodge Ram 1500 (5th Gen DT, including Sport trim) has a newer style Security Gateway (SGW).
Requires a J2534 passthru device with WiTech.
Nothing aftermarket for new gateway.
Require Witech2.0 with NASTF. The nastf 4 digit pin is for witech.
You are seeing a completely different connector because Stellantis quietly overhauled the electrical architecture for the **2025 RAM 1500 refresh** (the Hurricane engine era).
The classic 12+8 pin Security Gateway (SGW) bypass cable used from 2018–2024 will **not** work on this truck.
Why the Connector is Different?
The 2025 RAM 1500 has upgraded to a new generation cybersecurity firewall utilizing **FD Ethernet (Flexible Data-rate Ethernet)**.
* **The Physical Difference:**
The old SGW relied on traditional CAN-bus pairs (which the 12+8 cable tapped into). The new module manages high-speed ethernet lines, meaning the physical pins, connector size, and wiring layout are totally redesigned.
* **The Software Difference:**
It enforces strict cryptographic authentication that cannot be bypassed by simply throwing a bridge harness between traditional CAN lines.
How to Successfully Program a Key
Because the physical bypass cables you might be used to are incompatible, the workflow for adding a key to a 2025 RAM has shifted toward **authorized software-level unlocking** rather than tearing apart the dash to find a physical bypass plug.
The Authorized Software Route (Recommended)
Instead of trying to find an adapter cable, you bypass the gateway digitally via the OBD-II port:
Hardware:
You will need a high-quality J2534 PassThru interface (like aTopdon R-Link,Autel MaxiFlash, or official Mopar MDP/MicroPod II) paired with a stable internet connection.
Software:
Use official OEM diagnostics via **wiTECH 2.0**.
Authentication:
You must have an active wiTech 2.0 account registered with your diagnostic platform. When you initiate the key programming procedure, the software communicates over the internet to officially unlock the Secure Gateway over the OBD port.
Note:If you are generating a smart key using universal aftermarket remotes (e.g., certain Xhorse or aftermarket platforms), many technicians have reported programming failures on 2025 models. For these newer architectures, it is highly recommended to use an original OEM Mopar proximity fob or a high-quality, pre-coded OE-equivalent key.
Posted by: jean at
07:25 AM
| No Comments
| Add Comment
Post contains 407 words, total size 4 kb.
July 03, 2026
What is the difference betweengolden JLR Pluto VCIand new greenJLR Pluto vci?
Transparent can do 2026.
and has 5 times speed more than gold.
They have the same function.
If need to replace with a new VCI, just install new driver and plug the new VCI. But the old one will stop working.


Posted by: jean at
08:40 AM
| No Comments
| Add Comment
Post contains 65 words, total size 2 kb.
July 02, 2026
Today, we’re looking at a special case: cloning the Volkswagen 5C chip – a process that has recently become more accessible thanks to new functionality in the Autel KM100 programming tool.
This guide walks you through the entire procedure, from reading the original key to generating a cloned chip, while also highlighting some important caveats based on real-world testing.
Understanding the VW 5C Chip
The Volkswagen 5C chip is a transponder used in many modern VW vehicles. Traditionally, duplicating this type of key required disassembling modules, requesting security calculations, or even removing components from the car. However, new techniques now allow technicians to perform a clone based solely on reading the key itself – no need for additional module disassembly or external code requests.
Key advantage: All the necessary information can be extracted directly from the original key, streamlining the duplication process significantly.

Tools Required
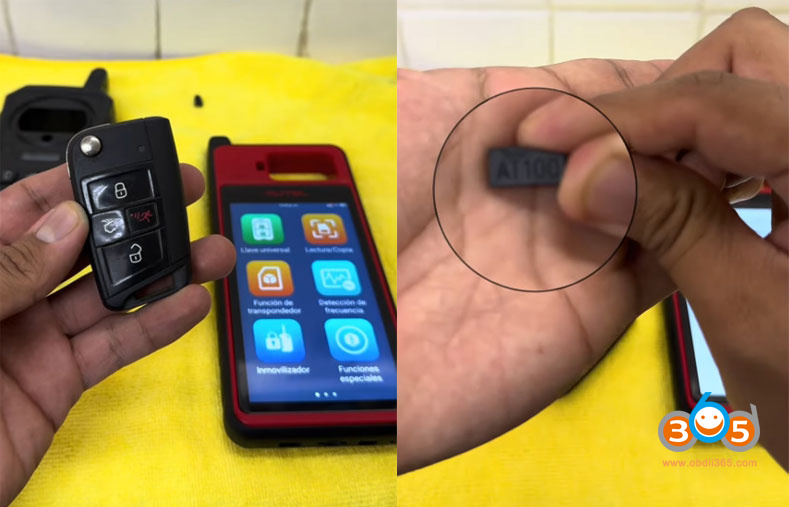
Autel KM100Device – recently updated with a function specifically for cloning 5C keys.
Original VW 5C Key – the one you wish to clone.
Autel AT100 Chip– a blank transponder used to receive the cloned data.
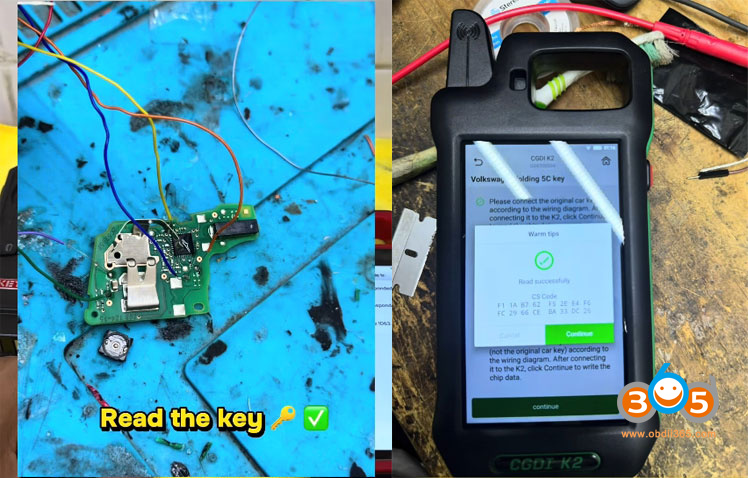
CGDI K2(or similar) programmer – used to read the original key’s CS data (16 bytes required).
Step 1: Read the Original Key
Before you can clone anything, you need to extract the full data from the original key. In this demonstration, a CGDI K2 device is used to connect to the key’s board via wires after opening the key housing. This process reveals the 16 bytes of data – the critical information needed for the clone.
Result: The device successfully reads the key’s identification and security data, including the 16-byte CS code required for duplication.
Check:How to read MQB49 5C key data and CS code with CGDI K2.


Step 2: Generate a Blank 5C Transponder (AT100)
The AT100 chip is a rewritable transponder that will receive the cloned data. Using the KM100 device:
- Navigate to the Transponder Generator function.
- Select ID5C from the menu.
- Choose New ID 5C.
- Press Generate.
- Confirm completion.
At this point, you have a freshly generated blank 5C chip ready to be written with the original key’s data.


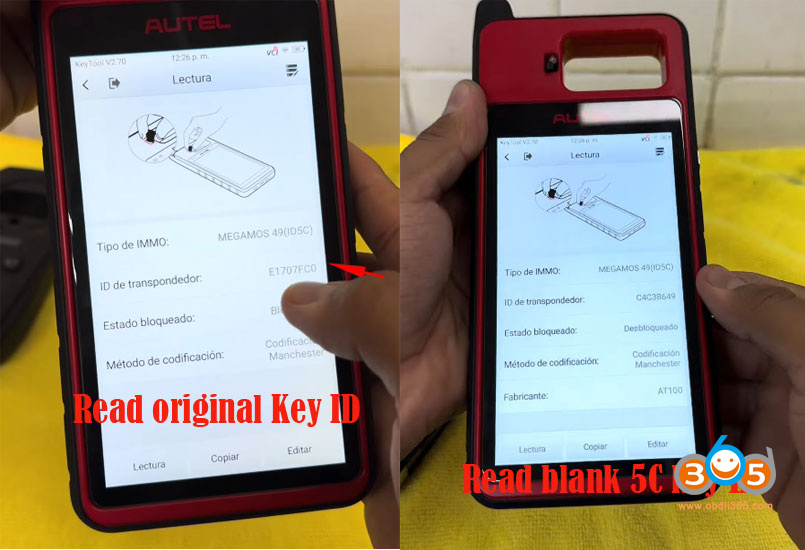
Step 3: Verify Original and Blank Chip IDs
For reference, read both chips:
Original key: Shows ID ending with "C” and displays a closed padlock icon – indicating the chip is locked.
Generated blank chip: Shows a different ID initially and displays an open padlock icon – indicating it is unlocked.
This distinction is crucial, as it reveals one of the main uncertainties about the cloning process.


Step 4: Perform the Cloning Procure
Now comes the core cloning process using the KM100 device:
- Place the original key in the reader slot.
- Press Read to confirm the chip is detected.
- SelectCopyfrom the menu.
- Choose the Volkswagen 5C option.
- Press Accept and then Start.
- Enter the 16 byte cs code security components (obtained from the earlier reading).
- Press Accept – the device will begin reading the key’s information.
- When prompted, remove the original key and insert the AT100 chip into slot T1.
- Press Next and wait for the copy to complete.
- Confirm completion when prompted.


Step 5: Verify the Cloned Chip
After the cloning process, read the newly written AT100 chip:
The ID now matches the original key’s ID.
However, the padlock icon remains open – indicating the chip is still unlocked.
In contrast, when you read the original key again, it shows a closed padlock. This difference raises an important question: does the unlock state affect the clone’s functionality in the vehicle?

The copied AT100 5C key only contains the immobilizer (transponder) data. It can only be used for emergency starting by holding it against the ignition switch. The smart key functions—such as keyless entry and push-button start—require OBD matching through the IMMO menu to be fully enabled.
Posted by: jean at
07:44 AM
| No Comments
| Add Comment
Post contains 640 words, total size 21 kb.
July 01, 2026
What is the difference betweenMucar 892BTand the newMucar 892BT PROdiagnostic scanner? Just same hardware but with topology and more functions?
Here is the clue.
They come with exactly the same case and accessories. But software and license are different.
The 892BT Pro already ships withtopology mapping built in.
The MUCAR 892BT does not support the Topology Map function.
892BT PRO supports more special functions (40+)while 892BT supports 35+ service functions.

Can we migrate Mucar 892 BT to PRO version by software update?
No, the Mucar 892 BT can’t be converted to 892 BT PRO with a simple update.
And here’s why:
Why is updating to Pro not possible?
1. Both versions use different licenses
Although the material is identical, the PRO version includes:
- additional software modules
- licenses for advanced functions
- access totopology mapping
- moremaintenance service functions.
These licenses are paid and related to the device’s serial number.
2. PRO firmware is not compatible with the standard version
Mucar locks firmware to avoid:
- unauthorized facilities,
- software conflicts,
- stability issues.
3. Mucar servers check model before authorizing updates
Even if you manually install an APK, PRO functions do not activate without server validation.
Posted by: jean at
07:41 AM
| No Comments
| Add Comment
Post contains 197 words, total size 3 kb.
June 30, 2026
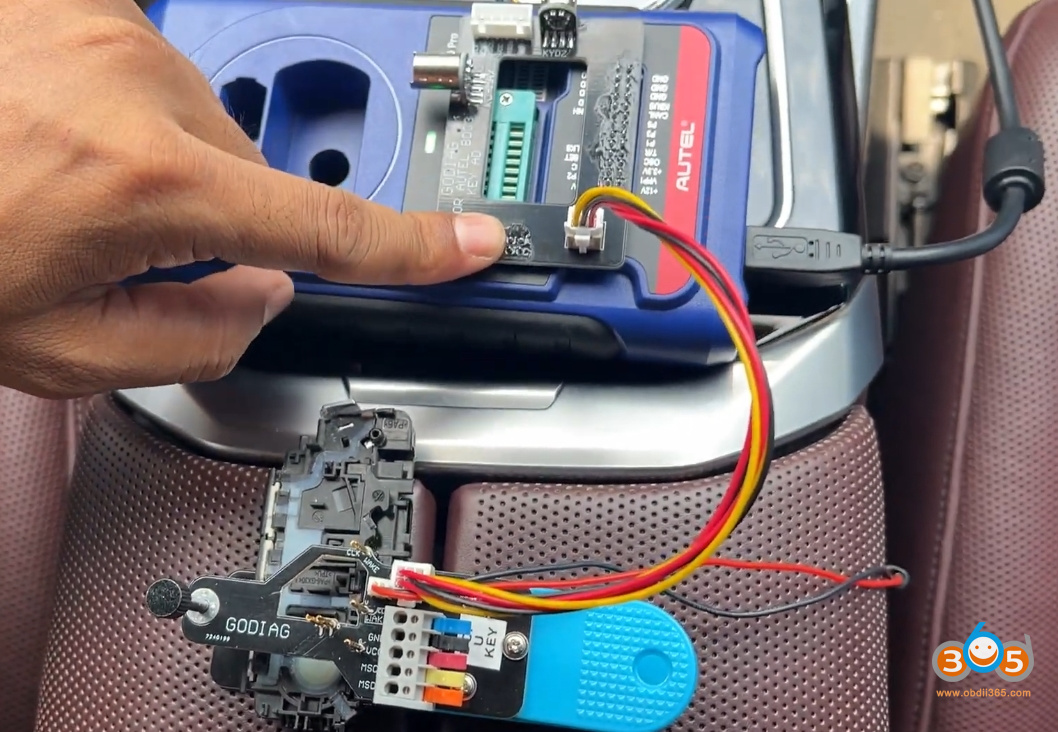
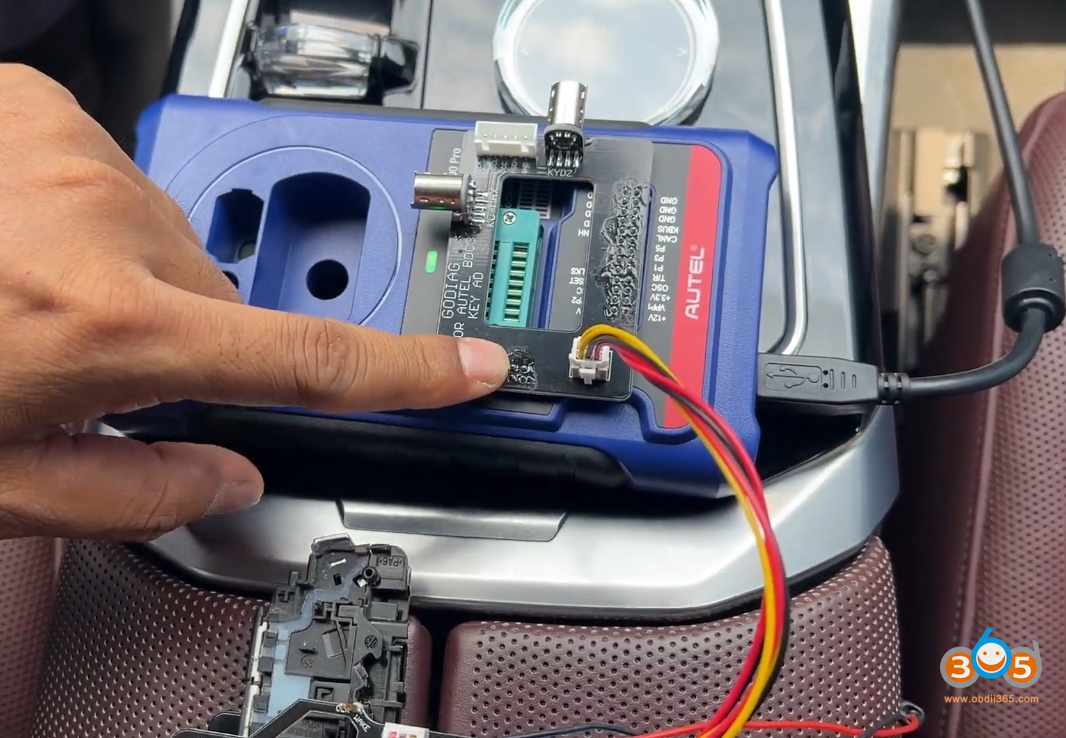
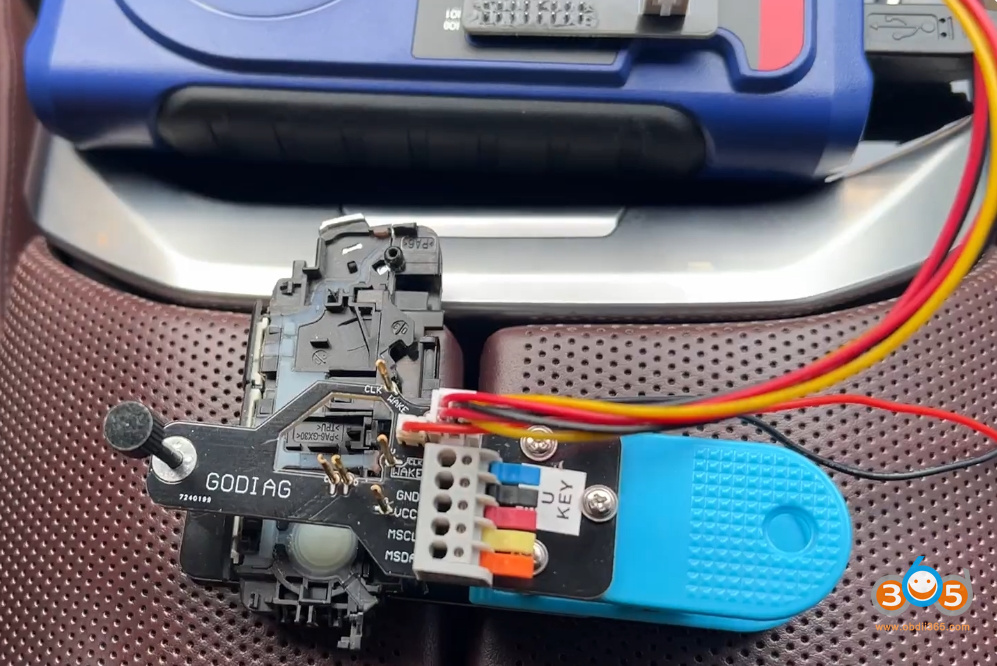
How to copy and clone BMW U Chassis BCP key data using theAutel IM608together with theGODIAG BCP Adapter. Follow the complete step-by-step process for reading BCP key data and performing key programming on supported BMW U Chassis vehicles.
The process is straightforward but requires meticulous attention to the tool’s prompts and the physical connections.
Model example: 2024 BMW I7 BCP system
Copy a BCP key using Autel BMW ikey.

Preparing the Vehicle and Tool
Before diving into the software, connect the BCP adapter with XP400 pro. With the Godiag BCP clip adapter, you don’t need to disassemble the inner key shell. Just dril a hole to the inner key shell and connect the clip with inner key shell according to the points.


Step-by-Step Cloning Process
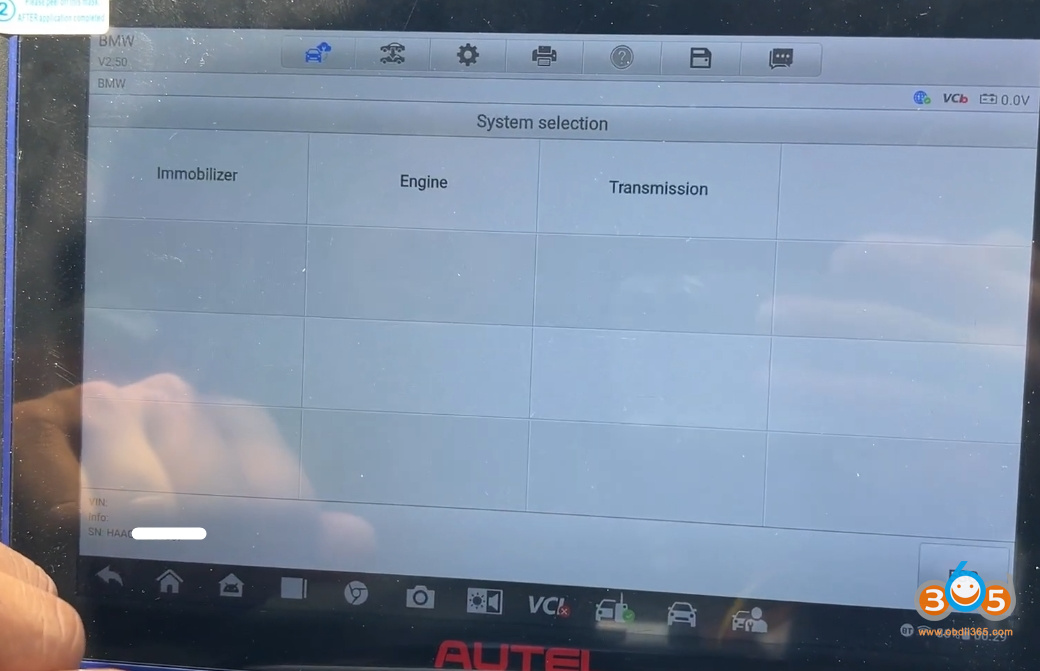
Accessing the BDC Function:On the Autel IM608, Selects the "BMW”, then chooses "System Selection” to allow the tool to automatically identify the vehicle’s system. Then navigates to "Immobilizer” – "BCP Immobilizer” – Key Operation – Add key. Select Encrypted or Unencrypted key type.


Identifying the Vehicle:The tool prompts you to enter the vehicle’s VIN (Vehicle Identification Number). Confirms the VIN and selects the appropriate frequency—in this case, 433 MHz, a common frequency for BMW remote keys.

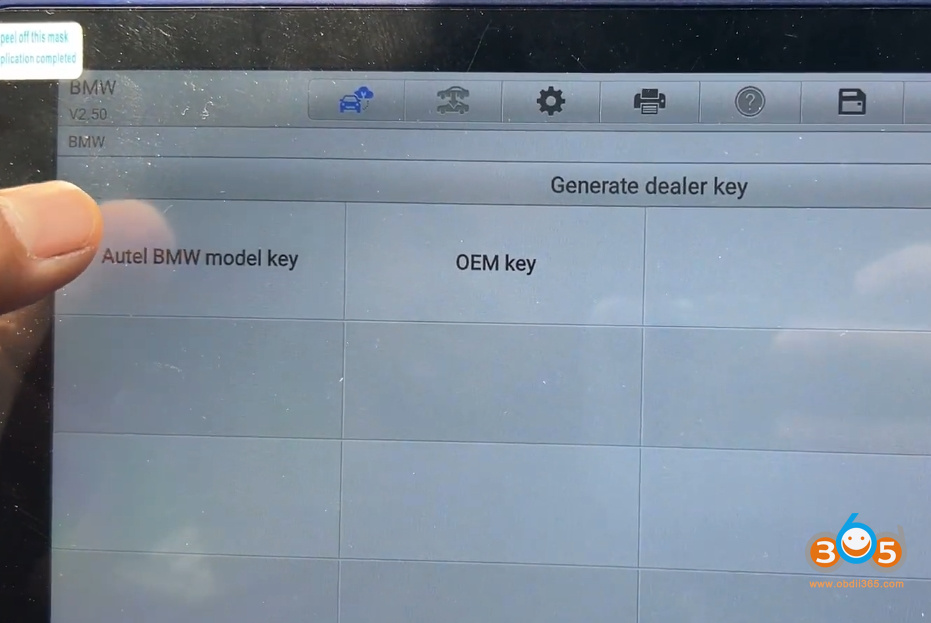
Choosing the Key Type:A crucial decision point appears: must choose between an "OEM key” (likely referring to a master/original key) or a "Autel Key.” In this instance, we chooses the "Autel Key” because he only has a single Autel key available to clone. It is important to note that a Autel key is often a valet or limited-access key. Cloning this type replicates its specific permissions and restrictions.

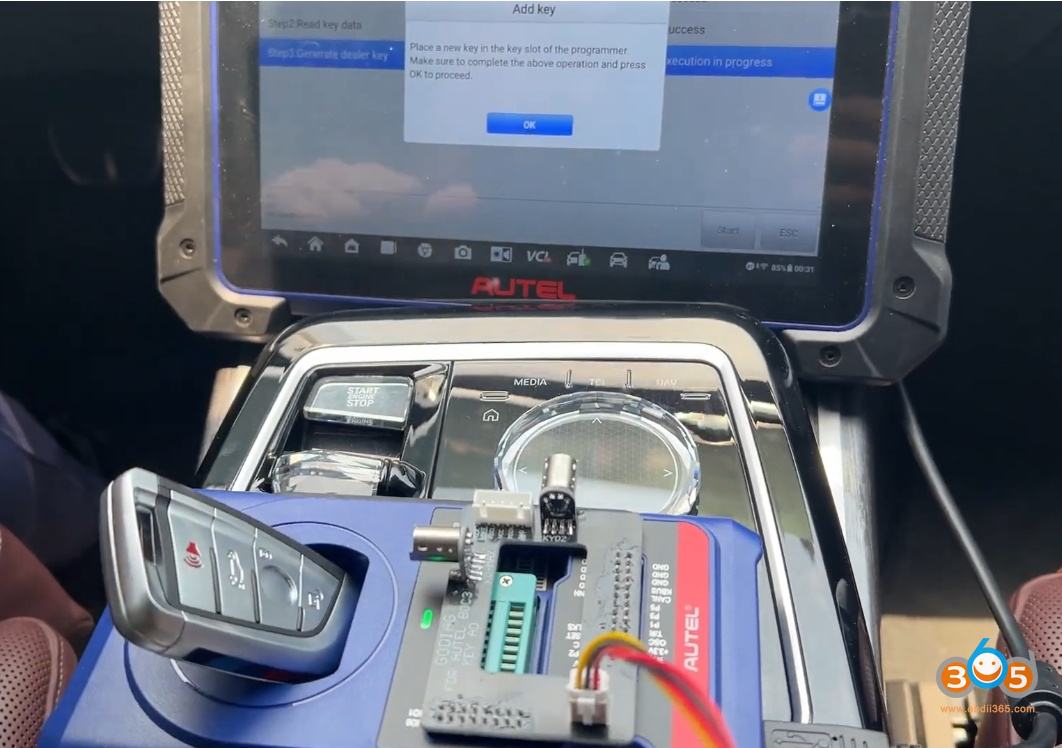
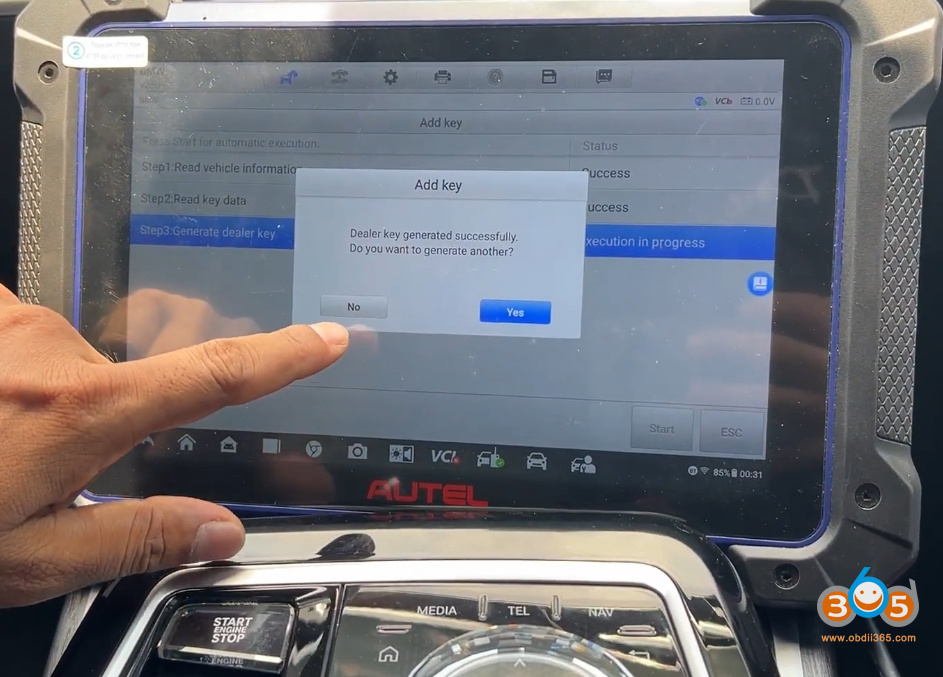
Generating the Dealer Key:The tool displays a warning: "This function can only generate the Autel key.” After confirming, places the new, blank key into the designated programming slot on the IM608 (or the connected key programmer). Then presses "OK,” and the tool begins generating the key data.
Successful Generation:Within moments, the IM608 displays "Success.” The tool asks if more keys are needed; declines and proceeds.


Verifying the Clone
With the programming complete, the true test is functionality. Takes the newly cloned key and performs a series of checks:
Door Lock/Unlock:open and close the door to test the remote’s locking and unlocking functions. The vehicle responds correctly.
Ignition/Start:Finally, he places the key in the vehicle and starts the engine. The car starts without hesitation, confirming that the clone process was a complete success.
Key Takeaways and Best Practices
Autel vs. Master Keys:Understand the difference between key types. Cloning a Autel key will produce a copy with the same limited access. If you need a master key with full access, you must clone from a master key.
Follow Prompts Exactly:The Autel IM608 provides clear, step-by-step instructions. Rushing or skipping steps—especially regarding physical connections and key placement—can lead to failures.
Verify Before Finishing:Always test all functions (remote locking/unlocking and engine start) before handing the key to the customer.
Conclusion
Cloning keys for newer BMW models is no longer a simple cut-and-program job; it requires advanced diagnostic tools, specific adapters, and a clear understanding of the vehicle’s security architecture. The Autel IM608, combined with the BDC3 adapter, provides a reliable and efficient solution for locksmiths facing these modern challenges.
www.obdii365.com
Posted by: jean at
08:32 AM
| No Comments
| Add Comment
Post contains 548 words, total size 18 kb.
June 29, 2026
The 2026 Toyota Camry presents unique challenges when dealing with an "all keys lost” situation. Here we walk through the complete process of gaining access, bypassing security systems, and programming new keys for this modern vehicle.
2026 Toyota Camry all Keys lost using LONDSOR K518, and Toyota 30 pin bypass cable.
Tools Required
Before beginning, ensure you have the following equipment:
-
10mm socket(or 10mm wrench)
-
Phillips head screwdriver
-
Trim removal wedge
-
Toyota bypass cable(30-pin connectortype)
-
Key Programming tool(Lonsdor K518 ProorAutel IM508recommended)
-
Smart key emulator(Lonsdor or equivalent)
-
Wi-Fi hotspot(for internet connectivity)
-
Flathead screwdriver(for manual door lock manipulation)
Step 1: Accessing the Smart Box Connection
The critical connection point for this procedure is located behind the glove box. Here’s how to access it:
-
Remove the lower trim panel– Grab and pull toward you; it should pop off easily
-
Identify and remove all fasteners:
-
Three Phillips head screws
-
One 10mm bolt
-
Additional screws on both sides of the dash
-
-
Lower the glove box assembly– Once all fasteners are removed, carefully lower the entire assembly
-
Locate the smart box– The connection you need is thetop connectoron the smart box
Pro Tip:When removing the dash components, take note of screw locations for easier reassembly.
Step 2: Disabling the Factory Alarm System
Newer Toyota models (2023+) have an updated alarm system that requires a specific procedure to disable:
The Problem
Older methods of simply turning the door lock actuator with a screwdriver no longer work on 2023+ models. The alarm may still remain active even after manually unlocking.
The Solution – Step by Step:
-
Access the door lock cylinder:
-
Remove the driver’s door lock cylinder
-
Carefully fish it out through the handle (it may be tight)
-
-
Manual unlock procedure:
-
Insert a flathead screwdriver into the actuator
-
Turn to the unlock position
-
Open the driver’s door (alarm will sound)
-
-
The "Newer Method” to disable the alarm:
-
With the door open, turn the lock fromlocktounlock
-
Close the door
-
Turn fromlocktounlockagain
-
The alarm should now be fully disabled
-
Important:This method is essential on 2023+ Toyotas. Failure to properly disable the alarm will result in communication errors with the ECU.
Step 3: Bypass Cable Installation
The 30-pin bypass cable connects the smart box to the OBD port:
-
Disconnect the top connectorfrom the smart box
-
Connect the bypass cableto the smart box’s female port
-
Route the cablefrom the smart box to the OBD port
-
Connect the cable’s OBD endto your diagnostic tool
Note:The male end of the bypass cable connects to the female part of the smart box, and the female part connects to the male part of the connector that came out of the box.


Step 4: IMMO Data Backup
Once the bypass cable is installed and the alarm is disabled:
-
Connect your key programmer(Lonsdor K518 Pro or Autel IM50

-
Select appropriate vehicle menu:
-
If available:Camry HV > 2021 and up
-
If not found (as in this case):Corolla > 2023-2026 – Smart Key System
-
-
Enable hazard lights(some systems require this)
-
Select "Backup IMMO Data”
-
Enter vehicle VINwhen prompted
-
Save the IMMO data filefor use in key generation


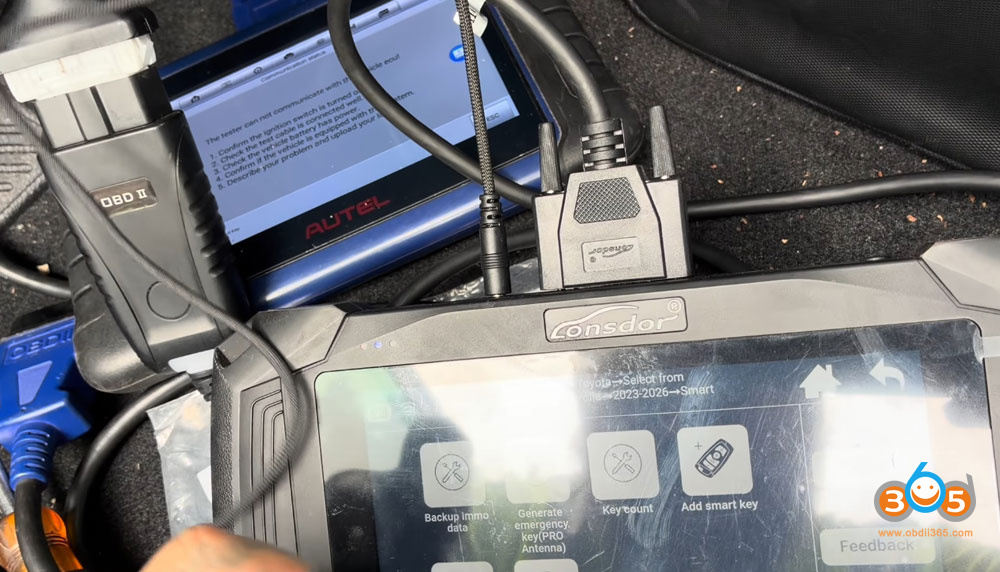
Troubleshooting Communication Errors
If you encounter communication errors:
-
Verify the alarm is completely disabled
-
Ensure the bypass cable is properly connected
-
Try accessing through a different vehicle model menu (e.g., Corolla instead of Camry)
-
Confirm internet connectivity (some functions require online access)
-
Check that the vehicle battery is sufficiently charged
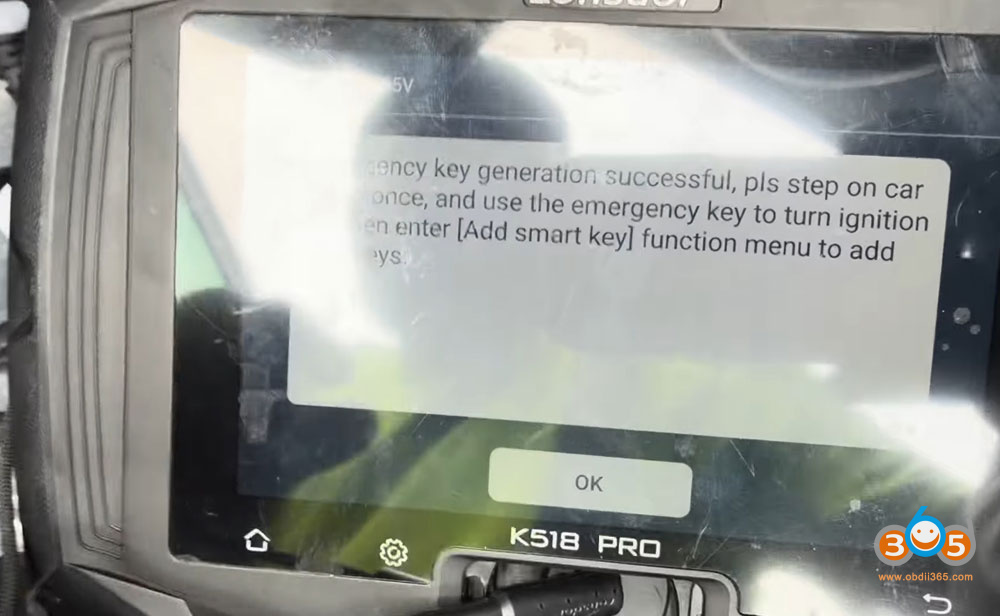
Step 5: Generating the Emergency Smart Key
With IMMO data backed up:
-
Connect the smart key emulator/antennato the programming tool
-
Place the emulator antennain the vehicle’s key detection area
-
Select "Generate Emergency Key”from the tool menu
-
Load the saved IMMO data file
-
Wait for calculationand key generation
-
Test the emergency keyby holding it to the start button
Validation:When successfully generated, pressing the start button with the emergency key should turn on the vehicle’s ignition.

Step 6: Programming the Smart Key
Choosing the Right Key
Two options were tested in this procedure:
Option 1 – Autel Universal Smart Key:
-
Tested with Autel KM100 and Toyota universal keys
-
Frequently encountered compatibility issues
-
AutelToyota ikey only works on Toyota 8A/4Dmodels. It does not work on this 4A key model.
Option 2 – Xhorse Universal Smart Key:
-
More reliable for Toyota applications
-
Successfully generated for the 2026 Camry
-
The preferred choice for this vehicle

Programming Steps:
-
Open your key programming software(Xhorse in this case)
-
Select:
-
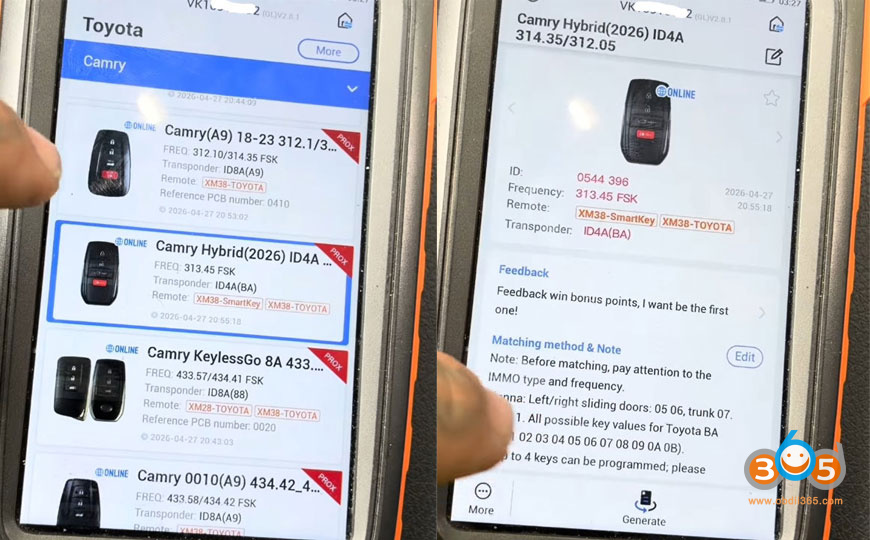
Toyota > Camry > Camry Hybrid 2026
-
Generate key
-
-
Wait for 100% completionand select "Complete”
-
Add the smart key:
-
Select "Add Smart Key”
-
Ensure internet connection
-
Verify fully charged battery in vehicle
-
Turn ignition on
-
-
Load the IMMO data:
-
Select "Load D-Flash” or similar option
-
Navigate to your saved Camry 2026 file
-
Allow system to calculate and bypass rolling PIN code
-
-
Key registration process:
-
Hold theregistered keyto the start button (hear one beep)
-
Then hold thenew keyto the start button (hear two beeps)
-
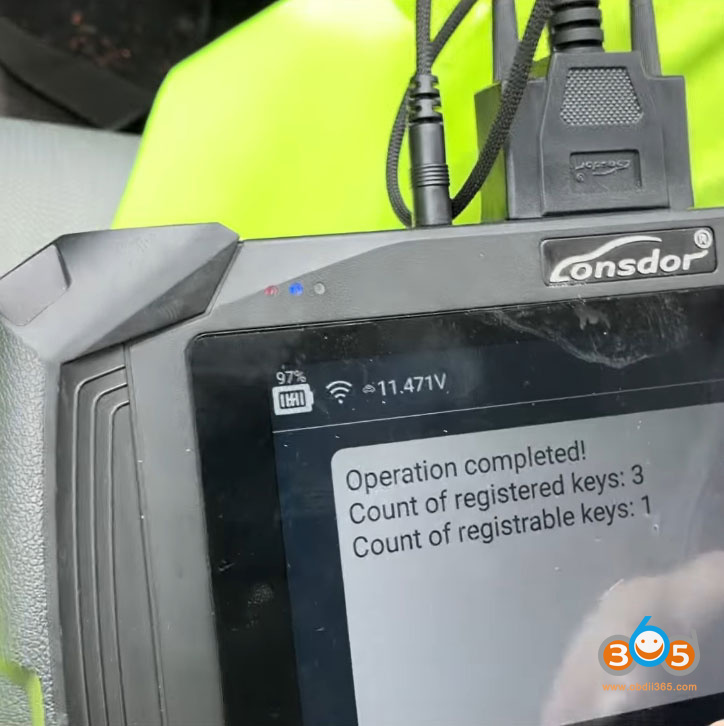
Confirm successful registration (system will show key count)
-
-
Test the new key:
-
Turn ignition off
-
Test lock/unlock functions
-
Test proximity start without holding key to button
-
Press start button twice (without brake) to verify ignition operation
-

Step 7: Emergency Key Cutting
The final step for a complete job:
-
Retrieve the door lock cylinder
-
Locate the key codestamped on the cylinder
-
Punch in the codeto a key cutting machine
-
Cut the mechanical emergency keyfor the customer
Common Challenges and Solutions
Alarm Won’t Disable
-
Ensure you’re using the lock/unlock sequence with the dooropen
-
The sequence must be performed with the door open, then closed
Communication Errors After Alarm Disabled
-
Try different model year menus (2021+ vs 2024+)
-
The Corolla menu may work for Camry systems
-
Check all connections at smart box and OBD port
Key Generation Failures
-
Verify internet connection is stable
-
Ensure correct frequency (this vehicle uses 314-315 MHz)
-
Consider switching from Autel to Xhorse keys
Vehicle Shows Malfunction Errors
-
Common after crash damage (as in this case)
-
Not related to key programming
-
Advise customer of pre-existing issues
Model-Specific Notes
2026 Toyota Camry Hybrid:
-
Frequency: ~314-315 MHz
-
Uses 30-pin connector for bypass
-
Requires specific alarm disable procedure
-
Menu selection may require using Corolla option
Compatibility Notes:
-
2021+ model selection may not work
-
2024+ menus provide correct communication
-
Xhorse keys are more reliable than Autel for this application
Summary of Critical Steps
| Step | Action | Importance |
|---|---|---|
| 1 | Access smart box connector | Essential for bypass |
| 2 | Disable alarm (newer method) | Critical for communication |
| 3 | Install 30-pin bypass cable | Allows OBD access |
| 4 | Backup IMMO data | Required for key generation |
| 5 | Generate emergency key | Verifies communication |
| 6 | Program permanent key | Main objective |
| 7 | Cut emergency key | Complete service |
Final Verification
After completing all steps, verify:
-
Vehicle starts with proximity key
-
Lock/unlock functions work
-
Emergency key operates door
-
No additional warning lights present (beyond pre-existing issues)
Posted by: jean at
08:53 AM
| No Comments
| Add Comment
Post contains 1128 words, total size 20 kb.
June 26, 2026
Problem:
Added a spare key today to 2022 Toyota Kluge / Highlander HV usingAutel IM508salong withAutel universal keyfor Toyota 8A.
Backed up eeprom file via OBD, followed guided add key, and programmed in successfully.
However trunk open button not functioning.
Did eco to immobiliser sync and all other buttons /keyless entry etc working great but need to get trunk button working.
Had same issue recently with a 2023 Rav4 hybrid. Any input?

Solved.
RECTIFIED TODAY BY CONNECTING XP400 BACK UP TO 508s and first reading info off universal key I generated yesterday for 2022 Toyota Kluger / Highlander then updating – changing assigned function for trunk open button from trunk to tailgate
TURNS OUT ELECTRIC TAILGATES IN SUVSV NEED A CONTINUAL 3 TO 4 SECOND SIGNAL WHERAS THE DEFAULT IS TRUNK WHICH ONLY GIVES A SHORT Half second pulse.
Tested and now all smart functions etc working like a genuine one.
Posted by: jean at
08:51 AM
| No Comments
| Add Comment
Post contains 161 words, total size 2 kb.
30 queries taking 0.1153 seconds, 213 records returned.
Powered by Minx 1.1.6c-pink.